The right preparation can turn an interview into an opportunity to showcase your expertise. This guide to Conduit Bending and Wiring interview questions is your ultimate resource, providing key insights and tips to help you ace your responses and stand out as a top candidate.
Questions Asked in Conduit Bending and Wiring Interview
Q 1. What are the different types of conduit used in electrical installations?
Conduit, the protective metal tubing for electrical wiring, comes in several types, each suited for different applications. The most common include:
- Electrical Metallic Tubing (EMT): Lightweight, thin-walled steel tubing. It’s easy to bend and cost-effective, making it popular for residential and commercial use. Think of it as the ‘everyday workhorse’ of conduit.
- Rigid Metal Conduit (RMC): Heavier, thicker-walled steel conduit offering superior protection against physical damage. It’s often used in industrial settings or where greater strength is required. Imagine it as the ‘heavy-duty’ option.
- Intermediate Metal Conduit (IMC): Falls between EMT and RMC in terms of weight and strength. It offers a good balance of protection and workability. This is a ‘middle ground’ option.
- Flexible Metal Conduit (FMC): A flexible metallic conduit used in areas requiring movement or where rigid conduit isn’t practical, such as connections to equipment. Think of it as the ‘flexible friend’.
- Liquidtight Flexible Metal Conduit (LFMC): A flexible conduit with a sealed construction, preventing liquid ingress. This is crucial in damp or wet locations. It’s the ‘water-resistant warrior’.
The choice of conduit depends on factors such as the environment, the type of wiring, and the applicable electrical codes.
Q 2. Explain the process of bending EMT conduit using a hand bender.
Bending EMT conduit with a hand bender is a skilled task requiring precision. Here’s the process:
- Measure and Mark: Carefully measure the desired bend radius and mark the conduit using a marking tool. Accurate marking is critical for a clean bend.
- Position the Conduit: Securely place the conduit in the hand bender, ensuring it’s properly seated against the bending shoe. A firm grip is essential to avoid slippage and uneven bends.
- Apply Pressure: Slowly and steadily apply pressure to the handle of the bender, creating a smooth, consistent bend. Avoid jerky movements; a slow, controlled approach is key.
- Check the Bend: Once the desired angle is achieved, carefully remove the conduit from the bender and inspect the bend for any kinks or irregularities. A proper bend should be smooth and consistent.
- Repeat as Needed: For multiple bends, repeat the process, ensuring each bend is accurate and doesn’t interfere with the others. This often involves pre-bending or using a conduit bender with adjustable shoes.
Practice is essential to master this technique. Start with smaller bends and gradually increase complexity as your skill improves. Think of it like learning calligraphy – precision and control are paramount.
Q 3. How do you calculate the correct conduit bends for various angles?
Calculating conduit bends involves understanding the relationship between the bend radius, the angle of the bend, and the resulting length of the conduit. We often use a conduit bender’s markings or a bend calculation chart. The basic idea is that the circumference of the bend (related to the radius) determines how much conduit is used to make the bend.
For example, a 30-degree bend using a certain radius will require a specific length of conduit to create that bend. These values are generally found on the bender itself or in bending charts specific to the conduit type and bender. Some online calculators and software can also aid in this calculation. Failing to accurately calculate the bend leads to either insufficient conduit for the angle, resulting in a kink, or excessive conduit length, causing excess material waste.
It’s important to note that different conduit benders may have slightly different bending characteristics. So, practice and familiarity with your tools are crucial to accurate calculations. Using a trial bend and measuring the result can also be a helpful approach.
Q 4. Describe the safety precautions you take when bending conduit.
Safety is paramount when bending conduit. Here are some key precautions:
- Eye Protection: Always wear safety glasses to protect your eyes from flying debris or sparks.
- Gloves: Wear work gloves to protect your hands from cuts and abrasions.
- Proper Tool Use: Ensure that the conduit bender is in good condition and that you understand its operation before you begin. Using damaged tools is dangerous.
- Work Area: Maintain a clean and organized work area. Clutter can increase the risk of accidents.
- Avoid Overbending: Overbending can easily damage the conduit and create a weak point. Control the pressure applied to the bender.
- Sharp edges: Be aware of sharp edges on the conduit and the bender; these can easily cause injury. Deburr the conduit after bending where necessary.
Following these safety procedures will help to prevent injuries and ensure a safe work environment.
Q 5. What are the common problems encountered during conduit bending?
Several common problems occur during conduit bending:
- Kinks and Flattening: These result from applying too much pressure or using an inappropriate bending technique. This weakens the conduit and reduces its protective capabilities.
- Uneven Bends: Poor technique, loose grip, or a damaged bender can lead to uneven bends.
- Incorrect Angle: Inaccurate measurement and marking can result in bends that don’t meet specifications.
- Overbending: Applying excessive force can crush or damage the conduit.
- Conduit Collapse: Using too small a radius for the bender can cause the conduit to collapse.
Addressing these issues requires careful attention to detail, proper technique, and the use of appropriate tools. Prevention is far easier than correction.
Q 6. How do you troubleshoot a conduit bend that is not to specification?
Troubleshooting a faulty conduit bend involves a systematic approach:
- Identify the Problem: Determine the exact nature of the deviation from specifications. Is it a kink, an incorrect angle, or an uneven bend?
- Re-evaluate Measurements: Double-check your initial measurements and markings. A simple error in measurement can be the root cause.
- Check the Bender: Ensure your bender is in good condition and suitable for the conduit type and size.
- Assess Technique: Review your bending technique. Are you applying pressure correctly? Is the conduit properly seated in the bender?
- Rectify the Bend: Depending on the nature and severity of the problem, you might be able to carefully correct the bend, or you may need to cut out the faulty section and re-bend it. If the damage is too significant, replacement might be necessary.
Remember, precision is essential. If you are unsure about rectifying a bend, seeking guidance from a more experienced electrician is recommended. It’s always better to redo a section than to risk compromising safety and code compliance.
Q 7. What are the different types of wire used in electrical systems?
Electrical wiring comes in a variety of types, each designed for specific applications and voltage levels:
- Copper Conductors: The most common type, offering excellent conductivity and durability. It’s a standard across most electrical systems.
- Aluminum Conductors: Lighter than copper, but with slightly lower conductivity. Often used in larger-gauge wiring for high-current applications, sometimes requiring special connectors.
- Solid Wire: A single, solid conductor, easier to terminate but less flexible than stranded wire.
- Stranded Wire: Made of multiple smaller strands, offering greater flexibility for use in areas requiring movement or tighter bends.
- Insulated Wire: Wrapped in insulation material such as PVC, Teflon, or other materials to provide electrical insulation and protection. Different insulation types are suited to different temperature and voltage conditions.
- Different Gauge Sizes: Wire gauge refers to its diameter, with lower numbers indicating thicker wires capable of carrying higher currents. This relates directly to amperage capacity.
The choice of wire depends on several factors, including the amperage rating, voltage, and environmental conditions. Following the National Electrical Code (NEC) guidelines is critical for safe installations.
Q 8. Explain the National Electrical Code (NEC) requirements for conduit installations.
The National Electrical Code (NEC) is a comprehensive set of regulations governing electrical installations in the United States. Regarding conduit installations, the NEC focuses heavily on safety and ensuring proper grounding, protection from damage, and adequate wire fill. Key requirements include:
- Conduit Type and Material: The NEC specifies acceptable conduit materials (e.g., PVC, rigid steel, EMT) based on the application’s environment (wet, dry, corrosive). For example, PVC is suitable for dry locations, while rigid steel offers better protection in harsh conditions.
- Conduit Size: The conduit must be sized appropriately to accommodate the number and size of conductors, allowing for sufficient fill without exceeding the maximum allowable percentage. Overfilling can damage insulation and impede heat dissipation, leading to fire hazards.
- Bending Radius: Minimum bending radii are specified to prevent conduit damage and ensure smooth wire pulling. These vary depending on the conduit type and size. Improper bending can crush the conduit or create sharp edges that can damage wire insulation.
- Support and Securing: Conduit must be adequately supported and secured at regular intervals to prevent sagging and protect it from physical damage. This is crucial for safety and maintaining the integrity of the electrical system.
- Grounding and Bonding: Conduit systems must be effectively grounded and bonded to prevent electrical shock hazards. This usually involves using grounding conductors and bonding bushings.
- Entrance and Exit Points: Proper sealing and protection are needed at conduit entrances and exits to prevent water and pest entry.
Non-compliance can lead to dangerous conditions, potential equipment failure, and costly rework. Always consult the latest NEC edition for specific requirements relevant to your project.
Q 9. How do you determine the correct size of conduit for a given application?
Determining the correct conduit size is crucial for a safe and efficient installation. It’s not simply about fitting the wires; it’s about ensuring adequate space for heat dissipation and easy wire pulling. The process involves:
- Identify the conductors: List all wires (power, ground, etc.) including their size (AWG). For example, you might have three 12 AWG conductors and one 10 AWG ground wire.
- Consult NEC Table 1: This table provides the allowable percentage fill for different conduit types and material. You need to ensure the total cross-sectional area of the wires, plus any other materials within the conduit, stays below this percentage.
- Calculate the fill: Use a conduit fill calculator or manual calculation methods to determine the total area of your conductors. Many online tools are available for ease and accuracy.
- Select conduit size: Choose the smallest conduit size that meets the NEC requirements for fill percentage. Always round up to the next larger size for easier pulling and to provide a safety margin. For instance, if the calculation suggests a 1/2 inch conduit, but it’s slightly above the allowable fill, use a 3/4 inch conduit for easier pulling.
Remember, undersized conduit increases the risk of overheating and makes pulling wires difficult. Oversized conduit is less efficient use of materials but preferable to undersized conduit. This calculation is essential for any electrical installation and should always be completed prior to work commencing.
Q 10. What are the best practices for pulling wires through conduit?
Pulling wires through conduit requires care and technique to prevent damage to the wires or the conduit itself. Best practices include:
- Lubrication: Use a suitable wire lubricant (conduit lubricant) to reduce friction and make pulling easier. This is especially important for long runs or tight bends.
- Proper Pulling Equipment: Employ the correct pulling equipment, such as fish tape, hand-cranked pullers, or electric pullers, depending on the length and complexity of the conduit run. Never use excessive force – this could damage the wires.
- Careful Preparation: Ensure the conduit is clean and free of obstructions. Inspect the bends for kinks or sharp edges before pulling wires. If using a pull rope, ensure the rope is properly lubricated.
- Fish Tape Technique: When using fish tape, feed it slowly and carefully to avoid snagging or bending the tape excessively. The tape should be advanced smoothly, avoiding sudden jerks.
- Bundle Wires Appropriately: Properly bundle wires together using wire ties to maintain a uniform shape and prevent tangling, but not too tight, and only to the degree necessary.
- Multiple Pulls: For large bundles of wires, it may be necessary to pull them in multiple stages to prevent damage or over stressing the wires or the pull equipment.
Remember, damaged wires can lead to electrical faults, arcing, and potentially fires. Careful and methodical wire pulling is vital for long-term system reliability.
Q 11. How do you handle conduit bends in tight spaces?
Handling conduit bends in tight spaces requires careful planning and specialized techniques. Simple bends can be accomplished using hand benders, but complex bends often necessitate using a hydraulic bender for accurate and efficient results. Here are some strategies:
- Short Radii Bends: For very tight bends, use a bender capable of creating short radii. This often involves using specialized bending tools or techniques such as using multiple smaller bends instead of one large bend. This avoids crushing the conduit.
- Multiple Bends: Instead of trying to create one sharp bend, create several smaller bends to achieve the same overall angle. This reduces stress on the conduit and helps to avoid kinking.
- Pre-bending: In some situations, pre-bending sections of the conduit prior to installation can simplify the process and improve the final result. This can be particularly helpful in confined areas.
- Hydraulic Benders: Hydraulic benders offer precise control and allow for consistent bends, even in challenging spaces. This is very helpful to prevent damage and increase efficiency.
- Flexible Conduit: In very tight spaces where bending is difficult, flexible conduit might be considered, but always check NEC compliance.
Always prioritize safety. If you’re unsure about how to bend the conduit in a tight space, consult a more experienced electrician. Improper bending can damage the conduit, creating sharp edges that can cut or fray wires. This also increases the possibility of short circuits.
Q 12. Explain the techniques for using a hydraulic conduit bender.
Hydraulic conduit benders are powerful tools that provide accurate and consistent bends. Using one effectively involves:
- Select the correct bender head: Choose the die that matches the conduit size. Using an incorrect die can damage the conduit or create inaccurate bends.
- Secure the conduit: Firmly clamp the conduit into the bender’s jaws, ensuring it’s securely positioned. This prevents slippage during the bending process.
- Set the bending shoe: Position the bending shoe at the desired bend radius, according to the conduit’s specification. The bending shoe helps to produce uniform bends and protects the conduit from damage.
- Apply hydraulic pressure: Slowly and smoothly operate the hydraulic pump to apply pressure to the bender. Avoid sudden movements or jerking. Watch the bender to verify the conduit is bending smoothly.
- Check the bend: After the bend is completed, inspect it for accuracy and damage. If necessary, make minor adjustments.
Safety is paramount. Always wear safety glasses and gloves when using a hydraulic bender. Ensure the bender is properly maintained and in good working order to reduce the chance of an accident.
Q 13. What are the advantages and disadvantages of using different types of conduit benders?
Several types of conduit benders are available, each with advantages and disadvantages:
- Hand Benders: These are simple, portable, and inexpensive. They’re best suited for small jobs and simple bends, but are less accurate and require more physical effort for larger conduits and tighter bends.
- Hydraulic Benders: These offer precise control, allowing for consistent bends, even in challenging situations. They’re powerful and efficient, suitable for larger conduit and more complex bends, but are more expensive and require more space for operation.
- Electric Benders: These automate the bending process, saving time and effort. They offer good accuracy but come with a higher price tag and can be cumbersome to transport.
The choice of bender depends on the project’s scale and complexity. For a small residential job, a hand bender might suffice. Larger commercial projects may necessitate a hydraulic or electric bender for efficiency and accuracy. The investment in a specific tool should reflect the frequency and scope of bends that will be made.
Q 14. How do you ensure proper grounding and bonding of conduit systems?
Proper grounding and bonding of conduit systems is crucial for safety. It provides a low-impedance path for fault currents, preventing dangerous voltage buildup on the conduit and protecting people from electrical shocks. Here’s how to ensure it:
- Grounding Conductors: Use appropriate grounding conductors (typically bare copper) within the conduit to connect the system to the building’s grounding electrode. The size of the grounding conductor should comply with the NEC.
- Bonding Jumpers: Use bonding jumpers to connect separate sections of conduit, ensuring a continuous grounding path. This is particularly important at fittings, boxes, and other connection points.
- Grounding Clamps: Securely fasten grounding clamps to the conduit at intervals specified by the NEC to maintain a secure and continuous ground path. These connections should be clean and tight.
- Grounding Bushings: Use grounding bushings at conduit entrances and exits to provide a reliable connection between the conduit and the equipment or enclosure.
- Inspection: Regularly inspect the grounding and bonding system for corrosion, loose connections, or damage. This helps to identify potential hazards early on.
A properly grounded conduit system is essential for a safe and functional electrical installation. Any compromise in this area increases the risk of electrical shock and potential fire hazards. Always follow the NEC guidelines for bonding.
Q 15. What are the NEC requirements for grounding and bonding?
The National Electrical Code (NEC) mandates rigorous grounding and bonding to ensure electrical safety. Grounding connects non-current-carrying metal parts of an electrical system to the earth, providing a safe path for fault currents. Bonding connects different metal parts within the system to equalize their potential, preventing voltage differences that could cause shocks or fires. This is crucial because it creates a low-impedance path for fault current to flow directly to ground, tripping a breaker or blowing a fuse before dangerous voltages appear on exposed metal surfaces.
- Grounding: NEC Article 250 details grounding requirements, specifying the size and type of grounding electrodes (such as ground rods), the connection methods, and the impedance limits. For example, a typical grounding electrode system might consist of multiple ground rods driven into the earth, interconnected and bonded to the building’s grounding system.
- Bonding: NEC Article 250 also covers bonding requirements, mandating the interconnection of metal enclosures, conduit, and equipment grounding conductors. This ensures that all metallic parts are at the same electrical potential. For instance, all metal conduit running throughout a building must be bonded together, and to the building’s grounding system.
- Specific Applications: Grounding and bonding requirements vary depending on the system voltage, the location (e.g., hazardous locations have stricter requirements), and the type of equipment. Always refer to the latest NEC for specific details.
Failure to adhere to these NEC requirements can lead to serious safety hazards, including electric shock, fire, and equipment damage. A properly grounded and bonded system protects people and property.
Career Expert Tips:
- Ace those interviews! Prepare effectively by reviewing the Top 50 Most Common Interview Questions on ResumeGemini.
- Navigate your job search with confidence! Explore a wide range of Career Tips on ResumeGemini. Learn about common challenges and recommendations to overcome them.
- Craft the perfect resume! Master the Art of Resume Writing with ResumeGemini’s guide. Showcase your unique qualifications and achievements effectively.
- Don’t miss out on holiday savings! Build your dream resume with ResumeGemini’s ATS optimized templates.
Q 16. Describe the process of installing a conduit system in a new building.
Installing a conduit system in a new building involves a systematic approach, beginning with planning and design and culminating in thorough testing and inspection. Imagine building a highway for electricity – it requires careful planning and precise execution.
- Planning: Determine the routing of conduit runs based on the building’s electrical plan. This involves considering factors like accessibility, minimizing bends, and adhering to code requirements for minimum bend radii (to avoid damaging the wire).
- Conduit Installation: Securely fasten conduit using appropriate hangers and supports at regular intervals to prevent sagging. Proper support prevents conduit from flexing and becoming damaged. Carefully bend conduit to follow the planned route, using specialized bending tools to achieve the necessary angles and radii without crushing the conduit or damaging the wire inside.
- Wire Pulling: After the conduit is installed, pull the wires through the conduit using appropriate pulling techniques and lubricants. This must be done without causing excessive stress on the conductors, or the insulation could be damaged.
- Grounding and Bonding: Connect all metal conduit sections together and to the building’s grounding system. Ensure proper bonding is maintained throughout the entire system. Using proper grounding clamps and techniques is crucial for system integrity.
- Testing: After installation, test the conduit system for continuity and proper grounding using a continuity tester. This verifies that the system is electrically sound and meets code requirements.
Throughout this process, adherence to the NEC is paramount, ensuring the safety and reliability of the electrical system.
Q 17. How do you inspect a conduit system for compliance with codes and standards?
Inspecting a conduit system is crucial for ensuring safety and code compliance. Think of it like a thorough car inspection; every part must function correctly.
- Visual Inspection: Check for physical damage to conduit, such as dents, corrosion, or cracks. Look for signs of overheating (discoloration) or damage to the conduit from sharp objects or improper bending.
- Grounding and Bonding: Verify that all conduit sections are properly bonded together and to the building’s grounding system. Use a continuity tester to check for electrical continuity and ground resistance. Poor connections are a major safety hazard.
- Wire Pulling: Examine the ease with which wires can be pulled through the conduit. Difficulty pulling wires may indicate obstructions or kinks in the conduit.
- Support and Securing: Check that the conduit is securely fastened with appropriate hangers and supports at adequate intervals. Proper support prevents sagging and potential damage to wires inside.
- Documentation: Compare the as-built system to the original drawings and specifications. Maintain a detailed record of the inspection findings.
Non-compliance could lead to safety issues and may require corrective action before the system can be energized.
Q 18. What are the common causes of conduit failures?
Conduit failures can stem from various causes, often stemming from improper installation or environmental factors.
- Corrosion: Exposure to moisture or chemicals can cause corrosion, weakening the conduit and potentially leading to leaks or failures. Using galvanized steel or other corrosion-resistant materials helps mitigate this risk.
- Mechanical Damage: Improper bending, crushing, or impacts can damage the conduit, creating weak points that can lead to failure. Always use the proper tools for bending and handle conduit with care.
- Overfilling: Packing too many wires into a conduit reduces available space and increases friction, which can make pulling wires difficult, cause abrasion, and damage conductors over time. Using oversized conduit is sometimes more cost-effective in the long run than encountering problems pulling wires.
- Improper Support: Inadequate support can cause sagging and stress on the conduit, potentially leading to failure. Consistent support reduces stress on the conduit.
- Poor Grounding and Bonding: Improper grounding and bonding can lead to overheating and potential failures in the conduit system.
Understanding these common causes allows for proactive measures during installation and inspection to prevent future problems.
Q 19. How do you repair a damaged conduit?
Repairing damaged conduit depends on the nature and extent of the damage.
- Minor Damage: Minor dents or scratches can often be repaired by carefully straightening the conduit or applying a suitable protective coating. Always ensure that repaired conduit is properly grounded.
- Significant Damage: If the conduit is severely damaged or corroded, it must be replaced. This often involves cutting out the damaged section, installing a new section, and ensuring proper grounding and bonding are maintained.
- Couplings and Connectors: Damaged sections are often joined using appropriate couplings or connectors. These should be securely fastened to prevent any movement or leakage.
Before making any repairs, always de-energize the circuit to prevent electrical shock. Safety should be the top priority during any repairs.
Q 20. Explain the importance of proper conduit installation for safety.
Proper conduit installation is critical for electrical safety because it protects wires from physical damage, prevents short circuits, and provides a grounding path for fault currents. Imagine your electrical wiring as the delicate veins and arteries of your home – proper conduit acts as protective shielding.
- Physical Protection: Conduit shields wires from mechanical damage, preventing shorts and protecting occupants from potential shock hazards.
- Fire Prevention: Conduit helps contain electrical fires, preventing their spread. A properly grounded system is less prone to sparking and overheating.
- Grounding Path: The conduit itself can serve as a grounding path, providing a low-resistance route for fault currents to flow to ground, protecting people and equipment.
- Code Compliance: Proper installation ensures compliance with NEC codes, reducing the risk of accidents and legal issues.
Ignoring proper conduit installation practices puts lives and property at significant risk.
Q 21. How do you identify different types of conduit materials by sight?
Identifying conduit materials requires a keen eye and knowledge of their visual characteristics. Think of it like learning to identify different types of wood – with practice, it becomes second nature.
- Rigid Metal Conduit (RMC): Usually galvanized steel, RMC has a distinctive silvery-gray appearance and is relatively heavy and rigid. The threading is easily visible at the ends.
- Intermediate Metal Conduit (IMC): Lighter and thinner than RMC, IMC still has a similar silvery-gray appearance. It’s often slightly more malleable than RMC.
- Electrical Metallic Tubing (EMT): Also known as thinwall conduit, EMT is lighter and more flexible than RMC or IMC and usually features a slightly less shiny galvanized finish. It’s usually joined using compression couplings.
- PVC Conduit: Plastic conduit is usually either white or gray and has a smooth, non-metallic surface. It’s lighter and more flexible than metal conduits, and is often less expensive.
Always verify the conduit material using markings on the conduit itself. There may be slight variations in appearance depending on the manufacturer, but the characteristics outlined above are typical.
Q 22. What are the limitations of different types of conduit?
Different conduit types have varying limitations depending on their material and design. Let’s explore some examples:
- Rigid Conduit (Steel): Strong and durable, offering excellent protection, but it’s heavy, difficult to bend, and susceptible to corrosion. This makes it less ideal for complex layouts or situations requiring frequent adjustments. Its rigidity also means more careful planning is needed to avoid needing many fittings.
- Intermediate Metal Conduit (IMC): Lighter than rigid steel conduit, offering similar protection but with greater flexibility. However, it’s still less flexible than EMT and can be more prone to damage during rough handling.
- Electrical Metallic Tubing (EMT): Lightweight and highly flexible, making it easy to work with, especially in tight spaces. However, its thinner walls offer less protection against physical damage compared to rigid conduit, requiring more careful placement and handling, especially in areas with potential impacts.
- Flexible Conduit (Liquidtight Flexible Metal Conduit – LFMC): Excellent for applications where flexibility is paramount, like connecting moving equipment or crossing obstructions. However, it’s not as strong as rigid or IMC and is more susceptible to crushing or kinking. Furthermore, the sealing mechanisms need to be carefully checked for moisture integrity.
- PVC Conduit: A lightweight, corrosion-resistant option that is easy to install. However, it is not as durable as metal conduits and can be easily damaged by sunlight or sharp objects. Temperature limits are also important consideration, as PVC can soften and become less rigid at higher temperatures.
The choice of conduit depends heavily on the specific application, considering factors like environmental conditions, the level of protection needed, and the complexity of the installation.
Q 23. Describe the process of installing a conduit system underground.
Installing an underground conduit system is a meticulous process requiring careful planning and execution. Here’s a step-by-step breakdown:
- Survey and Design: Determine the exact route, avoiding underground utilities and obstacles. Use a pipe locator to identify existing lines. Accurate measurements are critical for purchasing the correct amount of conduit.
- Excavation: Dig a trench that’s wide and deep enough to accommodate the conduit, with extra space for backfill and bedding.
- Bedding: Place a layer of compacted gravel or sand at the bottom of the trench to provide a stable base for the conduit and protect it from direct contact with soil.
- Conduit Placement: Carefully place the conduit in the trench, ensuring it’s straight and has a consistent slope for proper drainage.
- Pulling Strings/Fish Tape: Before backfilling, pull a string or fish tape through the conduit. This is essential for pulling the cables later.
- Backfilling: Backfill the trench with appropriate material, carefully compacting the soil in layers. The backfill should protect the conduit from damage. In areas prone to settling, a designated warning tape is also usually placed above the conduit.
- Cable Pulling: Once the trench is completely backfilled, pull the cables through the conduit using the string or fish tape.
- Testing: After installation, conduct a thorough inspection to ensure the conduit is properly installed and free from damage. Electrical tests may be needed to verify continuity and ground integrity.
Proper planning and adherence to safety regulations are crucial during this process. Always mark the conduit’s location for future reference.
Q 24. What are the challenges of working with rigid conduit?
Working with rigid conduit presents unique challenges due to its inherent stiffness. The major challenges include:
- Difficulty in Bending: Requires specialized bending equipment (e.g., a hydraulic bender) to create accurate bends without kinking or crushing the conduit. Improper bending can weaken the conduit and compromise its integrity.
- Weight and Handling: Rigid conduit, especially in larger diameters, is heavy and cumbersome, requiring extra effort for handling and installation.
- Limited Flexibility: Adapting to complex layouts or unforeseen obstacles during installation can be difficult, often requiring additional fittings or potentially rerouting.
- Potential for Damage: Its rigidity makes it more susceptible to damage during transport and installation if not handled carefully.
- Precise Measurement and Cutting: Requires precise measurements and clean cuts to ensure proper fit with fittings and to avoid wasted materials.
Overcoming these challenges requires careful planning, appropriate tools, and a skilled workforce. Experience and knowledge of conduit bending techniques are essential to ensuring a successful installation.
Q 25. How do you ensure the integrity of conduit bends after installation?
Ensuring the integrity of conduit bends after installation is crucial for maintaining a safe and effective electrical system. Several methods ensure this:
- Proper Bending Techniques: Using the correct bending equipment and techniques is paramount. This avoids kinks or crushes which weaken the conduit.
- Support Structures: Adequate support structures (e.g., straps, clamps) prevent sagging or movement of the conduit after installation, particularly in long runs or areas with vibration.
- Visual Inspection: After bending and installation, a thorough visual inspection is necessary to check for any signs of damage like kinks, dents, or cracks.
- Testing: Electrical testing can be performed to verify that the conduit maintains its electrical continuity and grounding. This verifies the overall system integrity.
- Proper Fitting Installation: Ensuring all conduit fittings are correctly installed and securely fastened prevents movement and maintains the integrity of the bends.
Regular inspection of the conduit system after installation helps detect any potential issues before they become serious problems.
Q 26. What are the differences between EMT, rigid conduit, and flexible conduit?
EMT, rigid conduit, and flexible conduit are all used in electrical installations, but they differ significantly in their properties and applications:
| Feature | EMT | Rigid Conduit | Flexible Conduit |
|---|---|---|---|
| Material | Steel | Steel, Aluminum | Various (e.g., PVC, Metal) |
| Flexibility | High | Low | High |
| Strength | Moderate | High | Low to Moderate |
| Weight | Light | Heavy | Light to Moderate |
| Installation | Easy, quick bending | Difficult bending, requires tools | Easy |
| Cost | Relatively Low | Relatively High | Moderate |
| Applications | General purpose, residential | Heavy-duty applications, industrial environments | Connecting moving equipment, tight spaces |
The choice depends on factors such as the application’s requirements, environmental conditions, and budget constraints.
Q 27. How do you calculate the required length of conduit for a given run?
Calculating the required conduit length for a given run involves several steps:
- Measure each straight section: Use a measuring tape to accurately measure the length of each straight section of the conduit run.
- Calculate bend allowances: For each bend, calculate the additional length needed to compensate for the bend radius. This varies depending on the conduit type, bender used, and bend angle. Many conduit benders have charts that give the correct bend allowance for different angles and conduit sizes.
- Sum the lengths: Add together the lengths of all straight sections and the calculated bend allowances.
- Add extra length: Add extra length (typically 10-15%) to account for unforeseen circumstances such as fitting adjustments or errors in measurement.
For example, a run with two 10-foot straight sections and two 90-degree bends with a 6-inch bend allowance each would require: (10ft + 10ft) + (0.5ft + 0.5ft) + (10-15% extra) = approximately 22 feet of conduit.
Q 28. Describe your experience with different types of conduit fittings.
My experience encompasses a wide range of conduit fittings, including:
- Couplings: Used to join two lengths of conduit together.
- Elbows: Provide changes in direction (90-degree, 45-degree).
- Tees: Create branch connections.
- Conduit Bodies: Provide space for pulling wires and accommodating switches.
- Bushings: Protect wires entering the conduit and provide strain relief.
- Locknuts and Connectors: Secure the conduit to fittings and boxes.
- Grounding bushings and fittings: Ensure proper grounding continuity.
The selection of appropriate fittings is crucial for ensuring a safe and efficient electrical installation. Understanding their specific applications, sizes, and material compatibility is key to achieving a successful project. I have experience installing fittings in various environments and materials, ensuring the proper use and function of each component.
Key Topics to Learn for Your Conduit Bending and Wiring Interview
- Conduit Material Properties: Understanding the characteristics of various conduit materials (e.g., PVC, EMT, rigid steel) and their suitability for different applications. This includes knowing their bending radii and limitations.
- Bending Techniques: Mastering different conduit bending methods (e.g., hand bending, using a bender, offsets, saddles) and the tools involved. Practice applying these techniques accurately and efficiently.
- Electrical Code Compliance: A thorough understanding of relevant electrical codes (NEC or local equivalents) related to conduit bending, wiring methods, and safety regulations is crucial.
- Wiring Methods and Practices: Familiarity with various wiring methods (e.g., pulling wires through conduit, wire termination techniques, grounding practices) and best practices for efficient and safe installation.
- Troubleshooting and Problem Solving: Be prepared to discuss how you would approach common problems encountered during conduit bending and wiring, such as pulling difficulties, damaged conduit, or code violations.
- Safety Procedures and Practices: Demonstrate a strong understanding of safety regulations and procedures related to working with electricity and conduit bending tools. This includes personal protective equipment (PPE) and lock-out/tag-out procedures.
- Project Planning and Execution: Explain your approach to planning and executing conduit bending and wiring projects, including reading blueprints, estimating materials, and managing time effectively.
- Tools and Equipment: Show familiarity with common tools and equipment used in conduit bending and wiring (e.g., various types of benders, fish tapes, wire strippers, cable cutters).
Next Steps
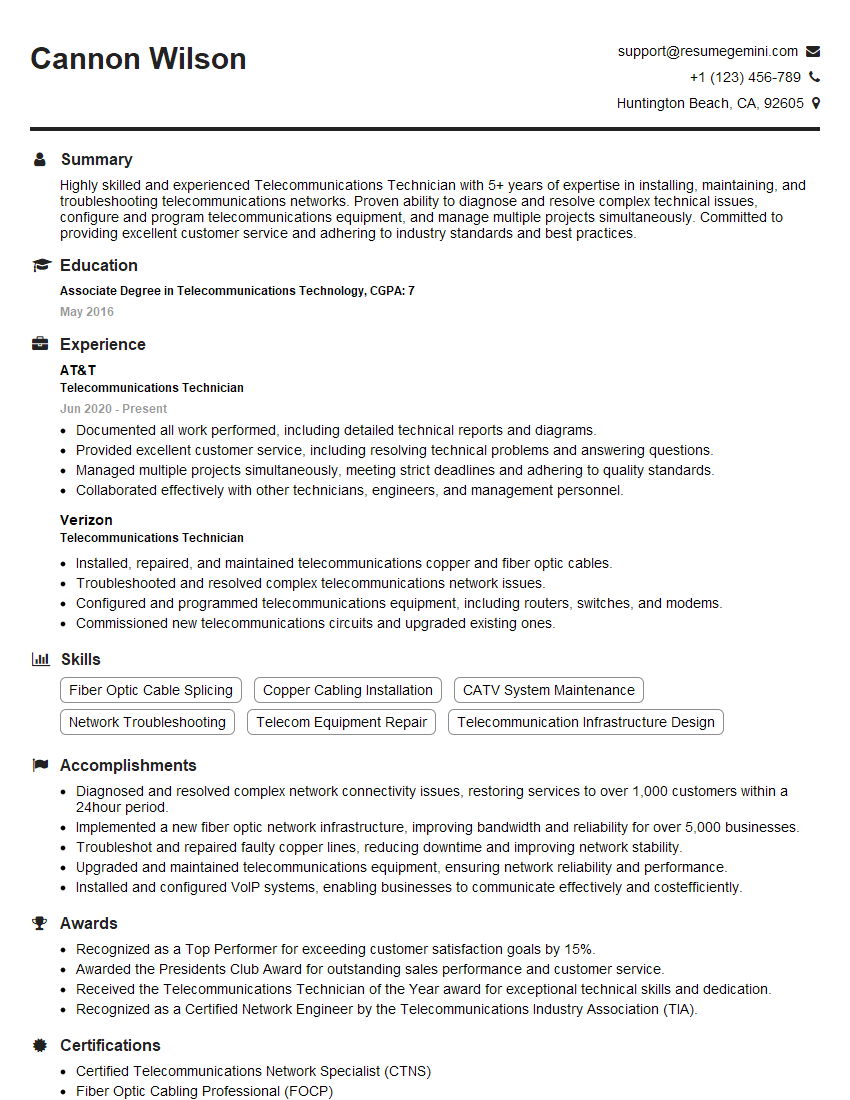
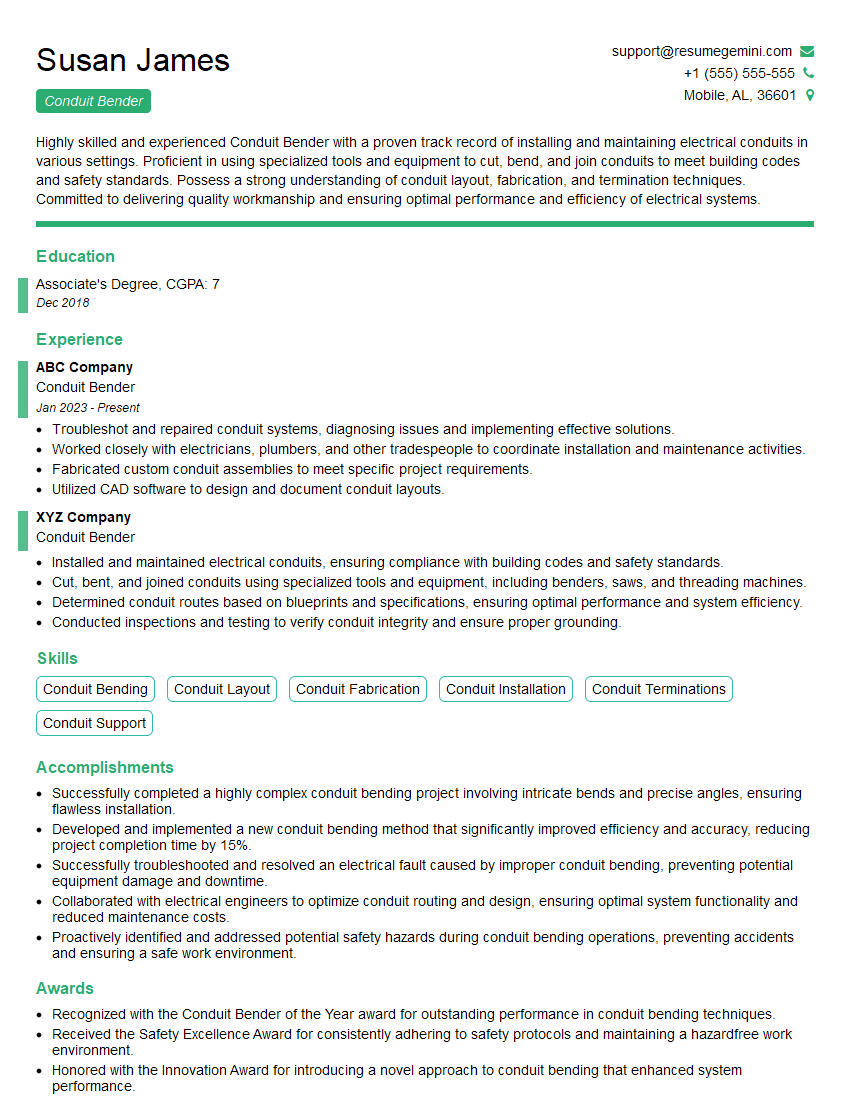
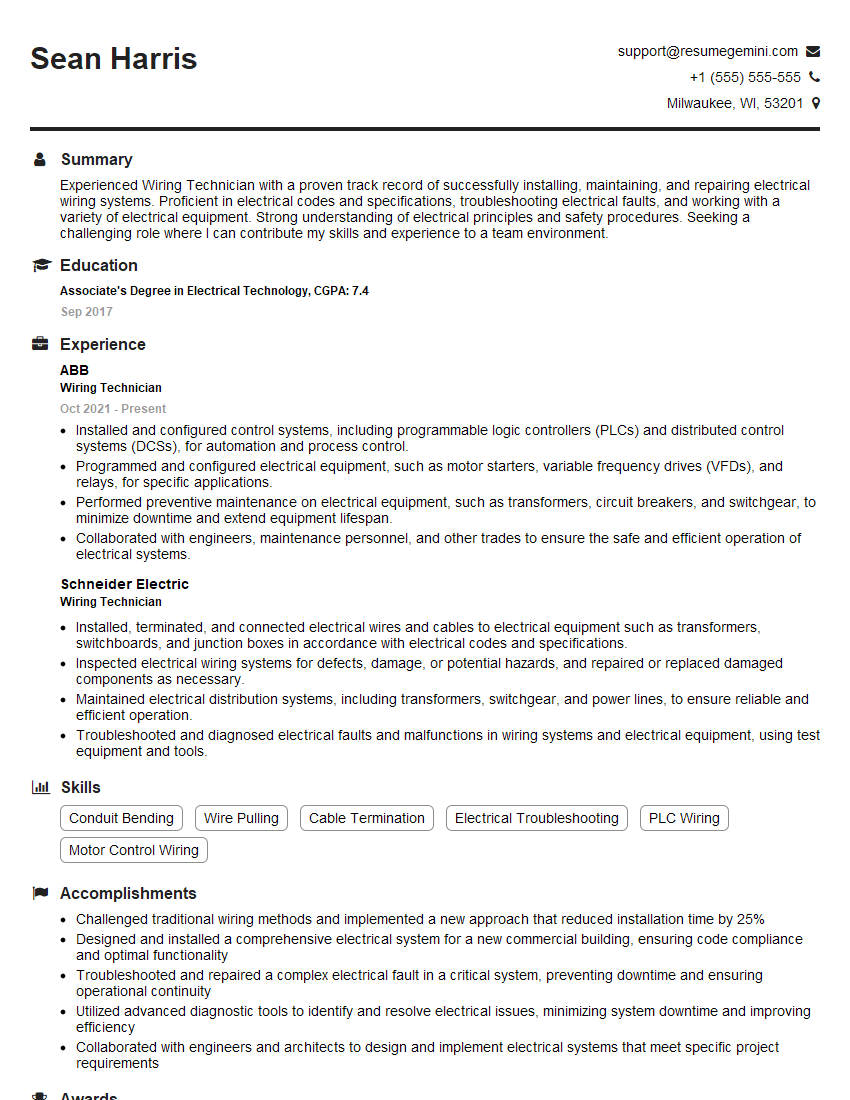
Mastering conduit bending and wiring is essential for a successful and rewarding career in the electrical field. It opens doors to diverse opportunities and showcases your technical skills and commitment to safety. To maximize your job prospects, focus on crafting a compelling and ATS-friendly resume that highlights your abilities and experience. ResumeGemini is a trusted resource that can help you build a professional resume that gets noticed. They provide examples of resumes tailored specifically to the Conduit Bending and Wiring field, giving you a head start in your job search. Take the time to build a strong resume – it’s your first impression with potential employers.
Explore more articles
Users Rating of Our Blogs
Share Your Experience
We value your feedback! Please rate our content and share your thoughts (optional).
What Readers Say About Our Blog
This was kind of a unique content I found around the specialized skills. Very helpful questions and good detailed answers.
Very Helpful blog, thank you Interviewgemini team.
