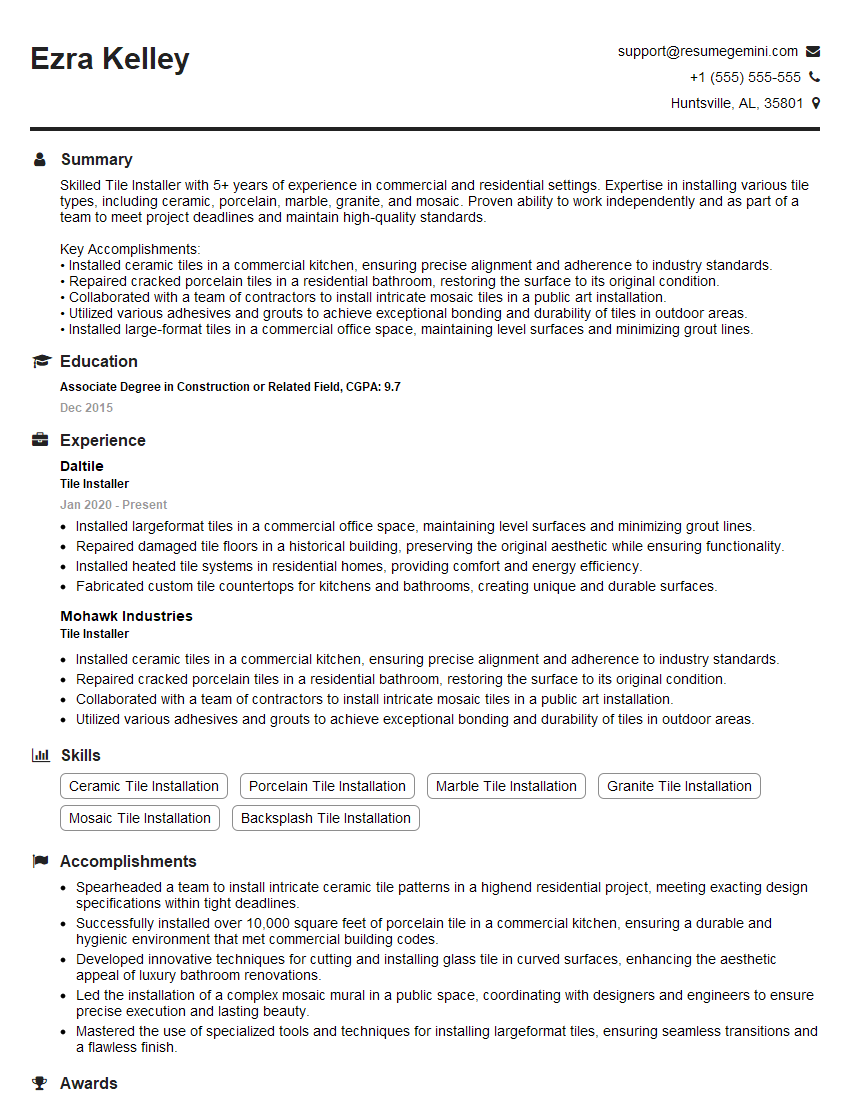
Every successful interview starts with knowing what to expect. In this blog, we’ll take you through the top Working with grout interview questions, breaking them down with expert tips to help you deliver impactful answers. Step into your next interview fully prepared and ready to succeed.
Questions Asked in Working with grout Interview
Q 1. What types of grout are you familiar with (e.g., epoxy, cement-based)?
Grout comes in various types, each with its own strengths and weaknesses. The two most common are cement-based and epoxy grouts.
- Cement-based grout: This is the most widely used type, offering a good balance of cost-effectiveness and durability. It’s porous, meaning it can absorb water, which is something to consider in high-moisture areas. It comes in a vast array of colors and is relatively easy to work with.
- Epoxy grout: This is a premium option known for its superior water resistance and stain resistance. It’s ideal for areas like showers, pools, and kitchens where moisture and staining are major concerns. However, it’s more expensive and requires a bit more expertise to work with, as it sets quickly and doesn’t allow for much working time.
- Other types: While less common, you’ll also find other grouts like furan resin grout, which is exceptionally strong and chemically resistant, suitable for industrial settings.
Choosing the right grout depends entirely on the project’s specific needs and location. For instance, I would always recommend epoxy grout for a shower, but cement-based might suffice for a backsplash.
Q 2. Describe the process of mixing grout to the correct consistency.
Mixing grout correctly is crucial for a successful installation. The goal is to achieve a smooth, workable consistency, avoiding lumps or being too dry or too runny. Think of it like making a cake batter – you wouldn’t want it too thick or too thin!
- Read the manufacturer’s instructions: This is paramount. Mixing ratios vary by brand and type of grout.
- Use clean tools: A clean bucket and mixing paddle are essential to prevent contamination.
- Add powder to water: Gradually add the grout powder to the water, not the other way around. This prevents clumping.
- Mix thoroughly: Use a low-speed drill with a mixing paddle for even consistency. Mix for at least 2-3 minutes until you achieve a smooth, creamy texture that’s easy to spread but firm enough to hold its shape.
- Check consistency: Take a small amount of grout and spread it on your trowel. If it sticks to the trowel easily and is easily spread, you have the right consistency. If it’s too dry, add a bit more water. If it’s too wet, add more powder.
- Mix only what you can use within its working time: Grout starts to set after a certain period, so only mix as much as you can apply within that timeframe.
Q 3. What tools and equipment are essential for professional grout application?
Professional grout application demands the right tools. Having the right equipment makes the job much easier and yields a much better final product.
- Grout float: This is the primary tool for applying and spreading the grout.
- Rubber grout float: A helpful addition. It provides a more polished finish.
- Grout sponge: For cleaning excess grout.
- Bucket: For mixing grout and cleaning.
- Mixing paddle: Attaches to a drill for efficient grout mixing.
- Measuring tools: For precise mixing ratios.
- Protective gear: Gloves, safety glasses, and possibly a dust mask are crucial for safety.
- Tile spacers: To ensure consistent grout joint widths.
For larger jobs, a power grout mixer and a wet/dry vacuum for clean-up can significantly increase efficiency.
Q 4. How do you prepare a surface for grout application?
Proper surface preparation is key to a long-lasting grout job. It ensures the grout adheres correctly and prevents issues later on.
- Clean the tile surface: Remove any dust, debris, or loose mortar from the tile surfaces with a brush or vacuum.
- Dampen the surface: Slightly moisten the tile surface. This helps the grout adhere better and prevents it from drying too quickly.
- Check for gaps: Ensure all the tile gaps are empty and clean, free of any remaining mortar or debris. This will improve adhesion.
- Cure time: Allow the tiles to fully cure according to the manufacturer’s instructions. Grouting too soon can lead to problems.
Think of it as preparing a canvas for a painting. You would never paint on a dirty canvas. The same applies to grouting!
Q 5. Explain the importance of proper grout joint spacing.
Consistent grout joint spacing is vital for both aesthetics and structural integrity. It ensures a uniform, professional appearance and prevents weak points in the tile installation.
- Uniformity: Consistent spacing provides a clean, professional look. Uneven grout lines look sloppy.
- Structural Support: Proper spacing distributes pressure and weight evenly, preventing cracking and shifting over time.
- Water penetration: Consistent spacing creates a solid seal, helping prevent water penetration in areas like showers or backsplashes.
Using tile spacers of a consistent size during tile installation is essential for achieving this.
Q 6. What techniques do you use to ensure even grout application?
Even grout application is an art that comes with practice. The goal is to fill the joints completely and avoid excess grout buildup on the tile surfaces.
- Press the grout into joints: Use a grout float to press the grout firmly into the joints at a 45-degree angle, ensuring complete filling.
- Maintain consistent pressure: Avoid applying too much pressure in one area or too little in another. Work in small sections for better control.
- Remove excess grout immediately: This prevents staining or excess hardening. After filling the joint, wipe away excess grout with a damp sponge.
- Use a rubber grout float: For a smoother finish and better control over excess grout removal.
Imagine spreading butter on toast—you want even coverage without excess. Grouting is similar; it requires a steady hand and attention to detail.
Q 7. How do you clean excess grout from tile surfaces?
Cleaning excess grout quickly and efficiently is crucial to prevent staining and achieve a clean finish. This process should happen as soon as the grout starts to set.
- Use a damp sponge: Use a clean, damp sponge to wipe away excess grout from the tile surface. Rinse the sponge frequently in clean water to prevent smearing.
- Work in small sections: Cleaning in small areas allows you to focus on removing excess grout without letting it set.
- Avoid harsh scrubbing: Vigorous scrubbing can damage the tile surface. Use gentle pressure, working the sponge over the tile surfaces to lift the grout.
- Multiple passes might be necessary: Depending on the grout type and how much excess grout is present, multiple passes with a damp sponge may be necessary.
- Use a grout haze remover: For tougher stains, a grout haze remover can help remove any remaining grout residue after initial cleaning.
Think of it like cleaning a spill immediately. The quicker you act, the easier it is to clean up.
Q 8. What are the common problems encountered during grout application?
Common grout application problems stem from improper preparation, incorrect mixing, or poor technique. Think of it like baking a cake – if you don’t follow the recipe precisely, you’ll have problems.
- Uneven Grout Lines: This often happens due to inconsistent pressure during application or using the wrong tools. Imagine trying to fill a crack with toothpaste using a paintbrush – messy! A rubber grout float is crucial for consistent application.
- Grout Shrinkage and Cracking: This is often caused by using too much water when mixing, improper curing, or rapid drying. The grout loses its bond as it dries too quickly.
- Air Pockets: Trapped air bubbles weaken the grout and create unsightly blemishes. Proper mixing and compaction are key to avoid this.
- Staining: This can be caused by using the wrong type of cleaner or allowing spills to sit for too long. Think of it like setting a coffee stain on a white shirt.
- Efflorescence: This is a white, powdery residue that appears on the surface of the grout due to salts within the material being drawn to the surface by moisture. It’s a sign of moisture problems within the wall itself.
Q 9. How do you address grout shrinkage or cracking?
Addressing grout shrinkage and cracking requires a multifaceted approach. Prevention is key, beginning with proper grout selection and mixing. Using the correct water-to-powder ratio specified by the manufacturer is paramount. Too much water weakens the grout, leading to shrinkage and cracking.
- Proper Curing: Keep the grout moist for the recommended curing time (usually 24-72 hours) to prevent rapid drying and cracking. This might involve covering the grout with plastic sheeting and dampening it periodically.
- Appropriate Mixing Techniques: Thoroughly mix the grout to ensure a consistent consistency, avoiding lumps which could compromise the overall strength and lead to cracks.
- Crack Repair: For existing cracks, carefully remove the loose or damaged grout using a grout saw or a similar tool. Clean the area thoroughly before applying a matching grout to fill the gap. Again, proper curing is essential to ensure a lasting repair.
Q 10. Describe your experience with different grout colors and finishes.
My experience encompasses a wide range of grout colors and finishes. It’s like choosing paint for a room – the options are vast and affect the overall aesthetic.
- Colors: I’ve worked with everything from classic white and gray to vibrant blues, greens, and even custom-mixed shades to complement specific tile designs. The color selection impacts the overall look and feel of the space. A dark grout can make smaller tiles appear larger, while lighter grout can emphasize larger tiles and create a more open feel.
- Finishes: I’m familiar with various finishes, including matte, glossy, and textured options. Each finish offers a unique visual appeal and also impacts the grout’s maintenance requirements. A matte finish is less likely to show dirt, while a glossy finish is easier to clean.
For example, I once worked on a project where the client wanted a specific shade of green grout to match the accent wall. This required careful color matching and communication with the supplier to achieve the desired effect.
Q 11. How do you handle grout staining or discoloration?
Grout staining can be frustrating, but often treatable. The key is prompt action and the right cleaning agents. Think of it like treating a stain on clothing – the faster you act, the better the chance of removal.
- Identify the Stain: Different stains require different treatments. Is it mildew, rust, efflorescence, or a simple dirt stain?
- Gentle Cleaning: Start with a mild detergent and water solution. Scrub gently with a soft brush or sponge. Avoid harsh chemicals unless absolutely necessary.
- Specialized Cleaners: For stubborn stains, you may need a grout cleaner designed for the specific type of stain. Always test in an inconspicuous area first.
- Professional Cleaning: If the staining is severe or you are unsure about the best method, consider calling in a professional cleaning service.
In one project, a client had stubborn rust stains from a leaky faucet. We used a specialized rust remover following manufacturer instructions, ensuring proper ventilation and safety precautions.
Q 12. What safety precautions do you take when working with grout?
Safety is paramount when working with grout. It’s crucial to treat it with the respect it deserves and follow guidelines meticulously.
- Respiratory Protection: Grout dust can be irritating, so always wear a respirator or dust mask, especially when grinding or sanding grout.
- Eye Protection: Safety glasses or goggles are crucial to protect your eyes from dust and splashes.
- Gloves: Wear protective gloves to prevent skin irritation from the grout and cleaning chemicals.
- Ventilation: Ensure adequate ventilation in the work area to avoid inhaling dust and fumes from cleaning products.
- Proper Disposal: Dispose of leftover grout and cleaning supplies according to local regulations.
Ignoring these precautions can lead to health issues like respiratory problems or skin irritations.
Q 13. Explain the process of sealing grout.
Sealing grout is a crucial step in protecting it from staining, moisture damage, and wear. It’s like applying a protective layer on a piece of furniture – it extends its life and makes it easier to maintain.
- Clean the Grout: Thoroughly clean the grout surface to remove any dirt, debris, or existing sealant. Allow it to dry completely.
- Apply the Sealant: Use a grout sealer specifically designed for the type of grout being used. Apply it evenly using a brush, sponge, or roller, following the manufacturer’s instructions.
- Allow to Dry: Allow the sealant to dry completely, typically for a few hours or overnight, before subjecting the grout to water or heavy traffic.
- Second Coat (if needed): Some sealers may require a second coat for optimal protection. This is usually specified on the product packaging.
It’s recommended to seal grout at least once a year, or more frequently in high-traffic areas.
Q 14. What type of sealant is best for different grout types?
The best sealant depends on the type of grout. It’s like choosing the right lubricant for different types of machinery; each requires a specific approach.
- Epoxy Grout: Epoxy grout is extremely durable and often doesn’t require sealing, but if you do want to seal it, use a sealant specifically formulated for epoxy.
- Cement Grout: Cement grout, being more porous, benefits greatly from a penetrating sealer that helps repel water and stains. A water-based sealer is usually suitable.
- Sanded Grout: Sanded grout, due to its texture, might benefit from a topical sealer that creates a protective film on the surface, although penetrating sealers can still be effective.
- Unsanded Grout: Unsanded grout is generally less porous and can sometimes benefit from a topical sealant, providing enhanced protection from staining.
Always consult the manufacturer’s recommendations for both the grout and the sealant to ensure compatibility and optimal results.
Q 15. How do you repair damaged or cracked grout?
Repairing damaged or cracked grout depends on the extent of the damage. For minor cracks, you can often use a grout pen or a small amount of matching grout to fill the gaps. Think of it like patching a small hole in a wall – you use a similar material to seamlessly blend in the repair.
For more significant damage, you’ll need to remove the damaged grout completely using a grout saw or a utility knife. This involves carefully chiseling out the cracked areas without damaging the surrounding tiles. Then, you clean the area thoroughly, apply new grout, and tool it to achieve a smooth, even surface. This is similar to replacing a section of drywall – you’ll need to remove the old, damaged part and replace it with a fresh section that matches the existing structure.
- Step 1: Assess the damage. Minor cracks? Use a grout pen. Major damage? Chisel out the cracked grout.
- Step 2: Clean the area thoroughly using a grout cleaning brush and water. Remove any loose debris.
- Step 3: Apply new grout, ensuring it’s firmly packed into the joints.
- Step 4: Tool the grout using a damp sponge to create a smooth, uniform surface. Remove excess grout immediately.
- Step 5: Allow the grout to cure properly before exposing it to water.
Career Expert Tips:
- Ace those interviews! Prepare effectively by reviewing the Top 50 Most Common Interview Questions on ResumeGemini.
- Navigate your job search with confidence! Explore a wide range of Career Tips on ResumeGemini. Learn about common challenges and recommendations to overcome them.
- Craft the perfect resume! Master the Art of Resume Writing with ResumeGemini’s guide. Showcase your unique qualifications and achievements effectively.
- Don’t miss out on holiday savings! Build your dream resume with ResumeGemini’s ATS optimized templates.
Q 16. What are the different methods for removing old grout?
Removing old grout can be accomplished using several methods, each suited to different situations. For smaller areas or delicate tiles, a grout saw or utility knife is ideal for carefully removing individual sections. This is a precise method, minimizing damage, but it’s more time-consuming.
For larger areas, a rotary tool with a grout removal bit is much faster. Imagine a tiny, controlled jackhammer – it effectively chips away at the grout, but you must use caution to prevent damaging the tiles. For particularly stubborn grout, a chemical grout remover can be applied. This is like using a powerful solvent to dissolve the old grout and needs to be carefully used according to manufacturer instructions.
The choice depends entirely on the job’s size, the tile type, and your comfort level with different tools. Remember to always protect your eyes and wear appropriate safety gear when removing grout.
Q 17. Describe your experience with different tile materials and their grout compatibility.
My experience encompasses a wide range of tile materials, including ceramic, porcelain, natural stone (marble, granite, travertine), glass, and mosaic tiles. Each tile type requires a different approach when selecting grout.
For instance, porous tiles like natural stone often require epoxy grout to prevent staining, as epoxy grout is non-porous and resists water absorption. With ceramic or porcelain tiles, which are less porous, a cement-based grout is frequently sufficient. Glass tiles, being more delicate, often necessitate a softer, more flexible grout to prevent cracking. The key is always matching the grout’s properties to the tile’s characteristics to ensure a durable and aesthetically pleasing result. Ignoring this can lead to staining, cracking, or even tile damage.
I always research and consider the specific requirements of the tile before selecting a grout. It’s critical to consider factors like water absorption and potential expansion and contraction of the tiles, which can impact grout performance.
Q 18. How do you determine the appropriate grout type for a specific project?
Choosing the right grout involves considering several factors: the type of tile, the application’s location (interior or exterior), and the desired aesthetic. The tile’s porosity is key. Highly porous tiles need a grout that prevents moisture absorption, such as epoxy grout, while less porous tiles may be suitable with cement-based grout.
Location is also crucial. Exterior applications require grout that can withstand the elements, including freeze-thaw cycles. Aesthetics involve choosing the right color and finish. Unsanded grout is often used for smaller grout lines, whereas sanded grout is better for wider joints. There are even colored grouts available to match or complement the tiles perfectly. Careful consideration of all these factors ensures the grout’s longevity and the project’s success. Making the wrong choice can lead to a shorter lifespan, unsightly discoloration, or even structural problems.
Q 19. Explain the importance of proper grout curing.
Proper grout curing is vital for its long-term durability and water resistance. It allows the grout to fully harden and develop its intended properties. Think of it as allowing concrete to set – if you don’t give it enough time, it will be weak and prone to cracking.
The curing process involves keeping the grout moist for a specific period after installation, usually 24-72 hours. This prevents it from drying out too quickly, which can lead to cracking and reduced strength. Keep it moist by regularly misting it with water or covering it with damp cloths. Following the manufacturer’s instructions for curing time is crucial – rushing this process compromises the grout’s integrity, leading to issues down the line.
Q 20. What are the signs of improper grout installation?
Signs of improper grout installation include cracking, discoloration, crumbling, and loose or hollow-sounding grout. Cracking suggests inadequate curing, poor grout selection, or excessive shrinkage. Discoloration can indicate staining from water or improper cleaning. Crumbling grout is a sign of insufficient curing or using the wrong type of grout. Loose or hollow-sounding grout usually indicates poor application technique, with insufficient packing into the joints.
These problems lead to a shorter grout life, aesthetic issues, and even potential water damage if the grout doesn’t adequately seal the joints. Regular inspection and promptly addressing any issues are vital for long-term durability.
Q 21. How do you ensure the longevity of grout?
Ensuring grout longevity involves proper installation, selection, and ongoing maintenance. Choosing the right grout for the specific tile and application is the first step. This includes understanding the tile’s porosity and the application’s environment (interior/exterior). Correct installation is essential, including proper mixing, application, and curing.
Regular cleaning is vital to prevent staining and build-up. Avoid harsh chemicals and abrasive cleaners, as they can damage the grout. Use a soft brush, mild detergent, and plenty of water. Sealing the grout after it has fully cured can enhance its stain resistance and durability. This creates an additional protective barrier against moisture and staining. It’s similar to sealing a wooden deck – the sealant adds a layer of protection that enhances lifespan.
Q 22. What are some common grout maintenance tips?
Grout maintenance is crucial for preserving the beauty and longevity of tiled surfaces. Think of grout as the mortar holding your beautiful tile artwork together; neglecting it risks the whole structure. Regular cleaning is key. Here’s how:
Regular Sweeping/Vacuuming: Prevent dirt and debris buildup which can stain and damage the grout. This is like regularly dusting your furniture – a small effort prevents a big mess.
Weekly Cleaning: Use a mild detergent and a soft-bristled brush to gently scrub the grout. Think of this as a quick shower for your tiles – keeps them fresh and clean.
Deep Cleaning (Quarterly): Employ a grout cleaner specifically designed to remove embedded dirt and grime. This is like a deep clean for your grout – tackling stubborn stains and restoring brightness.
Sealing: Grout sealant acts as a protective barrier, preventing staining and water damage. It’s like adding a layer of sunscreen to your grout, shielding it from harmful elements.
Immediate Stain Removal: Address spills promptly to avoid permanent staining. Think of it like tending to a small cut immediately to prevent infection.
By consistently following these tips, you’ll significantly extend the life of your grout and keep your tiled areas looking their best.
Q 23. How do you handle difficult grout applications (e.g., curved surfaces)?
Grouting curved surfaces requires precision and specialized techniques. It’s like sculpting with grout! Standard grout floats won’t work effectively here. Instead, I use a combination of approaches:
Small, Flexible Trowels: These allow for better control and maneuverability on curved surfaces. I prefer flexible rubber trowels for maximum adaptability.
Grout Bags or Caulk Guns: For intricate curves and narrow spaces, these tools help apply grout precisely, reaching otherwise inaccessible areas. Think of it as using a pastry bag for icing a cake – you get perfect control.
Sponge and Careful Cleaning: Removing excess grout is crucial on curves. I use damp sponges to gently wipe away grout without disturbing the newly applied material, ensuring a smooth and consistent finish. It’s a delicate balancing act – getting everything clean but not disturbing the application.
I’ve found that patience and a steady hand are essential for a successful outcome when working with curved surfaces. Practice on small test areas helps develop the necessary skills.
Q 24. Describe your experience working with large-scale grout projects.
I’ve been involved in several large-scale projects, including the recent renovation of a commercial shopping mall where we grouted over 50,000 square feet of tile. This involved meticulous planning and project management.
Detailed Planning: We mapped out the entire project area, dividing it into manageable sections to ensure efficient workflow and minimize material waste. This was like planning a military campaign – every detail considered and strategized.
Teamwork: Coordinating a large team of skilled installers was crucial. We established clear communication protocols to ensure everyone worked efficiently and consistently.
Material Management: Accurately estimating material requirements for a project of this scale was critical. Over- or under-ordering could have resulted in delays or extra costs. Accurate planning was a key to success.
Quality Control: Regular inspections ensured our work met the highest standards. We implemented strict quality control checks at every stage of the project.
These large-scale projects demand exceptional organizational skills, effective communication, and an unwavering commitment to quality. The successful completion of such projects is highly satisfying.
Q 25. What are the latest advancements in grout technology?
The grout industry is constantly evolving. Recent advancements focus on improved performance and ease of use. Some key developments include:
Epoxy Grout: Superior to cement-based grout in terms of durability, stain resistance, and water resistance. It’s like a super-powered grout that resists nearly anything.
Pre-mixed Grout: Reduces preparation time and eliminates the risk of incorrect mixing ratios. Think of it as a grout-in-a-box – convenient and consistent.
Colored Grout: A wide array of colors and shades provides greater design flexibility. This is like adding a palette of colors for artists – creating unique and expressive tile designs.
Eco-Friendly Options: Grout manufacturers are increasingly focusing on sustainable materials and reduced environmental impact.
These advancements reflect a continuous effort to provide high-performance, versatile, and environmentally responsible grout solutions.
Q 26. How do you manage your time and prioritize tasks when applying grout?
Time management is crucial in grout application. I utilize a structured approach:
Detailed Project Plan: This outlines all tasks, timelines, and resource allocation. This detailed plan is like a map guiding the journey.
Prioritization: Critical tasks, like surface preparation and grout mixing, are prioritized to ensure smooth workflow. This involves understanding the project’s key milestones.
Efficient Techniques: I employ efficient grout application and cleaning techniques to minimize downtime. Efficiency is key – less time spent, more projects completed.
Regular Checks: I constantly monitor progress and adapt the schedule as needed. This proactive approach avoids any unexpected delays.
This proactive approach minimizes delays and ensures projects are completed on time and within budget.
Q 27. How do you address client concerns or unexpected issues during grout installation?
Addressing client concerns and unexpected issues is an integral part of the job. My approach is based on open communication and problem-solving:
Active Listening: I carefully listen to the client’s concerns and ask clarifying questions. Understanding the problem is the first step to finding a solution.
Transparent Communication: I clearly explain the situation, potential solutions, and their implications. Honest communication is paramount – building trust with the client.
Collaborative Problem-Solving: I work with the client to find the best solution, balancing their needs and project constraints. A collaborative approach fosters a positive outcome.
Documentation: I meticulously document all issues, solutions, and resolutions. This protects both the client and myself and allows me to learn from any experience.
By prioritizing open communication and a collaborative approach, I can effectively address any concerns and maintain strong client relationships.
Q 28. Describe a time you had to troubleshoot a grout problem. What was the solution?
On one project, we encountered unexpected efflorescence (a white, powdery deposit) on the grout after it had cured. This is a common problem that arises from moisture issues. The solution involved multiple steps:
Identify the Cause: We determined that the underlying issue was moisture migration from the substrate. The moisture seeped into the grout, causing the efflorescence.
Cleaning: We cleaned the affected areas using a solution of water and a mild acid. This removed the visible efflorescence but didn’t solve the root problem.
Moisture Mitigation: We then addressed the moisture problem by improving ventilation and applying a sealant to the substrate to prevent further moisture migration. This addressed the cause rather than just the symptom.
Re-Grouting (In some areas): In severely affected areas, we carefully removed the old grout and re-grouted with a water-resistant epoxy grout to ensure longevity. This was a necessary step to ensure the long term effectiveness.
This experience underscored the importance of proper substrate preparation and the selection of appropriate grout for specific conditions. It also highlighted the fact that a simple symptom (efflorescence) may have a much more complex underlying cause.
Key Topics to Learn for Working with Grout Interview
- Grout Types and Selection: Understanding the different types of grout (cement-based, epoxy, sanded, unsanded) and their appropriate applications based on project needs and location (interior vs. exterior).
- Mixing and Preparation: Mastering the proper techniques for mixing grout to achieve the correct consistency, avoiding common pitfalls like improper water ratios or clumping.
- Application Techniques: Learning various application methods, including tools and techniques for achieving even grout lines, proper filling, and minimizing mess.
- Grout Finishing and Cleaning: Understanding the importance of proper cleaning and finishing techniques to ensure a professional and durable finish, removing excess grout before it sets.
- Troubleshooting Common Issues: Identifying and resolving problems like cracking, staining, efflorescence, and uneven grout lines. Knowing preventative measures is crucial.
- Safety Procedures and Best Practices: Understanding and adhering to safety regulations, including proper personal protective equipment (PPE) usage and waste disposal.
- Tools and Equipment: Familiarity with various tools used in grout application and finishing, such as trowels, floats, sponges, and cleaning brushes.
- Understanding Substrate Preparation: The importance of properly preparing the substrate (tiles, surfaces) before grout application to ensure optimal adhesion and longevity.
- Maintenance and Repair: Knowing how to maintain and repair grout over time, including cleaning, sealing, and addressing minor damage.
- Color Matching and Coordination: Understanding the process of selecting and matching grout colors to tile and overall design aesthetics.
Next Steps
Mastering the art of working with grout is essential for career advancement in tiling, construction, and related fields. A strong understanding of these techniques demonstrates professionalism and attention to detail, highly valued by employers. To significantly boost your job prospects, it’s vital to create an ATS-friendly resume that highlights your skills and experience effectively. ResumeGemini is a trusted resource that can help you build a professional and impactful resume. Use ResumeGemini to craft a winning resume, and take advantage of the available examples tailored to working with grout to showcase your expertise.
Explore more articles
Users Rating of Our Blogs
Share Your Experience
We value your feedback! Please rate our content and share your thoughts (optional).
What Readers Say About Our Blog
Hi, I have something for you and recorded a quick Loom video to show the kind of value I can bring to you.
Even if we don’t work together, I’m confident you’ll take away something valuable and learn a few new ideas.
Here’s the link: https://bit.ly/loom-video-daniel
Would love your thoughts after watching!
– Daniel
This was kind of a unique content I found around the specialized skills. Very helpful questions and good detailed answers.
Very Helpful blog, thank you Interviewgemini team.

