Are you ready to stand out in your next interview? Understanding and preparing for Wallpaper Hanging and Removal interview questions is a game-changer. In this blog, we’ve compiled key questions and expert advice to help you showcase your skills with confidence and precision. Let’s get started on your journey to acing the interview.
Questions Asked in Wallpaper Hanging and Removal Interview
Q 1. What types of wallpaper have you worked with (e.g., vinyl, fabric, grasscloth)?
Over the years, I’ve worked with a wide variety of wallpapers, each presenting its own unique challenges and rewards. This includes the most common types like vinyl, which is durable, washable, and relatively easy to install; fabric wallpapers, offering a luxurious feel and diverse textures but requiring more careful handling; and grasscloth, a natural fiber wallpaper that adds a unique, organic aesthetic but can be more delicate and challenging to work with. I’ve also had experience with non-woven wallpapers, known for their ease of installation, and flocked wallpapers, which have a velvety texture. Understanding the specific properties of each type is crucial for successful installation and removal.
Q 2. Describe your process for preparing a wall for wallpaper installation.
Preparing the wall is the most critical step for a flawless wallpapering job. It’s like preparing a canvas for a painting – a poor foundation leads to a subpar result. My process begins with a thorough cleaning of the wall to remove any dust, dirt, cobwebs, or grease. I then use a scraper to remove any loose paint or wallpaper remnants. Any imperfections, like holes or cracks, need to be repaired and sanded smooth. Next, I’ll prime the wall with a quality primer specifically designed for wallpaper. This ensures good adhesion and prevents the wallpaper from absorbing unevenly, which can cause bubbling or discoloration. Finally, I’ll thoroughly inspect the wall again, ensuring a perfectly smooth and clean surface ready for the wallpaper. Think of the primer as insurance – it protects against future problems.
Q 3. How do you measure and cut wallpaper accurately to avoid waste?
Accurate measuring and cutting are essential to minimize waste and achieve a professional finish. I start by carefully measuring the wall height and width, taking into account any windows, doors, or other features. I then add a few extra inches to each measurement to allow for pattern matching and trimming. Using a sharp utility knife and a metal straight edge, I cut the wallpaper strips precisely. It’s important to use a cutting mat to protect the surface and ensure clean cuts. For complex patterns, I lay out the strips on the floor first to visualize the pattern match before cutting. Think of it like a tailor taking precise measurements for a bespoke suit – accuracy is paramount.
Q 4. Explain your method for matching wallpaper patterns.
Matching wallpaper patterns requires patience and attention to detail. Most wallpapers have a pattern repeat – the distance the pattern takes to repeat itself. This information is usually found on the wallpaper roll label. I carefully measure this repeat and add it to my calculations when measuring and cutting each strip. Each successive strip needs to match the previous one exactly to ensure a seamless flow of the pattern. I use a plumb bob to ensure vertical alignment and carefully adjust each strip before applying adhesive. I often lay out multiple strips on the floor to visualize the pattern matching before applying them to the wall – this pre-planning dramatically reduces the chances of errors. It’s like assembling a jigsaw puzzle – each piece must fit perfectly.
Q 5. What tools and materials are essential for professional wallpaper installation?
Professional wallpaper installation relies on the right tools and materials. Essential tools include a plumb bob for vertical alignment, a measuring tape, a sharp utility knife and metal straight edge for precise cutting, a paste brush or roller for applying adhesive (depending on the wallpaper type), a smoothing brush or squeegee to remove air bubbles, a seam roller to secure seams, a sponge for cleaning up excess paste, and a stepladder for reaching higher areas. Materials include the wallpaper itself, appropriate adhesive (selecting the correct type is crucial based on the wallpaper type), primer, and possibly seam sealer for extra strength. Having the right tools is like having the right instruments for a musician – each one plays a vital role in creating a beautiful and lasting outcome.
Q 6. How do you handle difficult wall surfaces (e.g., textured walls, uneven surfaces)?
Textured walls or uneven surfaces can make wallpapering more challenging, but with the right techniques, it’s achievable. For textured walls, I’ll carefully assess the texture’s depth. If the texture is very pronounced, a heavier-weight wallpaper might be needed to prevent the texture from showing through. A thicker adhesive might also be necessary. For uneven surfaces, I start by filling any significant imperfections with spackle or joint compound, sanding it smooth, and then priming. In some cases, a lining paper might be used to create a smoother surface before applying the wallpaper. It’s like building a foundation – it must be strong and stable to support the structure. Preparation on challenging surfaces is essential.
Q 7. Describe your process for removing wallpaper, including dealing with stubborn adhesive.
Wallpaper removal can be messy but is a necessary part of updating interiors. I begin by scoring the wallpaper with a scoring tool, which helps loosen the paper and breaks the adhesive bond. Then, I apply a wallpaper remover solution, following manufacturer instructions, which helps to further soften the adhesive. Using a scraper, I carefully remove the wallpaper in strips, working from the top to the bottom. Stubborn adhesive requires patience and persistence. I may need to reapply the remover solution and carefully scrape repeatedly. For particularly stubborn areas, a steamer can be effective in loosening the adhesive. In some cases, using a combination of scoring, chemical removers, and steam is necessary for complete removal. After removing the wallpaper, I clean the walls thoroughly to remove any remaining adhesive or residue, ensuring they are fully prepared for repainting or re-wallpapering. Removing wallpaper is like peeling off a stubborn sticker – sometimes it requires several careful attempts to get it clean.
Q 8. What are the common problems encountered during wallpaper installation or removal, and how do you address them?
Wallpaper installation and removal present several challenges. During installation, common problems include uneven surfaces leading to bubbling or wrinkling, improper matching of patterns resulting in unsightly seams, and the wallpaper not adhering properly due to incorrect paste application or unsuitable surface conditions. During removal, the biggest issue is often stubborn wallpaper that resists peeling, particularly older vinyl wallpapers which can tear easily. Sometimes the adhesive remains stubbornly stuck to the wall, requiring further treatment.
Addressing Installation Issues: Before starting, I always thoroughly prepare the wall, ensuring it’s clean, smooth, and primed with the appropriate primer for the specific wallpaper type. For uneven surfaces, I use a lightweight spackling compound and sand it smooth before priming. I meticulously match patterns, using a plumb bob and measuring tape to ensure precise vertical alignment. Proper paste application is crucial; I follow the manufacturer’s instructions precisely. If bubbling occurs, I gently pierce the bubble with a pin and smooth out the air with a clean cloth.
Addressing Removal Issues: For stubborn wallpaper, I use a scoring tool to perforate the surface, making it easier to soak. I then apply a wallpaper remover solution or use a steamer to soften the adhesive. I work in small sections, slowly peeling away the wallpaper with a putty knife or scraper, being careful not to damage the wall. For lingering adhesive, I use a specialized adhesive remover and a scraper, always protecting the wall with a damp cloth to prevent damage. The key is patience and using the right tools.
Q 9. How do you ensure proper alignment and seams during installation?
Precise alignment and seamless joins are paramount for a professional finish. I use a few key techniques:
Plumb Bob: I start by establishing a perfectly vertical line using a plumb bob, ensuring the first strip is perfectly aligned. Subsequent strips are then carefully matched to this initial line, guided by the pattern repeat.
Measuring and Marking: I meticulously measure and mark the wall to ensure accurate placement of each strip. For patterned wallpaper, this is especially important to maintain consistency and avoid noticeable mismatches.
Pattern Matching: I carefully match the pattern repeat on adjacent strips, ensuring a smooth and seamless transition between them. This often involves overlapping slightly and trimming excess material with a sharp utility knife.
Seaming Roller: Once the strips are aligned, I use a seam roller to firmly press the edges together, eliminating air bubbles and ensuring a solid bond. A soft cloth is used to avoid damaging the paper.
Think of it like building a brick wall – each brick (wallpaper strip) must be perfectly aligned with the others to create a flawless surface.
Q 10. What safety precautions do you take while working with wallpaper and its adhesives?
Safety is always my top priority. Working with wallpaper paste and solvents requires careful consideration:
Ventilation: I ensure adequate ventilation to minimize exposure to fumes, especially when using steamers or adhesive removers. This often involves opening windows and using fans.
Protective Gear: I always wear appropriate personal protective equipment (PPE), including gloves to protect my hands from irritants, eye protection to prevent splashes, and a respirator when working with strong solvents or adhesives.
Careful Handling: I handle sharp tools, such as utility knives and scrapers, with caution, always cutting away from myself and ensuring a secure grip.
Proper Disposal: I dispose of leftover paste, solvents, and any other waste material according to local regulations to prevent environmental hazards.
Ladder Safety: When working at heights, I always use a stable and properly secured ladder, following all safety guidelines.
Q 11. How do you clean up after completing a wallpapering job?
Thorough cleanup is essential to leave the job site clean and presentable. My cleanup process involves:
Waste Removal: I carefully remove all scraps of wallpaper, packaging, and other debris from the work area. I use dustpans and brushes to collect smaller pieces of debris.
Surface Cleaning: I clean the surfaces thoroughly using appropriate cleaning solutions to remove any excess paste, adhesive residue, or other marks. I always test a small area first to ensure the cleaner doesn’t damage the wallpaper or wall paint.
Tool Cleaning: I clean my tools meticulously after use, ensuring they are free from paste, adhesive, and debris. Sharp tools are carefully stored to prevent accidents.
Vacuuming: A final vacuuming ensures all small debris is removed, leaving the area spotless and ready for the client to enjoy their freshly wallpapered room.
Q 12. What is your experience with different types of wallpaper paste or adhesive?
I have extensive experience with a wide range of wallpaper pastes and adhesives, from traditional powdered pastes to pre-mixed formulas and specialized adhesives for different wallpaper types, including vinyl, non-woven, and fabric. Powdered pastes require mixing and offer excellent control over consistency, while pre-mixed pastes are convenient but may not always suit all wallpapers. Some adhesives are designed for specific substrates, like plaster or drywall, ensuring a strong and lasting bond. I always consult the manufacturer’s instructions on the wallpaper and adhesive for optimal results. Knowing which adhesive to use is crucial for avoiding issues such as bubbling or peeling.
For example, a heavy vinyl wallpaper would require a stronger adhesive than a lightweight non-woven paper. Choosing the right adhesive is a critical step in ensuring a successful installation.
Q 13. Have you ever worked with murals or custom wallpaper designs?
Yes, I have experience with murals and custom wallpaper designs. These projects demand a higher level of precision and attention to detail. Proper planning and precise measurements are critical, particularly for seamless murals that span multiple panels. I’ve worked on large-scale murals, coordinating the installation of numerous panels to create a cohesive and visually stunning artwork. The approach is similar to regular wallpapering but with a heightened focus on precise alignment and pattern matching across different panels, potentially requiring the use of specialized tools and techniques to ensure a perfect match.
One memorable project involved a large-scale nature mural for a client’s living room. The meticulous planning and careful installation ensured the final result was breathtaking.
Q 14. Describe your experience with steam stripping wallpaper.
Steam stripping is a highly effective method for removing stubborn wallpaper, particularly vinyl and older wallpapers. It involves using a wallpaper steamer to soften the adhesive, making the wallpaper easier to remove. I use a professional-grade steamer, ensuring it’s properly filled with water and allowed to heat up completely before use. I work in manageable sections, applying steam evenly to the wallpaper until it’s visibly softened. A scraper is then used to gently peel away the softened wallpaper, paying close attention to avoid damaging the wall underneath. For particularly tenacious adhesive, I may need to repeat the steaming process or use a chemical wallpaper remover after steaming.
Important Note: Steam stripping requires caution to prevent water damage. I protect adjacent surfaces with plastic sheeting and ensure proper ventilation while working. This method is also not suitable for all wall types and should be carefully considered before application.
Q 15. How do you handle damaged wallpaper during removal or installation?
Handling damaged wallpaper during removal or installation requires a careful and methodical approach. During removal, if the wallpaper is severely damaged and tearing easily, I often use a scoring tool to weaken the adhesive before applying a wallpaper remover solution. This minimizes further damage to the wall. For small tears, I might be able to repair them using matching wallpaper scraps and a quality adhesive. Larger tears, however, generally require patching with new wallpaper. During installation, damaged rolls are immediately set aside and replaced. I always inspect rolls thoroughly before starting a project to avoid delays. Think of it like baking – if your ingredients are compromised, the final product suffers. So meticulous inspection is crucial.
Career Expert Tips:
- Ace those interviews! Prepare effectively by reviewing the Top 50 Most Common Interview Questions on ResumeGemini.
- Navigate your job search with confidence! Explore a wide range of Career Tips on ResumeGemini. Learn about common challenges and recommendations to overcome them.
- Craft the perfect resume! Master the Art of Resume Writing with ResumeGemini’s guide. Showcase your unique qualifications and achievements effectively.
- Don’t miss out on holiday savings! Build your dream resume with ResumeGemini’s ATS optimized templates.
Q 16. What is your process for repairing minor wall damage before wallpapering?
Repairing minor wall damage before wallpapering is essential for a professional finish. My process involves several steps: First, I thoroughly clean the wall to remove dust and loose debris. Then, I assess the damage. Small holes and cracks are filled with spackling paste, allowing it to dry completely and then sanding it smooth. For larger holes, I might use a drywall patch. Once the repairs are dry, I lightly sand the area again to ensure a seamless transition. Finally, I prime the repaired areas with a high-quality primer to ensure proper adhesion of the wallpaper. Imagine it like preparing a canvas for a painting – you need a smooth, clean surface for the best results.
Q 17. Are you familiar with different types of wallpaper borders and how to install them?
Yes, I’m very familiar with various wallpaper borders. They add a unique design element and can greatly enhance the overall aesthetic. I work with different materials like vinyl, paper, and fabric borders. Installation techniques vary slightly depending on the material and design, but generally involve precise measuring, cutting, and applying adhesive to the back of the border. The process is similar to wallpaper installation but on a smaller scale, often requiring more precise alignment and careful handling to avoid creases or wrinkles. For example, a delicate fabric border requires more gentle handling than a durable vinyl one. I always ensure a clean, straight application to create a sharp, defined look.
Q 18. How do you estimate the time and materials needed for a wallpapering project?
Estimating time and materials for a wallpapering project involves several factors. I begin by carefully measuring the area to be wallpapered and calculating the amount of wallpaper needed, accounting for pattern matching and waste. The type of wallpaper chosen also affects time. Heavy, textured wallpaper takes longer to install than a lighter-weight paper. Wall conditions also play a significant role. Damaged walls require additional time for repairs. My experience allows me to accurately estimate the labor required. I provide clients with a detailed breakdown of materials and labor costs, ensuring transparency and avoiding surprises.
Q 19. Can you describe your experience with different types of wallpaper seams (e.g., butt seams, overlapped seams)?
My experience encompasses various wallpaper seam types. Butt seams, where the edges of the wallpaper meet exactly without overlap, require precise cutting and alignment. Overlapped seams, where one piece of wallpaper slightly overlaps the next, are more forgiving but can create a noticeable seam if not done carefully. I choose the seam type based on the wallpaper design and the client’s preference. The type of wallpaper also plays a role, as some materials are better suited to butt seams while others are more forgiving with overlap. I always ensure that seams are perfectly aligned and blend seamlessly with the surrounding wallpaper for a professional finish. Think of it as tailoring – the seams need to be invisible for a flawless look.
Q 20. What is your approach to dealing with challenging customer requests or unexpected issues on a job site?
Handling challenging customer requests or unexpected issues requires clear communication and a problem-solving approach. I always start by actively listening to the customer’s concerns and understanding their needs. If an unexpected issue arises, such as damaged walls or inconsistent wallpaper, I assess the situation, propose solutions, and discuss the necessary adjustments with the client. I believe in transparency and maintaining open communication throughout the process. Flexibility and a willingness to adapt are key. For example, once a client requested a complete design change mid-project. Instead of arguing, we discussed options, and I adapted the schedule and material list accordingly, resulting in a satisfied client and a successfully completed project.
Q 21. How do you maintain a clean and organized workspace during installation?
Maintaining a clean and organized workspace is paramount. Before starting, I protect the floors and furniture with drop cloths. I use designated areas for tools, materials, and waste. As I work, I regularly clean up scraps and spills to prevent accidents and maintain a professional appearance. I use labeled containers for different materials to avoid confusion. At the end of each day, I thoroughly clean the work area, ensuring that the site is left clean and tidy. This meticulous approach is not just about aesthetics; it is crucial for efficiency and safety. A cluttered workspace increases the risk of accidents and slows down the work process. It’s like a chef’s kitchen; a clean, organized space leads to better results.
Q 22. How do you determine the correct amount of wallpaper needed for a job?
Accurately calculating wallpaper needs is crucial for avoiding costly mistakes. It’s not simply about measuring the walls; it involves understanding the pattern repeat, waste factors, and the type of wallpaper.
- Measure the wall area: Carefully measure the height and width of each wall, subtracting for windows and doors. Calculate the total square footage.
- Account for pattern repeat: Wallpaper patterns repeat at varying intervals. The manufacturer will specify the match (e.g., straight match, half-drop match). A half-drop match requires more wallpaper due to the offset pattern. You’ll need to factor this into your calculations. For instance, a pattern with a 24-inch repeat means that every 24 inches of wallpaper needs to perfectly align. Waste increases with larger pattern repeats.
- Add waste: Expect 10-15% extra wallpaper to account for trimming, matching errors, and possible damage during installation. More complex patterns or difficult wall surfaces may require even more. This is where experience comes into play—I can accurately assess the likely waste factor for a given job.
- Consider the number of rolls: Wallpaper is sold in rolls with a set square footage. Once you have your total square footage, including waste, you can determine the number of rolls needed.
Example: Let’s say a room has 200 square feet of wall space, and the wallpaper has a half-drop match requiring 15% extra for matching. 200 sq ft + (200 sq ft * 0.15) = 230 sq ft. If a roll covers 50 sq ft, you would need 5 rolls (230/50 = 4.6, round up).
Q 23. What is your experience with power tools and equipment relevant to wallpaper installation and removal?
My experience with power tools and equipment is extensive and vital for efficient and safe wallpapering. I’m proficient in using:
- Utility knife: For precise cutting of wallpaper and trimming excess.
- Seam roller: Ensures proper adhesion along seams, preventing bubbling and lifting.
- Measuring tape and level: Essential for accurate measurements and straight lines.
- Steam stripper: I use this to efficiently remove older wallpaper, considerably speeding up the process compared to manual methods. I always follow safety protocols, using appropriate personal protective equipment (PPE).
- Sander (for prep): Sometimes, pre-existing wall imperfections need smoothing before wallpaper application. I’m comfortable with using sanders to prepare the surface.
Safety is paramount. I always ensure proper ventilation when using power tools and handle them according to manufacturer instructions. Proper PPE, such as gloves and eye protection, is always utilized.
Q 24. How do you manage your time efficiently to meet project deadlines?
Effective time management is critical for meeting project deadlines and avoiding unnecessary costs. My approach involves:
- Detailed pre-job planning: This includes thorough measurements, material selection, and a step-by-step plan for installation. I’ll also discuss the project scope with the client to establish realistic expectations.
- Organized workflow: I work methodically, starting with preparation, then moving to installation, and finally finishing with cleanup. This avoids backtracking and ensures smooth progress.
- Efficient tools and techniques: Employing efficient tools (such as the steam stripper mentioned earlier) and well-honed techniques saves considerable time compared to slower manual methods.
- Realistic scheduling: I factor in potential delays, such as material delivery or unexpected wall conditions. I communicate transparently with clients about timelines.
- Prioritization: If faced with multiple tasks, I prioritize the most time-sensitive or crucial ones to ensure timely project completion.
I once faced a tight deadline for a large commercial project, and by applying these strategies – including assembling a small team for the bigger tasks – we successfully completed the project on time and to the client’s satisfaction.
Q 25. How do you ensure customer satisfaction throughout the wallpaper installation process?
Customer satisfaction is my top priority. I achieve this through:
- Clear communication: I maintain open communication throughout the project, addressing any questions or concerns promptly and professionally.
- Thorough preparation: A well-prepared surface is crucial for a successful wallpaper installation. This includes surface repair and proper priming.
- High-quality workmanship: I strive for meticulous work, ensuring precise cuts, seamless matching, and proper adhesion.
- Professionalism: I treat each client’s property with respect, ensuring a clean and orderly work environment.
- Post-installation inspection: After completion, I perform a thorough inspection with the client to ensure they are completely satisfied with the work.
- Follow-up: I follow up after the project is completed to ensure everything remains satisfactory.
For example, on a recent residential project, the client had a specific vision for their living room. Through careful consultation and attention to detail, I was able to exceed their expectations, resulting in a beautiful and personalized space. This led to positive referrals and word-of-mouth advertising.
Q 26. Describe your experience with working on various scales of projects (e.g., small residential, large commercial)?
I have extensive experience working on projects of various scales, from small residential projects to large commercial installations. My experience allows me to adapt my approach to meet the specific demands of each project.
- Residential Projects: These often involve smaller spaces and a higher degree of personalization. I’m adept at working closely with clients to select wallpaper that complements their individual style and preferences.
- Commercial Projects: These often involve larger spaces, tighter deadlines, and more complex logistical challenges. I have experience managing larger teams and coordinating materials and resources effectively for efficient project completion. I also have experience working within the constraints of building codes and regulations.
Working on both scales has honed my adaptability and problem-solving skills. I can seamlessly transition between managing the intricate details of a small home project and the large-scale logistics of a commercial build-out.
Q 27. What is your understanding of industry standards and building codes related to wallpaper installation?
Understanding industry standards and building codes is critical for ensuring safe and compliant installations. This includes knowledge of:
- Fire codes: Some wallpapers are rated for fire resistance, and I’m aware of the regulations related to their application in specific areas.
- Building codes related to surface preparation: Proper wall preparation is crucial for wallpaper adhesion, and building codes may dictate specific requirements.
- Health and safety regulations: I strictly adhere to all safety regulations, including the proper handling of chemicals and disposal of waste materials. The use of appropriate PPE is always a priority.
- Material specifications: I’m familiar with the different types of wallpaper available and their respective characteristics, ensuring that the chosen material is appropriate for the intended use and environment.
Keeping up-to-date with the latest standards and codes is ongoing; I regularly review relevant publications and training materials.
Q 28. How do you stay updated on the latest trends and techniques in wallpaper installation and removal?
Staying current with the latest trends and techniques in wallpaper installation and removal is crucial for providing top-tier service. I utilize several methods to maintain my expertise:
- Industry publications: I subscribe to trade magazines and online resources focused on interior design and wallpapering.
- Trade shows and workshops: I attend industry events to learn about new products, tools, and techniques. This includes attending training sessions on new materials and techniques.
- Networking with other professionals: Connecting with other wallpaper installers and designers allows for the exchange of best practices and insights.
- Online communities: Engaging in online forums and communities allows for access to a broad spectrum of experiences and knowledge.
Recently, I attended a workshop on using advanced adhesive techniques that improve the durability and longevity of wallpaper installations. Staying ahead of the curve benefits my clients and my business.
Key Topics to Learn for Wallpaper Hanging and Removal Interview
- Surface Preparation: Understanding different wall types (drywall, plaster, etc.), assessing surface condition (cracks, imperfections), and proper cleaning and priming techniques. Practical application includes knowing when to use specific primers and fillers.
- Wallpaper Selection and Measurement: Identifying appropriate wallpaper types for various applications (vinyl, non-woven, fabric), calculating accurate quantities needed, and understanding pattern matching. Practical application includes accurately measuring rooms and accounting for waste.
- Hanging Techniques: Mastering the use of paste, glue, and application tools. Understanding various hanging methods (single roll, double roll), and achieving seamless pattern alignment. Practical application includes demonstrating proficiency with different tools and techniques.
- Wallpaper Removal: Identifying different wallpaper types and employing appropriate removal methods (scoring, steaming, chemical removal). Understanding safe disposal practices and minimizing wall damage. Practical application includes knowing when to use different removal techniques based on wallpaper type and wall condition.
- Troubleshooting and Problem Solving: Identifying and resolving common issues such as air bubbles, wrinkles, seams, and uneven application. Practical application includes demonstrating ability to diagnose and rectify issues effectively and efficiently.
- Safety Procedures: Understanding and adhering to safety regulations regarding the use of tools, chemicals, and ladders. Practical application includes demonstrating awareness of safety protocols and the ability to work safely in various environments.
- Tools and Equipment: Familiarity with various tools used in wallpaper hanging and removal (brushes, rollers, seam rollers, steamers, scrapers). Practical application includes demonstrating competency in using a range of tools.
Next Steps
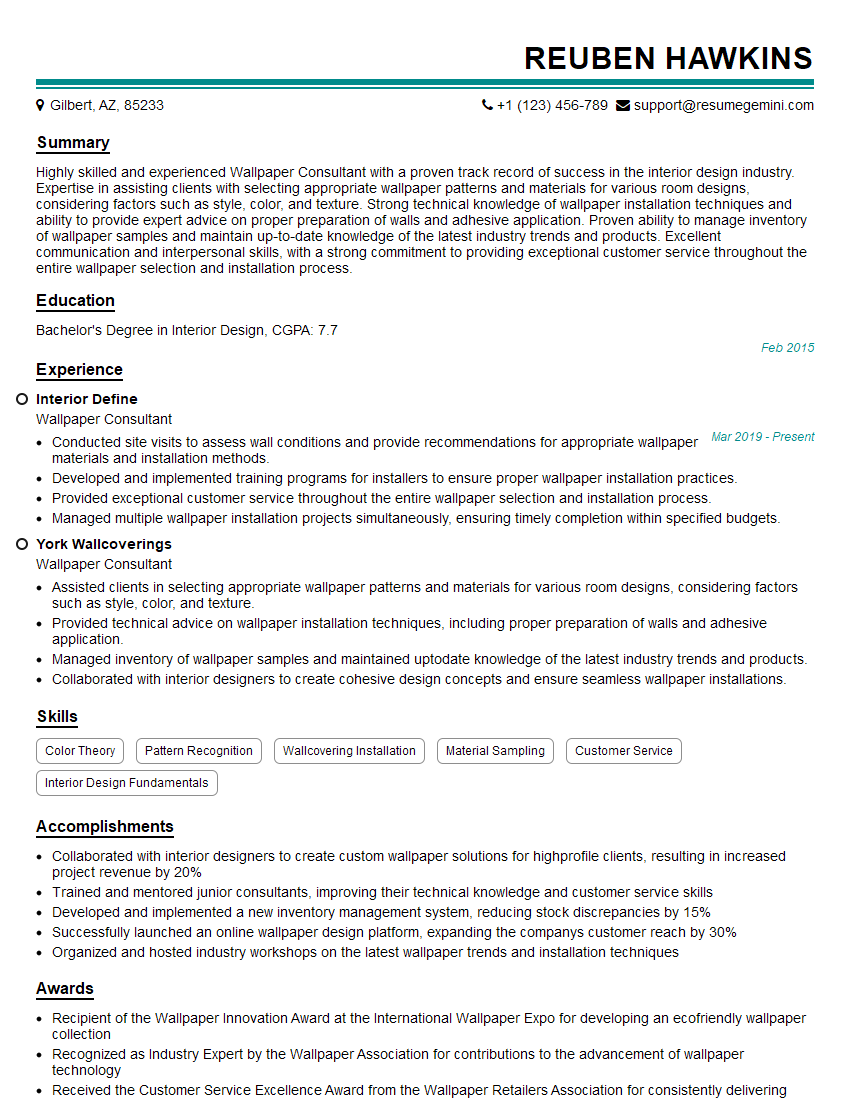
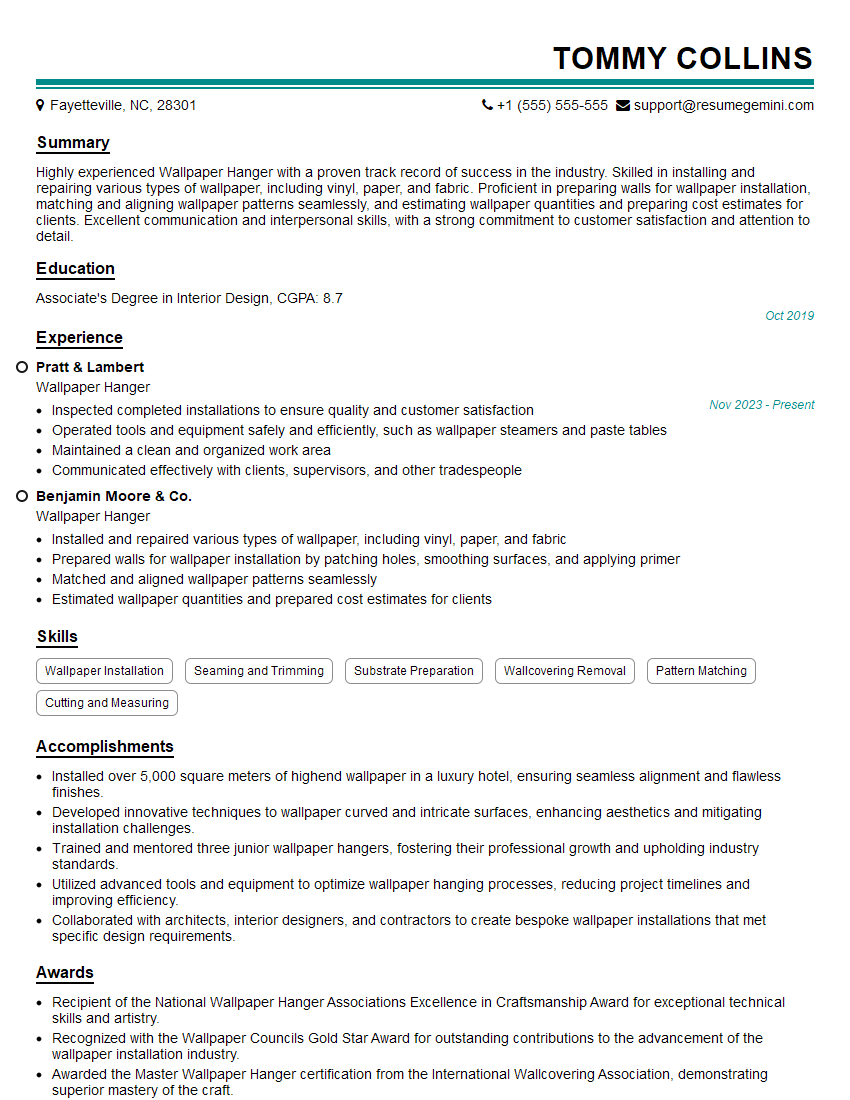
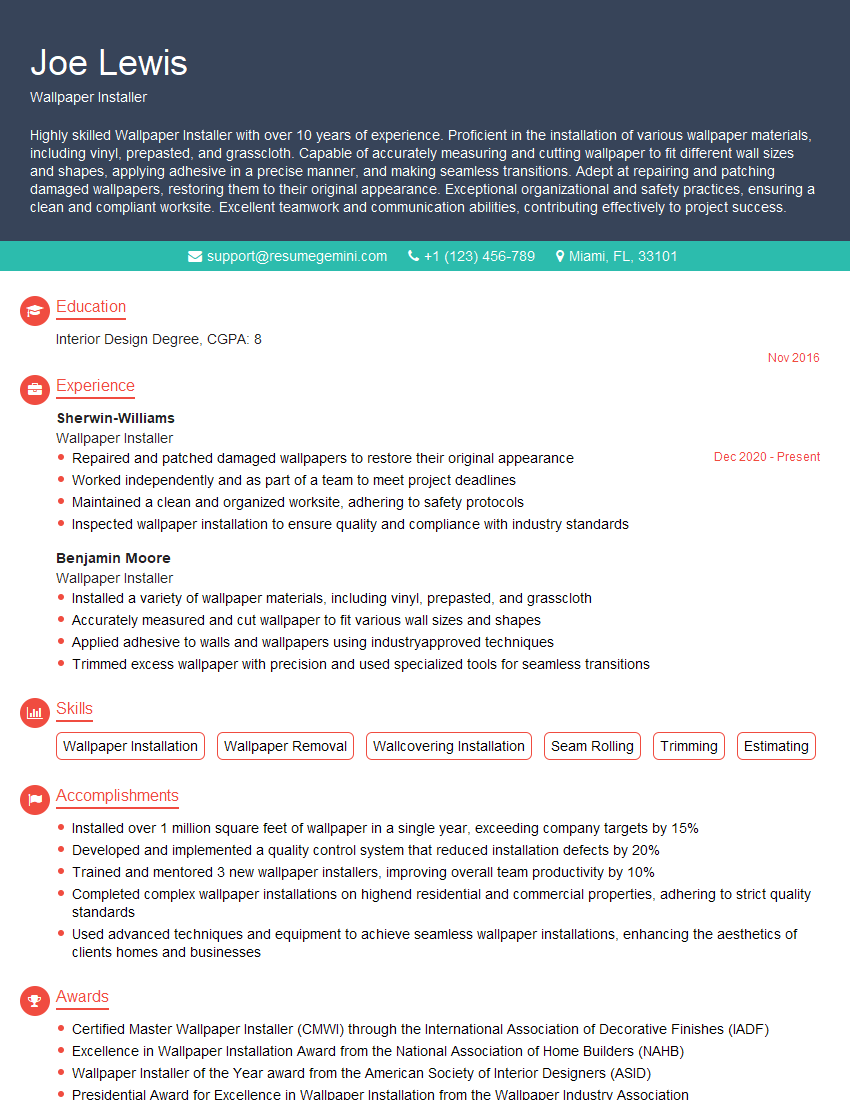
Mastering wallpaper hanging and removal opens doors to a rewarding career with diverse opportunities for growth, from residential projects to commercial contracts. Building a strong, ATS-friendly resume is crucial for showcasing your skills and experience to potential employers. ResumeGemini is a trusted resource to help you craft a professional and impactful resume that highlights your expertise. Examples of resumes tailored to the Wallpaper Hanging and Removal field are available to help you get started.
Explore more articles
Users Rating of Our Blogs
Share Your Experience
We value your feedback! Please rate our content and share your thoughts (optional).
What Readers Say About Our Blog
To the interviewgemini.com Webmaster.
Very helpful and content specific questions to help prepare me for my interview!
Thank you
To the interviewgemini.com Webmaster.
This was kind of a unique content I found around the specialized skills. Very helpful questions and good detailed answers.
Very Helpful blog, thank you Interviewgemini team.