The thought of an interview can be nerve-wracking, but the right preparation can make all the difference. Explore this comprehensive guide to Substrate Preparation for Wallpaper Application interview questions and gain the confidence you need to showcase your abilities and secure the role.
Questions Asked in Substrate Preparation for Wallpaper Application Interview
Q 1. What are the most common types of wall substrates encountered in wallpaper installation?
The most common wall substrates encountered in wallpaper installation are drywall (also known as plasterboard or gypsum board), plaster, and wood paneling. Each presents unique challenges and requires specific preparation techniques. Less common, but still encountered, are concrete, brick, and even metal surfaces. Understanding the characteristics of each is crucial for successful wallpaper application.
- Drywall: The most prevalent, offering a relatively smooth and even surface, but susceptible to damage and requiring careful priming.
- Plaster: A traditional material, often found in older buildings. It can be quite porous and may require more extensive preparation, including filling cracks and ensuring a stable base.
- Wood Paneling: Requires careful assessment for smoothness and stability. Any gaps or imperfections must be addressed before wallpapering.
- Other Substrates: Concrete, brick, and metal surfaces require specialized primers and often a more robust preparation process to ensure the wallpaper adheres properly.
Q 2. Describe the process for preparing a drywall surface for wallpaper application.
Preparing drywall for wallpaper is a multi-step process focused on creating a clean, smooth, and primed surface for optimal adhesion. Think of it as preparing a canvas for a painting – you wouldn’t paint on a rough, dirty canvas, would you?
- Clean the Surface: Thoroughly clean the drywall to remove dust, dirt, grease, or any loose particles. A damp sponge or cloth works well.
- Repair Imperfections: Fill any cracks, holes, or nail holes with a suitable drywall compound, ensuring it’s completely level with the surface once dry. Sand smooth to eliminate texture variations.
- Prime the Surface: Apply a high-quality primer designed for drywall. This seals the surface, improves adhesion, and provides a uniform base for the wallpaper. Two coats are generally recommended for best results, allowing each to dry completely.
Remember, thorough preparation is key. Rushing this stage often leads to wallpaper bubbling, peeling, or uneven application.
Q 3. How do you assess the suitability of a substrate for wallpapering?
Assessing substrate suitability involves a visual inspection and a tactile assessment. You’re looking for stability, cleanliness, and smoothness.
- Stability: The substrate must be firmly attached to the wall structure. Loose or crumbling plaster, for example, needs to be repaired or replaced before wallpapering.
- Cleanliness: Any dirt, grease, or old wallpaper residue will significantly impact adhesion. A clean surface is paramount.
- Smoothness: Significant texture variations will show through the wallpaper, resulting in an uneven finish. Minor imperfections can be addressed with filler, but extensive repairs might require resurfacing.
- Moisture: Check for dampness or signs of water damage. Wallpaper won’t adhere well to damp substrates and could lead to mold growth.
In short, if the surface is unstable, dirty, excessively textured, or damp, it’s unsuitable and will require remediation before wallpaper application.
Q 4. What are the different methods for repairing damaged drywall before wallpapering?
Repairing damaged drywall before wallpapering involves a systematic approach to restore the surface to a smooth, level condition.
- Small Holes and Cracks: These can be effectively repaired using spackling paste or lightweight drywall compound. Apply, let it dry completely, and sand smooth.
- Larger Holes: Larger holes require a more involved repair. Cut out the damaged section, install a drywall patch, and apply compound to create a smooth, even surface. Sand until flush with the surrounding drywall.
- Deep Cracks: Deep cracks might indicate structural issues. These often require more extensive repairs that may be beyond the scope of wallpaper installation, and professional help may be needed.
Always use appropriate tools for each repair—putty knives for filling, sanding blocks for smoothing, and fine-grit sandpaper for a flawless finish. Patience and attention to detail are key for achieving a professional result.
Q 5. Explain the importance of proper priming before wallpapering.
Proper priming is crucial for several reasons. It’s the foundation for a successful wallpaper installation, similar to how a well-prepared foundation is essential for a strong building.
- Improved Adhesion: Primer creates a uniform surface that enhances the bond between the wallpaper and the substrate.
- Sealing the Surface: Primer seals porous surfaces like plaster or drywall, preventing the wallpaper from absorbing moisture from the wall and leading to peeling or bubbling.
- Uniform Appearance: Primer provides a consistent base coat, ensuring even color and preventing the underlying wall texture from showing through the wallpaper.
- Stain Blocking: Primer effectively seals stains, preventing them from bleeding through the wallpaper.
Skipping this essential step is a common mistake that often leads to wallpaper installation problems.
Q 6. What types of primers are suitable for different substrate types?
The choice of primer depends largely on the substrate type and existing conditions.
- Drywall: A standard PVA (polyvinyl acetate) primer is generally suitable. Look for a primer that’s designed for interior walls and specifically states suitability for drywall.
- Plaster: A PVA primer often works, but a more penetrating primer might be necessary for very porous plaster to ensure adequate sealing.
- Wood Paneling: A shellac-based primer or a primer designed for wood surfaces is ideal to seal the wood and prevent tannins from bleeding through.
- Problem Areas: For stains or particularly porous surfaces, a stain-blocking primer is crucial. For surfaces with significant moisture issues, a specialized moisture-resistant primer is needed.
Always test a small area first to ensure compatibility and that the primer doesn’t react negatively with the wallpaper adhesive.
Q 7. How do you address wall imperfections such as cracks or holes before wallpapering?
Addressing wall imperfections before wallpapering requires careful repair and finishing. The approach depends on the severity of the imperfection.
- Small Cracks: These can be filled with spackling paste or a lightweight drywall compound. Apply thinly, let it dry completely, and sand smooth to create a seamless transition.
- Holes: Depending on size, small holes can be filled as above. Larger holes require patching with a piece of drywall, followed by filling and sanding to achieve a level surface.
- Large Cracks or Damage: Significant damage might indicate structural problems and require professional assessment and repair before wallpapering.
The key is to create a smooth, consistent surface. Any remaining imperfections will show through the wallpaper. Take your time, and remember that quality preparation significantly contributes to the final aesthetic appeal.
Q 8. Describe your experience with applying joint compound and sanding techniques for wall preparation.
Applying joint compound and sanding is crucial for achieving a smooth, even surface ideal for wallpaper. Think of it as creating a perfect canvas for your artwork. My experience involves years of working with various joint compounds, from lightweight all-purpose to heavier-duty options for larger repairs. I start by applying thin, even coats, allowing each to dry completely before sanding. This prevents cracking and ensures a seamless finish. My sanding technique involves using progressively finer grit sandpaper – starting with a coarser grit to remove larger imperfections and finishing with a very fine grit for a flawlessly smooth surface. I always use a sanding block to maintain a consistent pressure and avoid creating divots or scratches. For instance, on a wall with significant imperfections, I might use a 60-grit sandpaper initially, followed by 100-grit, 150-grit, and finally 220-grit for a polished finish. I pay close attention to the edges and corners, ensuring there are no lumps or ridges. Regular vacuuming during sanding is essential to remove dust and maintain a clean work environment.
Q 9. What is the proper way to clean a wall surface before wallpaper application?
Cleaning the wall is paramount; it removes dirt, grease, and other contaminants that can prevent the wallpaper adhesive from bonding properly. It’s like preparing a flowerpot for planting – you wouldn’t plant in dirty soil, would you? I begin by using a vacuum cleaner with a brush attachment to remove loose dust and debris. Then, I wash the walls with a solution of warm water and a mild detergent – a solution of TSP (trisodium phosphate) can be used for extra tough cleaning but always remember appropriate ventilation and protective gear. I use a soft sponge or cloth to gently scrub the surface, ensuring complete coverage. Finally, I rinse the walls thoroughly with clean water and allow them to dry completely before applying the wallpaper. I never use harsh chemicals as they can damage the wall surface. Any remaining grease or soap residue can interfere with the wallpaper adhesion, so a good rinsing is extremely important. The importance of drying is crucial to prevent mold or mildew issues behind the wallpaper.
Q 10. How do you handle different types of wall coverings such as vinyl, fabric, or grasscloth?
Different wall coverings require different approaches. Vinyl wallpapers are relatively easy to work with and often don’t demand extensive surface preparation beyond ensuring a smooth and clean surface. Fabric wallpapers, however, may require a more stable wall surface to prevent the fabric from showing imperfections. Grasscloth, with its natural texture, requires a perfectly smooth wall; otherwise, the imperfections will show through. The key is to choose the right adhesive for each material. For instance, a heavy-duty adhesive is needed for grasscloth to ensure proper adhesion and prevent tearing. Moreover, the type of wall covering dictates the level of detail in surface preparation. Minor imperfections can be easily overlooked with heavier, textured vinyl, while these same imperfections would be very noticeable with a thin fabric wallpaper.
Q 11. Explain your process for ensuring a smooth and level surface before wallpaper application.
Achieving a smooth and level surface is paramount. I use a combination of techniques. First, visual inspection; I identify any imperfections like cracks, holes, or unevenness. Small holes are filled with spackle, larger areas with joint compound. After the compound dries, sanding is crucial. Then comes priming, which seals the surface and provides a uniform base for the wallpaper, preventing uneven absorption of the adhesive and ensuring a consistent look. Before priming, it’s vital to spot prime any areas that have absorbed more water than others. After priming, a final inspection ensures a flawless substrate. I might use a straight edge or a level to check for any remaining unevenness. For instance, if I discover a slight bulge even after multiple sanding attempts, I might use a skim coat of joint compound for a more even surface.
Q 12. What tools and materials do you typically use for substrate preparation?
My typical toolkit includes a variety of essential items. This includes joint compound, spackle, various grits of sandpaper (from coarse to fine), sanding blocks, putty knives, a vacuum cleaner with a brush attachment, sponges, cloths, brushes for applying primer, primer itself, measuring tape, a level, and a straight edge. Selecting the right tools is key for success. For example, using a sanding sponge for final touches offers superior control in tight spaces or around corners. High-quality tools ensure precise application and a professional finish. Having all these tools readily available saves time and makes the work process far more efficient. The choice of sandpaper will also determine the quality of the finished surface.
Q 13. How do you deal with moisture problems on a wall before wallpapering?
Moisture problems are a significant concern. Ignoring them can lead to mold, mildew, and wallpaper failure. The first step is to identify and address the source of the moisture, whether it’s a leak, high humidity, or inadequate ventilation. Addressing the source is non-negotiable; otherwise, the problem will persist. Once the source is fixed, the affected area needs to be thoroughly dried. This often involves using dehumidifiers, fans, and even specialized drying equipment. Sometimes, it may require professional intervention from a mold remediation specialist. After the wall is completely dry, I’ll apply a specialized mold-resistant primer to prevent future issues. Failing to deal with moisture can result in costly repairs and potentially compromise the health of the occupants.
Q 14. Describe your method for preparing a textured wall surface for wallpaper installation.
Preparing a textured wall is more complex. The level of preparation depends on the depth and type of texture. For light textures, a thorough cleaning and priming might suffice. However, for heavily textured walls, more extensive steps may be required. These often include skim-coating with a thin layer of joint compound to smooth out the high points of the texture. This is followed by careful sanding to achieve a relatively smooth surface, still maintaining a hint of texture. The goal isn’t to make it perfectly smooth, as that would negate the original wall texture. Instead, it’s about creating a level surface for the wallpaper to adhere to without losing the original wall character. Once the surface is sufficiently smoothed and primed, the wallpaper can be applied. Using the correct adhesive is essential, often one specifically designed for textured walls.
Q 15. What are the signs of unsuitable substrates, and how would you address them?
Unsuitable substrates can lead to wallpaper failure. Think of it like trying to build a house on a shaky foundation – it won’t last! Signs include crumbling plaster, loose paint, greasy or dusty surfaces, excessive dampness, and significant surface imperfections like large cracks or holes. Addressing these issues is crucial. For crumbling plaster, you’d need to scrape away loose material and apply a suitable bonding agent. Loose paint requires thorough removal and a proper repaint before wallpapering. Grease or dust needs cleaning with a suitable degreaser or detergent. Dampness needs thorough investigation and remediation to prevent mold and wallpaper damage; this might involve fixing leaks and using a specialized anti-damp primer. Large cracks or holes need to be filled and sanded smooth. Essentially, your goal is to create a clean, stable, and dry surface.
- Example: On a recent job, I found significant grease stains on a kitchen wall. A simple sugar soap wash wasn’t enough; I used a specialized degreaser followed by a thorough rinse and drying before applying a primer and then the wallpaper.
- Example: I once encountered a wall with crumbling plaster. After carefully removing the loose material, I applied a PVA size (a type of bonding agent) to consolidate the remaining plaster before proceeding with wallpapering.
Career Expert Tips:
- Ace those interviews! Prepare effectively by reviewing the Top 50 Most Common Interview Questions on ResumeGemini.
- Navigate your job search with confidence! Explore a wide range of Career Tips on ResumeGemini. Learn about common challenges and recommendations to overcome them.
- Craft the perfect resume! Master the Art of Resume Writing with ResumeGemini’s guide. Showcase your unique qualifications and achievements effectively.
- Don’t miss out on holiday savings! Build your dream resume with ResumeGemini’s ATS optimized templates.
Q 16. How do you ensure the adhesion of wallpaper to different substrates?
Ensuring wallpaper adhesion depends on proper substrate preparation and choosing the right adhesive. The type of substrate greatly influences the adhesive choice. For example, smooth, painted surfaces usually require a standard paste, while porous surfaces like plasterboard may need a heavier-duty adhesive. Always follow the manufacturer’s instructions for both the adhesive and wallpaper. A key factor is to apply the adhesive evenly to both the wall (for some papers) and the back of the wallpaper to ensure complete contact and strong bonding across the entire surface.
- Tip: Using a paste brush or roller ensures even application.
- Tip: Pre-paste the wallpaper for better control and to avoid air bubbles.
Priming the wall is also very important to improve the adhesion of the adhesive and the wall. A high-quality primer will provide an even, absorbent surface, which prevents blotchy wallpaper application and helps to avoid bubbles or peeling.
Q 17. What are the implications of inadequate substrate preparation?
Inadequate substrate preparation is a recipe for disaster. The most common consequences are: wallpaper peeling, bubbling, cracking, and overall poor aesthetics. Imagine trying to stick a sticker to a dirty, uneven surface—it’s simply not going to work properly! Inadequate preparation leads to wasted materials, time, and money. It can also cause frustration for both the installer and the client, potentially leading to significant rework and additional expenses.
- Example: A failure to remove loose paint can lead to the wallpaper peeling along with the loose paint, making the whole process unusable.
- Example: Ignoring dampness can result in the growth of mold behind the wallpaper, leading to significant health problems.
Q 18. Explain the importance of understanding the type of adhesive to use with different substrates.
Understanding the correct adhesive is paramount. Different substrates require different adhesives for optimal adhesion. For example, a porous substrate like plasterboard absorbs moisture more readily, requiring an adhesive that can penetrate and bind effectively. A smooth, non-porous surface like painted drywall might need a different type of adhesive that creates a strong bond without excessive absorption. Using the wrong adhesive will compromise the integrity of the wallpaper and lead to peeling or bubbling, and possibly mold issues if the wrong type of adhesive is used in high humidity conditions. Always consult the wallpaper and adhesive manufacturer’s instructions.
- Example: Using a heavy-duty adhesive on a thin, delicate wallpaper can cause the paper to tear or become damaged.
Q 19. How do you prepare a wall for wallpaper installation in a high-humidity environment?
High-humidity environments pose unique challenges. The key is to ensure the wall is completely dry before wallpapering. This often involves using a specialized anti-damp primer designed for high-humidity areas. These primers prevent mold growth and provide a moisture barrier that helps prevent wallpaper failure. Good ventilation is also crucial. Address any underlying moisture problems (e.g., leaks) before you even start preparing the substrate. Properly addressing moisture problems is critical; ignoring it can lead to a situation where the wallpaper is permanently compromised.
- Tip: Employ fans and dehumidifiers to reduce moisture in the air during the preparation and application process.
Q 20. How do you deal with uneven walls or surfaces?
Uneven walls require careful attention. Minor imperfections can be addressed with a good quality wallpaper paste and careful application, but significant unevenness needs to be rectified. For minor imperfections, you could use a smoothing compound to create a level surface before priming. For more significant problems, it’s best to use a skim coat of plaster, allowing it to dry thoroughly and sand it smooth before priming and wallpapering. Never attempt to wallpaper over extremely uneven surfaces; it will result in a poor-quality finish. Consider the extent of the unevenness: minor unevenness can sometimes be addressed by careful layering and seam matching, but severe unevenness requires more preparation.
Q 21. Describe your experience working with different types of primers and their application methods.
I’ve worked extensively with various primers. PVA size, for example, is excellent for consolidating loose plaster. It acts as a bonding agent, improving adhesion. Oil-based primers offer a good moisture barrier but require longer drying times. This is often less preferable in time-sensitive jobs. I favor water-based primers for their ease of application, faster drying times, and compatibility with most wallpapers. However, water-based primers can cause some wallpapers to absorb moisture unevenly, so always test a small patch first to check compatibility. The application method depends on the primer; PVA size is often applied with a brush, whereas water-based primers can be applied with a roller for larger surfaces. Always follow the manufacturer’s instructions for proper application, including drying time.
- Tip: Always test any primer or adhesive in an inconspicuous area before full application to check for compatibility and potential reactions.
Q 22. What safety precautions do you take during substrate preparation?
Safety is paramount in substrate preparation. Think of it like preparing a delicate canvas for a masterpiece – you wouldn’t want to damage it before you even start painting! My safety precautions always begin with proper personal protective equipment (PPE). This includes safety glasses to protect my eyes from dust and debris, a dust mask to prevent inhaling harmful particles, and gloves to protect my hands from irritants and chemicals. I also ensure the work area is well-ventilated to minimize exposure to fumes from primers and sealers. Before starting any demolition or repair work, I always disconnect the power to the area to prevent electrical shock. Finally, I carefully dispose of all waste materials according to local regulations, ensuring environmentally responsible practices.
- Eye Protection: Safety glasses are mandatory to prevent dust and debris from entering the eyes.
- Respiratory Protection: A dust mask or respirator is essential to avoid inhaling harmful particles.
- Hand Protection: Gloves protect against chemicals and irritants present in primers, sealers, and cleaning solutions.
- Proper Ventilation: Open windows and use fans to ensure adequate ventilation.
Q 23. How do you ensure the proper drying time for primers and sealers?
Proper drying time is crucial for a successful wallpaper installation. Think of it like baking a cake – you wouldn’t take it out of the oven too early! I always refer to the manufacturer’s instructions on the primer or sealer for the recommended drying time. This information is usually clearly stated on the product label, and it can vary depending on factors like temperature, humidity, and the thickness of the applied coat. I generally allow for slightly longer drying times, especially in humid conditions. To check for dryness, I gently touch the surface. If it’s tacky or leaves a residue on my finger, it needs more time. I never rush the drying process, as insufficient drying can lead to peeling, bubbling, or poor adhesion of the wallpaper.
For example, if a primer recommends a 4-hour drying time, I often allow 6-8 hours, particularly if the room is damp. This ensures the substrate is fully prepared for the next step.
Q 24. What are the key differences in substrate preparation for different wallpaper types?
Substrate preparation varies greatly depending on the type of wallpaper being used. Heavy, textured wallpapers like grasscloth require a very smooth, stable surface, while lightweight papers may tolerate minor imperfections. For example, heavy vinyl wallpapers often hide minor imperfections and require less intensive preparation than delicate papers like silk or linen.
- Heavy Vinyl: These wallpapers can often hide minor surface imperfections. Preparation might involve cleaning and filling only significant holes or cracks.
- Lightweight Papers: Delicate wallpapers require a meticulously smooth surface. This often means filling all imperfections and sanding to a smooth finish.
- Fabric-backed Wallpapers: These wallpapers require a stable and even substrate to avoid showing through the fabric. Priming is often essential to provide a uniform surface.
Understanding the wallpaper’s requirements is key to achieving a professional finish. I always check the manufacturer’s recommendations before starting the preparation process.
Q 25. How do you handle challenging substrates like plaster or concrete?
Plaster and concrete can be challenging substrates, often requiring extra attention. Think of it as building a strong foundation for your house – you wouldn’t use substandard materials! With plaster, I focus on identifying and repairing any cracks or holes using appropriate patching compounds. These compounds should be allowed to dry completely before sanding smooth. I then prime the surface with a suitable primer designed for plaster, ensuring good adhesion. Concrete substrates are similarly treated. I might need to use a specialized bonding primer to create a good surface for wallpaper adhesion. This is because concrete can be porous and may absorb too much moisture, affecting the adhesion of the wallpaper. Thorough cleaning is also essential for both substrates to remove dust, dirt, and any loose particles. I always test a small, inconspicuous area with the chosen primer to ensure compatibility.
Q 26. Describe your experience with repairing damaged plaster walls.
Repairing damaged plaster walls is a regular part of my work. I approach it systematically. First, I assess the damage, determining the extent and type of repair needed. Minor cracks can usually be filled with a patching compound. Larger holes or damaged sections may require more extensive repair, potentially including removing loose plaster and rebuilding the area with a fresh coat. After filling, I allow the patching compound ample time to cure and dry, before carefully sanding the repaired area smooth and flush with the surrounding wall. I always use appropriate tools for each step, preventing further damage. Finally, I prime the entire repaired area to ensure consistent absorption and paint adhesion. For significant damage, I might even consult a structural engineer to ensure the wall’s stability.
For example, I recently repaired a large hole in a plaster wall caused by a plumbing leak. I carefully removed all loose plaster, treated the area with a fungicide to prevent mold growth, and rebuilt the section using a plaster patching compound. Once dry, I sanded it smooth and primed it before wallpapering.
Q 27. How do you identify and resolve potential issues with existing wallpaper before installation?
Identifying and resolving issues with existing wallpaper is crucial before installing new wallpaper. Think of it like cleaning a dirty canvas before painting – you’d want the final result to be flawless! I carefully inspect the existing wallpaper, looking for signs of damage, such as peeling, bubbling, or discoloration. I check for loose seams and any areas where the wallpaper is separating from the wall. If the existing wallpaper is heavily textured, damaged or poorly adhered, it must be removed completely. If minor imperfections can be left, I may use a suitable wallpaper liner to provide a smoother surface. Sometimes I employ a specialized wallpaper stripper to loosen the adhesive, making removal easier. It is important to protect the underlying substrate, cleaning it thoroughly to remove any residual adhesive before installing the new wallpaper.
Q 28. How do you maintain consistent quality control throughout the substrate preparation process?
Maintaining consistent quality control is essential. It’s like following a recipe precisely to get the desired results. My process involves several key steps: First, I meticulously prepare the substrate according to the wallpaper type and manufacturer’s recommendations. I use a checklist to ensure each step is completed correctly. After each stage, I carefully inspect my work, checking for any imperfections. I use high-quality materials and tools to ensure durability and long-lasting results. Regularly checking my tools ensures they’re functioning optimally, such as checking the sharpness of my putty knife or the evenness of my roller. I even maintain records of the products and procedures used for each job which acts as a valuable reference and helps to consistently deliver high-quality results. If any issues arise, I document them, analyze the cause, and implement corrective measures to avoid repeating the problem.
Key Topics to Learn for Substrate Preparation for Wallpaper Application Interview
- Surface Evaluation: Understanding different substrate types (plaster, drywall, wood paneling, etc.), identifying surface imperfections (cracks, holes, unevenness), and assessing their suitability for wallpaper application. Practical application includes knowing which tools to use for surface inspection and appropriate testing methods.
- Surface Repair and Preparation: Mastering techniques for filling holes and cracks using appropriate fillers and compounds, sanding techniques for achieving a smooth surface, and priming techniques for different substrate types to ensure proper adhesion. This includes understanding the drying times and potential issues with improper preparation.
- Primer Selection and Application: Choosing the right primer based on substrate type and wallpaper material, understanding the purpose of different primers (sealing, blocking stains, enhancing adhesion), and applying primers using appropriate methods to achieve even coverage and avoid issues like bubbling or streaking.
- Understanding Wallpaper Types and their Substrate Requirements: Recognizing how different wallpaper types (e.g., vinyl, non-woven, grasscloth) impact substrate preparation needs. This involves knowing which substrates are suitable for specific wallpaper types and potential challenges associated with each combination.
- Troubleshooting Common Substrate Issues: Identifying and resolving problems like loose paint, water damage, mold, and other surface defects that can compromise wallpaper adhesion and longevity. This involves problem-solving skills and applying relevant repair and preparation techniques.
- Health and Safety: Understanding and adhering to relevant health and safety regulations when working with primers, fillers, and other materials used in substrate preparation. This includes proper ventilation, personal protective equipment (PPE) usage, and waste disposal.
Next Steps
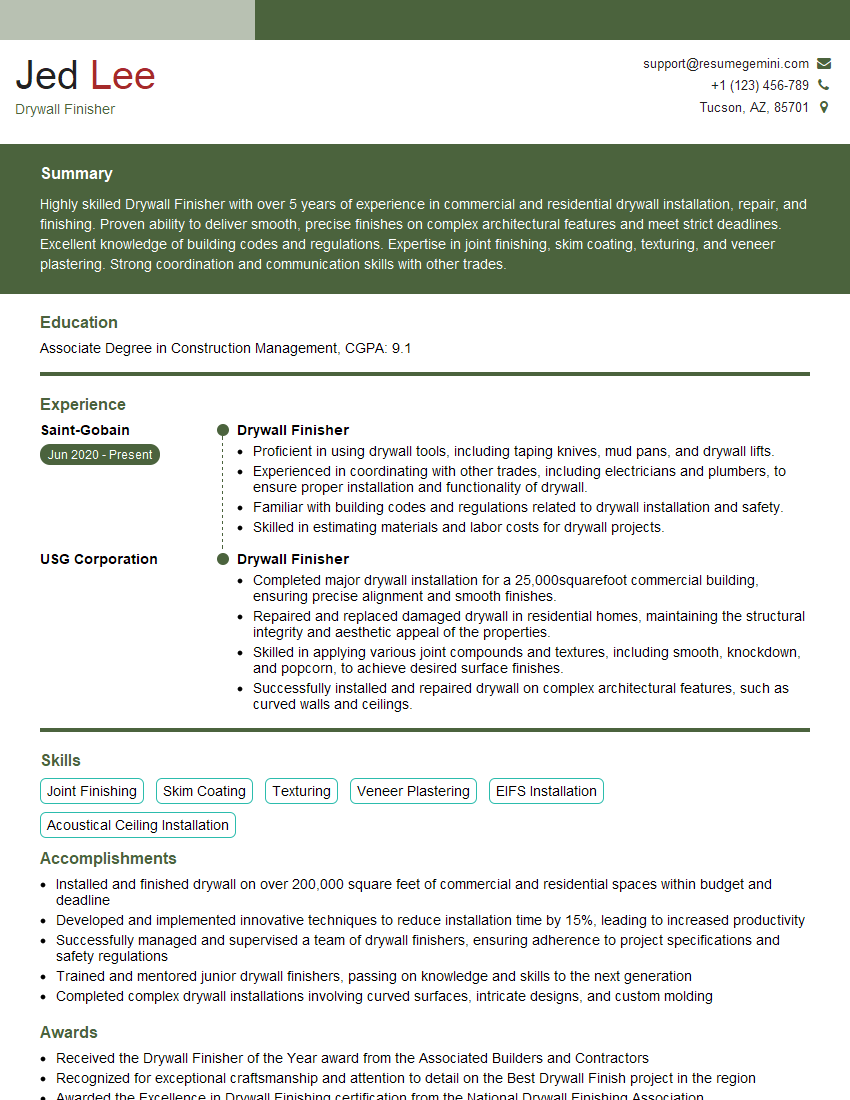
Mastering substrate preparation is crucial for a successful career in wallpaper installation. A strong understanding of these techniques demonstrates professionalism, attention to detail, and the ability to deliver high-quality workmanship. To enhance your job prospects, create an ATS-friendly resume that highlights your skills and experience effectively. ResumeGemini is a trusted resource that can help you build a professional resume tailored to your specific needs. Examples of resumes tailored to Substrate Preparation for Wallpaper Application are available, showcasing how to present your skills in the best possible light. Take the next step towards your dream job today!
Explore more articles
Users Rating of Our Blogs
Share Your Experience
We value your feedback! Please rate our content and share your thoughts (optional).
What Readers Say About Our Blog
To the interviewgemini.com Webmaster.
Very helpful and content specific questions to help prepare me for my interview!
Thank you
To the interviewgemini.com Webmaster.
This was kind of a unique content I found around the specialized skills. Very helpful questions and good detailed answers.
Very Helpful blog, thank you Interviewgemini team.