Cracking a skill-specific interview, like one for Pipefitting Tools and Equipment, requires understanding the nuances of the role. In this blog, we present the questions you’re most likely to encounter, along with insights into how to answer them effectively. Let’s ensure you’re ready to make a strong impression.
Questions Asked in Pipefitting Tools and Equipment Interview
Q 1. What safety precautions must be followed when using a pipe threading machine?
Operating a pipe threading machine requires stringent safety measures. Think of it like handling any powerful machinery – a lack of caution can lead to serious injury. Always begin by ensuring the machine is properly grounded and connected to a stable power source. Never operate the machine if you’re fatigued or under the influence of drugs or alcohol.
- Eye Protection: Wear safety glasses or a face shield to protect against flying metal chips and debris. This is absolutely critical.
- Hearing Protection: Pipe threading machines are loud. Ear plugs or muffs are essential to prevent hearing damage.
- Gloves: Wear heavy-duty work gloves to protect your hands from cuts and abrasions.
- Proper Clothing: Avoid loose clothing or jewelry that could get caught in the machine. Wear close-fitting clothing that is sturdy.
- Secure Workpiece: Ensure the pipe is firmly secured in the machine’s vise to prevent it from moving during operation. A slip could be catastrophic.
- Emergency Stop: Familiarize yourself with the location and operation of the emergency stop button before you begin. Know how to use it quickly and efficiently.
- Regular Maintenance: Regularly inspect the machine for any signs of wear or damage. A well-maintained machine is a safer machine.
Remember, safety is not just a procedure; it’s a mindset. Always prioritize safety over speed. A rushed job is a dangerous job.
Q 2. Explain the difference between a die stock and a pipe die.
While both die stocks and pipe dies are used for threading pipes, they differ significantly in their design and application. Imagine a die stock as a toolbox containing several dies, each for a different pipe size, while a pipe die is a single, self-contained threading tool.
- Die Stock: This is a handheld tool consisting of a handle and a set of interchangeable dies. Each die is sized to thread a specific pipe diameter. It’s a versatile tool suitable for various pipe sizes but requires changing dies for different pipe sizes.
- Pipe Die: This is a single, self-contained die with a handle integrated into its design. It’s designed for a specific pipe size and doesn’t require changing dies. It’s simpler to use but less versatile than a die stock.
In essence, a die stock is more adaptable for multiple jobs on different pipe sizes; a pipe die is easier to use for a single, specific size.
Q 3. Describe the proper procedure for using a pipe cutter.
Using a pipe cutter safely and effectively involves a series of precise steps. Think of it like a controlled slicing, avoiding sudden movements that could cause injury or damage.
- Secure the Pipe: Firmly clamp the pipe in a vise or other secure holding device.
- Position the Cutter: Place the pipe cutter around the pipe at the desired cutting point. Ensure all wheels are evenly touching the pipe.
- Rotate the Cutter: Slowly rotate the cutter in a clockwise direction, applying even pressure. Avoid excessive force that could damage the tool or the pipe.
- Tighten the Cutter: Periodically tighten the cutter’s handle to maintain consistent pressure on the pipe. This ensures a clean cut.
- Complete the Cut: Continue rotating the cutter until the pipe is completely severed.
- Remove the Cutter: Once the pipe is cut, carefully remove the cutter and inspect the cut end for any burrs or imperfections.
- Deburr (if necessary): Use a file or deburring tool to remove any sharp edges from the cut end to prevent injuries.
Remember to always wear safety glasses to protect your eyes from flying debris.
Q 4. How do you select the correct size of pipe wrench for a given pipe diameter?
Selecting the right pipe wrench size is crucial for efficient and safe work. Too small, and you risk damaging the pipe or the wrench; too large, and you might overtighten the connection. A simple rule of thumb is to choose a wrench whose jaw opening is slightly larger than the pipe diameter.
For example, if you’re working with a 1-inch diameter pipe, you might opt for a 1 1/4-inch or 1 1/2-inch pipe wrench. This provides adequate grip without excessive force. Always consider the material of the pipe; softer materials might require a smaller, gentler wrench to avoid crushing.
Think of it like choosing the right-sized tool for a particular screw – too small, and it slips; too big, and it strips the head. The same principle applies here, but with potentially much higher stakes.
Q 5. What are the different types of pipe fittings and their applications?
Pipe fittings are essential components in piping systems, connecting pipes of various sizes and configurations. They come in various types, each serving a specific purpose. Think of them as the connectors in a complex network of pipes.
- Elbows: Used to change the direction of a pipe.
- Tees: Used to connect three pipes, allowing for branching.
- Couplings: Used to join two pipes of the same diameter.
- Unions: Allow for the disconnection of pipes without cutting or disturbing the entire system. Imagine a quick-disconnect for your plumbing system.
- Reducers: Used to connect pipes of different diameters.
- Caps: Used to close the end of a pipe.
- Flanges: Used to create robust connections, especially in high-pressure systems. They are boltable components used to secure pipes.
The application of each fitting depends on the specific requirements of the piping system. For instance, elbows are used for directional changes, tees are used for branching off to different points, and unions are helpful during repairs or maintenance.
Q 6. Explain the purpose of a pipe vise.
A pipe vise is a crucial tool for securely holding pipes during cutting, threading, or other operations. It’s essentially a clamp, but one specifically designed to safely and firmly grip pipes of various diameters.
Think of it as a sturdy, adjustable clamp that keeps the pipe absolutely still while you work on it. This prevents the pipe from moving, rotating, or slipping, reducing risks of injury and ensuring a clean, accurate result. It’s essential for any pipefitting task where stability is paramount.
Q 7. How do you identify different types of pipe materials (e.g., PVC, steel, copper)?
Identifying pipe materials is critical for selecting the correct tools and fittings. Each material has unique properties influencing its use.
- Steel: Usually dark gray or black, heavy, and magnetic. Often has markings indicating the pipe’s grade and dimensions.
- Copper: Reddish-brown, relatively soft, and highly conductive. It often has a slightly shiny appearance.
- PVC (Polyvinyl Chloride): Light, rigid, and typically white or a light gray. It’s non-magnetic and relatively brittle compared to metal pipes.
- CPVC (Chlorinated Polyvinyl Chloride): Similar to PVC but can withstand higher temperatures.
- ABS (Acrylonitrile Butadiene Styrene): Black or dark gray, strong, and resistant to chemicals.
Sometimes, pipes are coated or painted, obscuring the base material. If unsure, always consult a reference guide or utilize a magnet – steel pipes will be magnetic, while others will not.
Q 8. What are the common causes of pipe leaks and how are they repaired?
Pipe leaks are a common problem, often stemming from several root causes. Think of a pipe like a straw – if it’s damaged or improperly sealed, the liquid inside will find a way out. Common causes include corrosion (think rust eating away at the metal), improper installation (like a loose fitting), mechanical damage (a bump or impact), and even thermal expansion and contraction (the pipe expanding and contracting due to temperature changes leading to stress cracks).
Repairing a leak depends heavily on its cause and location. Small leaks in minor fittings might be fixable with pipe sealant or PTFE tape. Larger leaks, especially in high-pressure systems, require more significant interventions. This could involve replacing the damaged section of pipe, welding it shut (if feasible), or using specialized clamps designed to seal leaks. For example, a corroded section of cast iron pipe in an older building might require cutting out the rusted section and replacing it with a new, appropriately sized pipe using compression fittings or threaded connections.
Remember, always isolate the section of pipe before attempting any repair to prevent further damage or injury from unexpected pressure release. Safety first!
Q 9. Describe the process of installing a flange.
Installing a flange is a crucial step in many pipe systems, especially where frequent dismantling or inspection is required. Think of a flange as a large, circular collar that connects two sections of pipe. The process involves several steps:
- Preparation: Ensure the pipe ends are clean, square, and free from burrs or imperfections. This is crucial for a good seal.
- Gasket Selection: Select the appropriate gasket material for the pipe’s contents and pressure. For example, a high-temperature application may require a specific gasket material.
- Flange Alignment: Carefully align the flanges on each pipe section, ensuring they’re parallel and concentric. Misalignment can lead to leaks and damage.
- Bolt Tightening: Gradually tighten the bolts in a star pattern (opposite bolts tightened in succession) to ensure even pressure distribution. Over-tightening can damage the flange and gasket.
- Torque Check: Use a torque wrench to ensure that each bolt is tightened to the manufacturer’s specified torque. This prevents both leaks and damage to the equipment.
- Leak Check: After installation, always test for leaks. Pressurize the system with water or air and check for any signs of leakage.
Improper flange installation can result in leaks, and even catastrophic failures in high-pressure systems. Taking your time and following these steps carefully is essential.
Q 10. Explain how to properly use a flaring tool.
A flaring tool is used to create a precisely formed flare at the end of a pipe, typically for creating a leak-proof connection with a compression fitting. Imagine it as carefully shaping the end of a straw so it fits snugly into a specialized connector. Proper use is crucial for a reliable seal:
- Pipe Preparation: Ensure the pipe end is clean, square, and deburred. Any imperfections can interfere with the flaring process.
- Tool Selection: Choose the correct flaring tool for the pipe size and material. The tool’s dies must match the pipe’s diameter precisely.
- Pipe Insertion: Insert the pipe end into the flaring tool, making sure it’s fully seated and aligned correctly.
- Flaring Process: Carefully operate the flaring tool, following the manufacturer’s instructions. Excessive force can lead to pipe damage or deformation. The process typically involves applying even, steady pressure. The flare should be smooth, symmetrical, and free from cracks.
- Inspection: After flaring, carefully inspect the flare for any signs of damage or imperfections. An uneven or damaged flare may lead to leaks.
A poorly executed flare can lead to leaks or the inability to form a reliable connection. Always practice caution and follow the manufacturer’s guidelines for your specific flaring tool.
Q 11. What are the safety considerations when working with high-pressure piping systems?
Working with high-pressure piping systems demands extreme caution. The potential for serious injury or even death from unexpected ruptures or releases of pressurized fluids (water, steam, chemicals etc) is very real. Key safety considerations include:
- Pressure Testing: Always pressure test the system before putting it into service to identify any leaks or weaknesses.
- Personal Protective Equipment (PPE): Wear appropriate PPE, including safety glasses, gloves, and hearing protection. For very high pressures, consider specialized protective gear.
- Lockout/Tagout Procedures: Implement lockout/tagout procedures to prevent accidental energization or pressure releases during maintenance or repair.
- Emergency Response Plan: Have a clear emergency response plan in place, including procedures for handling leaks, ruptures, or other emergencies. Ensure everyone involved knows the plan.
- Proper Training: All personnel working on high-pressure systems must receive adequate training in safe operating procedures.
- Regular Inspection: Regular inspections should be conducted to detect potential problems early on.
High-pressure systems are not to be trifled with. Diligence, training and rigorous adherence to safety protocols are paramount.
Q 12. How do you ensure proper pipe alignment during installation?
Proper pipe alignment is critical for avoiding stress, leaks, and premature failure. Imagine trying to connect two misaligned straws – it wouldn’t work! Methods for ensuring alignment include:
- Laser Alignment Tools: Laser alignment tools provide a precise way to verify that pipes are properly aligned before joining them.
- Alignment Guides: Various alignment guides and jigs can be used to support and align pipes during installation.
- Visual Inspection: Combining visual inspection with precision tools helps ensure accuracy.
- Pipe Supports and Hangers: Properly installed supports and hangers provide stable support for the pipe and help maintain alignment.
Remember, even slight misalignments can cause problems down the road. Investing time in proper alignment is always worthwhile.
Q 13. What are the different types of pipe hangers and supports?
Pipe hangers and supports are crucial for preventing stress and strain on pipes, ensuring proper alignment, and supporting the weight of the pipe and its contents. Several types exist, each designed for specific applications and pipe sizes:
- Rigid Hangers: Provide fixed support for the pipe.
- Variable Spring Hangers: Allow for thermal expansion and contraction without putting undue stress on the pipe.
- Trapeze Hangers: Offer multi-directional support, ideal for complex piping arrangements.
- Constant Support Hangers: Maintain a consistent level of support regardless of pipe movement due to thermal expansion or other causes.
- Clamps: Secure the pipe to a supporting structure.
- Sleeves: Provide support and protection around a pipe.
The selection of the appropriate hanger or support depends heavily on the pipe size, material, contents, operating temperature, and the overall system design.
Q 14. Describe the process of bending pipe using a bender.
Pipe bending is often necessary to create curves and navigate obstacles in a piping system. A pipe bender is a specialized tool used to create smooth, consistent bends without kinking or damaging the pipe. The process typically involves:
- Preparation: Ensure the pipe is clean and free from any obstructions.
- Tool Selection: Choose the appropriate pipe bender for the pipe’s diameter and material. Ensure that the bender is in good condition and that its dies are appropriate for the pipe type.
- Marking the Bend: Accurately mark the location and angle of the bend.
- Bending Process: Insert the pipe into the bender and slowly and steadily apply pressure to create the bend. Avoid using excessive force, as it may kink or damage the pipe.
- Inspection: Inspect the bend for any signs of kinking, damage, or flattening. A properly formed bend should be smooth and consistent.
Improper bending technique can weaken the pipe, creating potential points of failure. Always follow the manufacturer’s instructions for your specific bender.
Q 15. What are the advantages and disadvantages of different pipe joining methods (e.g., welding, threading, gluing)?
Choosing the right pipe joining method is crucial for a project’s success. Each method offers unique advantages and disadvantages, impacting factors like cost, strength, and ease of installation.
- Welding:
- Advantages: Creates a strong, permanent, and leak-proof joint; suitable for high-pressure applications; aesthetically pleasing in some cases.
- Disadvantages: Requires specialized equipment and skilled welders; can be time-consuming; poses safety risks due to heat and sparks; may require specialized preparation of the pipe ends; not easily reversible.
- Threading:
- Advantages: Relatively simple and fast; requires less specialized equipment; easily disassembled and reusable; cost-effective for smaller diameter pipes.
- Disadvantages: Weaker joint compared to welding; susceptible to leaks if not properly sealed; thread damage can weaken the joint; not suitable for high-pressure or high-temperature applications.
- Gluing (Solvent Welding):
- Advantages: Quick and easy; requires less specialized equipment; cost-effective for certain plastic pipes; creates a strong bond for many applications.
- Disadvantages: Limited to specific types of plastic pipes; requires precise cleaning and alignment; bond strength is highly dependent on proper preparation and adhesive choice; joint is not easily reversible; may be affected by extreme temperatures.
For example, in a high-pressure gas pipeline, welding would be preferred for its strength and leak-proof nature. However, for a low-pressure water system using PVC pipe, gluing would be a more efficient and cost-effective solution.
Career Expert Tips:
- Ace those interviews! Prepare effectively by reviewing the Top 50 Most Common Interview Questions on ResumeGemini.
- Navigate your job search with confidence! Explore a wide range of Career Tips on ResumeGemini. Learn about common challenges and recommendations to overcome them.
- Craft the perfect resume! Master the Art of Resume Writing with ResumeGemini’s guide. Showcase your unique qualifications and achievements effectively.
- Don’t miss out on holiday savings! Build your dream resume with ResumeGemini’s ATS optimized templates.
Q 16. How do you interpret pipe drawings and specifications?
Interpreting pipe drawings and specifications is fundamental to successful pipefitting. These documents provide crucial information about pipe size, material, layout, and connections. They use standardized symbols and notations.
I begin by thoroughly reviewing the title block for project details and revision history. Then, I carefully examine the isometric or orthographic drawings, identifying pipe sizes (indicated by nominal diameter and schedule), materials (e.g., steel, PVC, copper), fittings (e.g., elbows, tees, valves), and their locations. Specifications detail material requirements, pressure ratings, welding procedures, and quality control standards. I use these details to create a comprehensive understanding of the system’s design and requirements. Any ambiguities or inconsistencies are flagged for clarification with the engineering team.
For example, a symbol like ‘NPS 6 SCH 40 CS PIPE’ indicates a nominal pipe size of 6 inches, schedule 40, made of carbon steel. I need to understand what this means to choose the correct material and ensure that the wall thickness and pressure rating are appropriate for the application.
Q 17. Explain the importance of torque wrenches in pipefitting.
Torque wrenches are indispensable in pipefitting, especially when dealing with threaded connections. They ensure that joints are tightened to the manufacturer’s specified torque, preventing leaks and damage.
Over-tightening can strip threads or damage fittings, leading to leaks or system failure. Under-tightening can result in loose connections and potential leaks. A torque wrench precisely controls the tightening force, minimizing these risks. The correct torque value is critical and must be determined by consulting the manufacturer’s specifications for the specific fittings and pipe materials used. Different wrench types are available, including click-type, dial-type, and digital torque wrenches, each with its own advantages and accuracy.
Imagine connecting a valve to a pipe using threaded fittings. Using a torque wrench, I can ensure the connection is secure and leak-free without risk of damage. Failing to use a torque wrench could lead to a failed connection which is very costly to correct.
Q 18. What are the different types of pipe insulation and their applications?
Pipe insulation is vital for energy efficiency, preventing condensation, and protecting personnel from hot or cold pipes. Several types are available, each with specific applications:
- Fiberglass: Common, cost-effective, good thermal insulation; comes in various densities and thicknesses; can be easily cut and installed; however, it can be brittle and requires careful handling.
- Calcium Silicate: High-temperature insulation suitable for industrial applications and steam lines; excellent thermal performance; resistant to moisture and chemicals; however, it is heavier and more expensive than fiberglass.
- Polyurethane Foam: Excellent thermal performance with a high R-value; lightweight and easy to handle; available in rigid and flexible forms; can be sprayed or applied as pre-formed sections; however it can be moisture sensitive in some formulations.
- Mineral Wool: Made from rock or slag wool; good thermal and acoustic insulation; fire-resistant; however, it can be irritating to the skin if not properly handled.
The choice depends on factors like temperature range, pipe material, environmental conditions, and budget. For instance, a chilled water line in a commercial building might utilize polyurethane foam for its thermal efficiency and ease of installation, while a high-temperature steam pipe would need calcium silicate insulation to withstand the heat.
Q 19. How do you identify and address potential hazards in a pipefitting work environment?
Safety is paramount in pipefitting. Potential hazards include:
- Falls from heights: Working at heights necessitates fall protection measures such as harnesses and guardrails.
- Burns from hot pipes or welding: Appropriate PPE, including heat-resistant gloves and clothing, is crucial. Adequate ventilation and fire suppression measures are also necessary.
- Exposure to hazardous materials: Working with asbestos or other hazardous materials requires proper training and protective equipment.
- Electrocution: Working near electrical equipment calls for awareness and safety precautions.
- Compressed air and gas leaks: Regular inspection and proper handling of compressed gas cylinders are necessary.
I address these hazards by adhering strictly to safety regulations, using appropriate PPE, and employing safe work practices. Regular safety meetings and risk assessments help to identify and mitigate potential risks. Before beginning work, I always inspect the area for hazards and plan accordingly, ensuring that appropriate permits are in place.
Q 20. What are the common problems encountered during pipe installation and how are they solved?
Common pipe installation problems include:
- Leaks: Caused by improper threading, welding defects, or damaged fittings. Solutions involve tightening connections, re-welding, or replacing defective components. Leak detection tools like pressure testing are invaluable.
- Misalignment: Improper alignment leads to stress on the system and potential leaks. Carefully measuring and aligning pipes during installation is vital. Using appropriate alignment tools can ensure correct installation.
- Incorrect pipe sizing or material selection: Leads to inadequate flow, pressure drops, or system failure. Careful review of plans and specifications is crucial. Working with the engineering team to select appropriate pipe sizes is key.
- Corrosion: Damages pipes and fittings, leading to leaks and system failure. Proper material selection and protective coatings can mitigate corrosion.
Problem-solving involves careful observation, identifying the root cause, and employing appropriate corrective actions. Documentation is crucial throughout the process to track the problems and their solutions. For instance, if a leak is detected in a welded joint, it may necessitate re-welding the joint after carefully cleaning it. If a leak originates from a threaded fitting, the fitting may need to be replaced.
Q 21. Describe your experience with different types of pipe welding techniques.
My experience encompasses various pipe welding techniques, including:
- Shielded Metal Arc Welding (SMAW): A versatile technique suitable for various pipe materials and diameters. It’s relatively portable but requires skilled welders to achieve high-quality welds.
- Gas Metal Arc Welding (GMAW): Often preferred for its higher deposition rates and cleaner welds. Requires a steady hand and precise control of welding parameters.
- Gas Tungsten Arc Welding (GTAW): Produces high-quality, aesthetically pleasing welds, often used for stainless steel and other critical applications. It’s more complex and requires a highly skilled welder.
I’ve worked extensively with all three, selecting the appropriate technique based on the project requirements, pipe material, and access. Proper preparation, including cleaning and beveling the pipe ends, is critical to ensuring successful welds. Each technique involves specific safety precautions, including appropriate PPE and ventilation.
For instance, in a project involving stainless steel piping, I would choose GTAW for its superior weld quality and aesthetic appeal. In a large-scale project with carbon steel, GMAW might be selected for speed and efficiency.
Q 22. Explain the function of a pipe reamer.
A pipe reamer is a tool used to enlarge and smooth the inside diameter of a pipe. Think of it like a specialized drill bit, but instead of creating a hole, it expands an existing one. This is crucial because pipes often have a rough or slightly irregular interior after cutting, which can impede the flow of fluids or prevent a proper seal. The reamer’s cutting edges carefully remove small amounts of material, creating a clean, consistent bore.
There are different types of pipe reamers, including hand-operated reamers (often used for smaller pipes) and power-operated reamers (for larger pipes or when working with many pipes). The choice depends on the pipe size and the job’s scope. For instance, a hand reamer might be suitable for reaming the end of a copper pipe before soldering a fitting, while a power reamer is more efficient for preparing many steel pipes in a large-scale industrial project.
Proper reaming ensures that fittings slide smoothly onto the pipe, creating a leak-free seal. An unreamed pipe can lead to restrictions in flow or damage to the fitting during installation, requiring additional work and potentially increasing material costs. Therefore, reaming is a critical step in ensuring the quality and reliability of any piping system.
Q 23. What are the limitations of using different pipefitting tools?
The limitations of pipefitting tools often stem from their specific design and intended use. For example, a pipe cutter designed for thin-walled copper pipes might struggle to cut through thicker-walled steel pipes cleanly and efficiently, potentially leading to burrs or uneven cuts. Similarly, a wrench designed for a specific size and type of fitting might not provide enough grip or leverage on different types of fittings, causing slippage and damage.
Another limitation is the potential for tool misuse. Using a tool beyond its capacity or incorrectly can lead to damage to the tool, the pipe, or even injury to the user. For example, forcing a pipe bender beyond its rated capacity could cause it to break or permanently deform. The material of the pipe itself also plays a role. Tools designed for malleable materials like copper might not be suitable for more rigid materials like cast iron.
- Size limitations: Some tools are only designed for specific pipe diameters.
- Material limitations: Tools suitable for one material may not be appropriate for another (e.g., a reamer for soft copper is unsuitable for hard steel).
- Accessibility limitations: Some tools may be difficult to use in confined spaces.
- Operator skill: Improper use can lead to accidents or damage.
Therefore, selecting the right tool for the job is crucial. Careful consideration of pipe material, size, and the specific task at hand is essential to avoid limitations and ensure efficient, safe work.
Q 24. How do you maintain and care for pipefitting tools and equipment?
Maintaining pipefitting tools is crucial for their longevity and to ensure safe operation. Regular cleaning and inspection are vital. After each use, tools should be cleaned of debris, grease, and any other contaminants using appropriate solvents and brushes. This prevents corrosion and ensures proper functionality.
Storage is equally important. Tools should be stored in a dry, organized location to prevent rust and damage. Tools with moving parts should be lubricated regularly according to the manufacturer’s instructions. Sharp tools, such as cutters and reamers, should be stored carefully to prevent accidental injuries. Regularly inspect tools for wear and tear. Damaged or worn tools should be repaired or replaced immediately.
For power tools, maintenance is even more critical. This includes regular checks of power cords, ensuring proper grounding, and adhering to the manufacturer’s recommendations for lubrication, blade changes, and other maintenance tasks. Ignoring maintenance can lead to malfunction, injury, and costly repairs.
Think of it like maintaining a car: regular check-ups and preventative maintenance will keep it running smoothly and prevent major issues down the line. The same principle applies to pipefitting tools – proactive maintenance saves time, money, and potential injury.
Q 25. Describe a time you had to troubleshoot a complex pipefitting problem. What was the solution?
During a large-scale industrial piping project, we encountered a leak in a section of high-pressure steam piping. Initial investigations suggested a faulty weld. However, upon closer inspection, we found that the leak was originating from a microscopic crack in the pipe itself, not the weld. This crack was undetectable with the naked eye.
The initial troubleshooting involved pressure testing different sections of the pipe, isolating the leak to a specific area. However, finding the source of the leak within this area proved challenging. We employed dye penetrant testing, a non-destructive testing method that highlights cracks and surface imperfections. This revealed the previously invisible crack.
The solution was to cut out the damaged section of the pipe, using a specialized cutting tool designed for high-pressure lines. Then, a new section of pipe with the same specifications was carefully welded in place, followed by rigorous pressure testing to ensure the repair’s integrity. The success of this repair was attributed to the careful use of non-destructive testing techniques, which allowed us to identify the precise location and nature of the problem before proceeding with repairs.
Q 26. What are the industry standards and codes related to pipefitting?
Industry standards and codes related to pipefitting are essential for ensuring safety, reliability, and consistency. These standards vary depending on the location and type of piping system. Some key codes and standards include:
- ASME B31.1: Power Piping – Covers the design, fabrication, erection, testing, and operation of power piping systems.
- ASME B31.3: Process Piping – Addresses the design, construction, testing, and operation of process piping systems in various industries.
- ANSI/ASME B16: Standards for Pipe Flanges and Fittings – Provides specifications for pipe flanges, fittings, and valves.
- National Piping Codes (Specific to Countries): Many countries have their own national piping codes that are often based on or adapted from international standards.
Adherence to these codes ensures that piping systems are designed and constructed to meet minimum safety and performance standards. Failure to comply can lead to serious consequences, including leaks, fires, and explosions. Therefore, understanding and applying these codes is paramount for any professional working in pipefitting.
Q 27. How do you ensure the quality and integrity of your pipefitting work?
Ensuring the quality and integrity of pipefitting work requires a multi-faceted approach that begins with careful planning and selection of materials. This involves reviewing relevant engineering drawings, understanding the intended use of the piping system, and choosing the appropriate pipe materials, fittings, and tools for the job.
During the installation process, precision and attention to detail are paramount. This includes proper cutting, reaming, and threading of pipes; correct installation of fittings and valves; and meticulous welding or joining techniques where appropriate. Regular quality checks throughout the process help identify and rectify any potential issues early on. This might involve visual inspections, pressure testing, and other non-destructive testing methods to ensure the absence of leaks and structural integrity.
Finally, proper documentation is crucial. This involves maintaining detailed records of materials used, installation procedures, and inspection results. This documentation serves as evidence of the work’s quality and helps in troubleshooting or maintenance activities in the future. Ultimately, a commitment to quality and safety ensures the reliability and longevity of the pipefitting work, minimizing the risk of failures and ensuring the safety of those who depend on it.
Key Topics to Learn for Pipefitting Tools and Equipment Interview
- Measuring and Marking Tools: Understanding the use of measuring tapes, levels, and marking tools for accurate pipe layout and cutting. Practical application: Accurately measuring and marking pipe for a specific fitting installation.
- Cutting and Threading Tools: Mastering the operation and maintenance of pipe cutters, threaders, and dies. Practical application: Efficiently cutting and threading pipe to the required specifications, ensuring clean, precise cuts and threads.
- Joining Methods and Tools: Familiarity with various pipe joining methods (e.g., threading, welding, solvent welding, mechanical fittings) and the associated tools. Practical application: Selecting the appropriate joining method and tools based on pipe material, size, and application requirements.
- Pipe Bending Techniques and Tools: Knowledge of different pipe bending techniques (e.g., hand bending, using bending springs, hydraulic benders) and their applications. Practical application: Safely and accurately bending pipe to the desired radius and angle without causing damage or weakening the pipe.
- Safety Procedures and Equipment: Understanding and adhering to all relevant safety regulations and procedures when using pipefitting tools and equipment. Practical application: Properly using safety equipment (e.g., gloves, eye protection, safety shoes) and following safe work practices to prevent accidents.
- Troubleshooting and Maintenance: Identifying and resolving common problems encountered during pipefitting, as well as performing routine maintenance on tools and equipment. Practical application: Diagnosing and repairing faulty equipment, ensuring optimal performance and longevity.
- Pipe Materials and Their Properties: Understanding the characteristics and applications of various pipe materials (e.g., steel, copper, PVC, CPVC). Practical application: Selecting the appropriate pipe material based on the project requirements and environmental conditions.
Next Steps
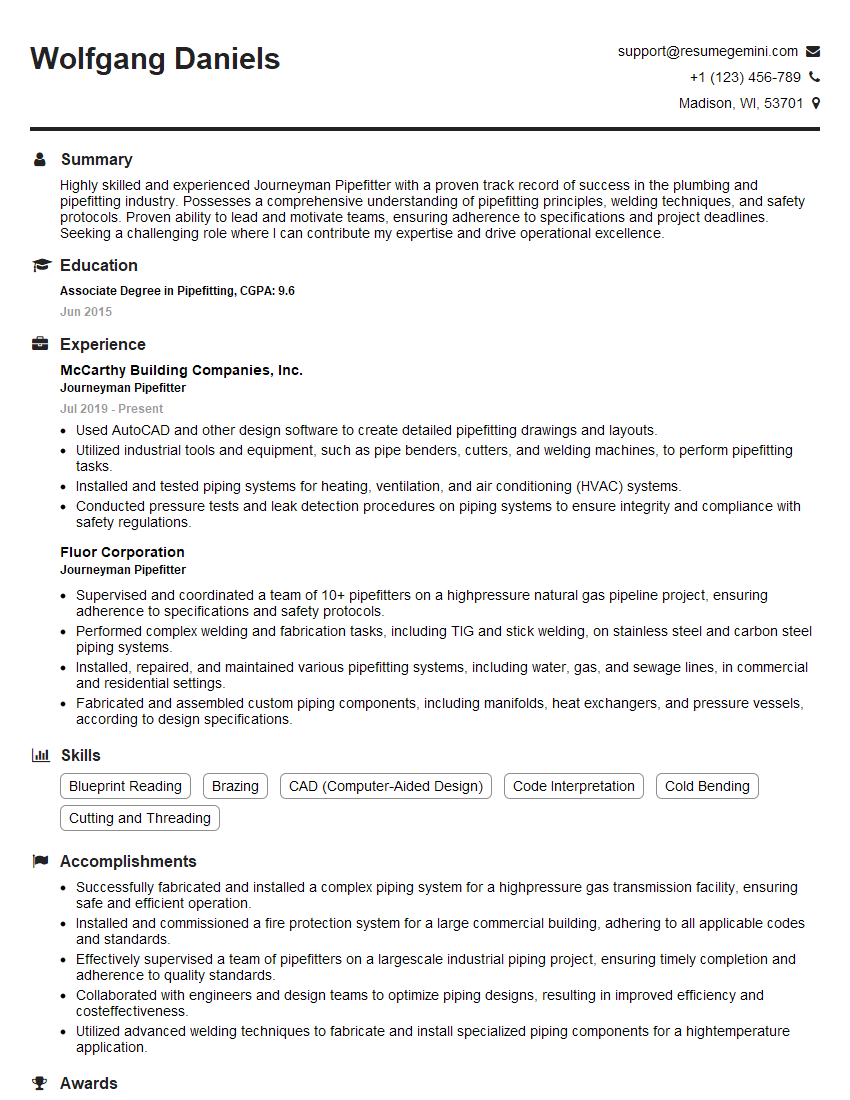
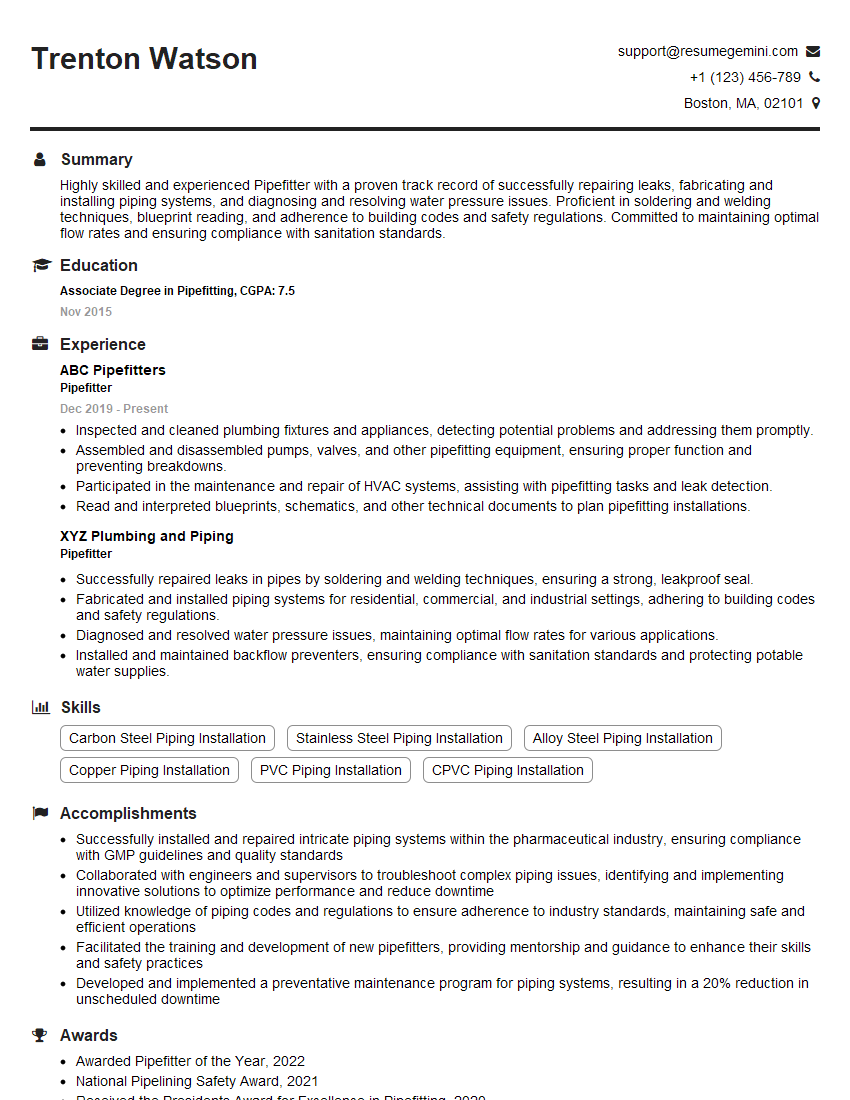
Mastering pipefitting tools and equipment is crucial for career advancement in the industry, leading to higher earning potential and increased job security. A strong understanding of these tools and techniques will significantly enhance your interview performance and overall employability. To stand out from other candidates, create an ATS-friendly resume that highlights your skills and experience effectively. ResumeGemini is a trusted resource for building professional, impactful resumes. Use ResumeGemini to craft a compelling resume; examples of resumes tailored specifically to Pipefitting Tools and Equipment are available to help guide you.
Explore more articles
Users Rating of Our Blogs
Share Your Experience
We value your feedback! Please rate our content and share your thoughts (optional).
What Readers Say About Our Blog
To the interviewgemini.com Webmaster.
Very helpful and content specific questions to help prepare me for my interview!
Thank you
To the interviewgemini.com Webmaster.
This was kind of a unique content I found around the specialized skills. Very helpful questions and good detailed answers.
Very Helpful blog, thank you Interviewgemini team.