The thought of an interview can be nerve-wracking, but the right preparation can make all the difference. Explore this comprehensive guide to Sink repair and replacement interview questions and gain the confidence you need to showcase your abilities and secure the role.
Questions Asked in Sink repair and replacement Interview
Q 1. Describe your experience with different types of sink materials (e.g., porcelain, stainless steel, composite).
My experience spans a wide range of sink materials, each with its own set of advantages and disadvantages. Stainless steel is a classic choice, known for its durability, resistance to stains and scratches, and ease of cleaning. I’ve worked extensively with various gauges of stainless steel, understanding that thicker gauges offer greater resilience. Porcelain sinks, often cast iron with a porcelain enamel coating, offer a sleek, elegant look. However, they’re more prone to chipping and staining than stainless steel, requiring careful handling and maintenance. Repairs often involve touch-up paint for minor chips. Composite sinks, made from materials like granite or quartz composite, have grown in popularity. They offer a wide variety of colors and styles, mimicking natural stone. They are usually more resistant to chipping and staining than porcelain, but can be more susceptible to scratches depending on the composition and manufacturing process. I’ve found that the installation techniques vary slightly depending on the material’s weight and fragility.
Q 2. Explain the process of replacing a kitchen sink.
Replacing a kitchen sink is a fairly involved process, but with the right tools and techniques, it’s manageable. First, the old sink must be carefully disconnected from the plumbing and removed. This often involves disconnecting the drain lines, water supply lines, and removing the clips or fasteners securing the sink to the countertop. Next, the new sink is carefully positioned, ensuring proper alignment with the countertop cutouts. New silicone caulk is applied to seal the sink to the countertop, preventing leaks. Finally, the drain lines and water supply lines are reconnected, and the sink is tested for leaks. I always double-check all connections, taking my time to ensure a watertight seal. The type of sink installation (undermount, drop-in, or farmhouse) significantly impacts the process, and my experience covers all three. For example, undermount sinks require more precise measurements and careful sealant application to achieve a seamless look.
Q 3. How do you identify and repair a leaky faucet?
A leaky faucet is usually caused by worn-out O-rings, washers, or cartridges within the faucet mechanism. I start by identifying the type of faucet (compression, cartridge, or ball). Then, I carefully disassemble the faucet, inspecting the internal components for wear and tear. Replacing the faulty parts is usually straightforward, but requires careful attention to detail to ensure proper reassembly. Sometimes, simple tightening of the packing nut can resolve a minor leak. However, severe leaks often necessitate replacing worn-out parts. I always use high-quality replacement parts to ensure longevity and reliability. For instance, a dripping compression faucet usually needs new O-rings and washers, which are readily available. I always have a variety of replacement parts on hand to tackle most common faucet issues.
Q 4. What are common causes of slow drains, and how do you troubleshoot them?
Slow drains are a common plumbing problem, often caused by a buildup of hair, soap scum, grease, or other debris. I typically troubleshoot using a combination of methods. A simple plunger is often effective for minor clogs. For more stubborn clogs, I use a plumber’s snake (also called an auger) to break up or retrieve the blockage. Sometimes, the problem lies deeper in the drainpipe, requiring more extensive work. Chemical drain cleaners are a last resort, as they can damage pipes if used excessively. I always advise homeowners on preventing slow drains by regularly cleaning drain strainers and avoiding pouring grease down the sink. I often explain the benefits of using a drain sieve to catch hair and food particles, preventing larger blockages.
Q 5. Describe your experience with different types of sink drains and their installation.
I have extensive experience installing various types of sink drains, including standard basket strainers, garbage disposals, and more complex drain systems. Standard basket strainers are relatively simple to install, requiring basic plumbing knowledge. Garbage disposals require more careful installation, including proper wiring and securing to the sink. More complex systems, like those with multiple sinks or dishwasher connections, demand a thorough understanding of plumbing codes and best practices. I always ensure proper sealing to prevent leaks and choose high-quality components for durability. My experience includes working with various drainpipe materials, including PVC and ABS, understanding their respective strengths and weaknesses. For example, I might need to adapt the installation process depending on whether the drainpipe is cast iron or a modern plastic variant.
Q 6. How do you handle a clogged garbage disposal?
A clogged garbage disposal is usually caused by an accumulation of food waste. Before attempting any repair, always turn off the power to the disposal at the breaker box. I often start by using tongs or pliers to retrieve any large debris that is visibly obstructing the disposal chamber. If that fails, a long-handled brush can help to clear smaller debris. If it’s still clogged, using a wrench to turn the motor’s impeller might dislodge the blockage. If these methods don’t work, a more invasive approach might be necessary. For severe clogs, I’ll use a drain snake to clear the blockage. I only advise chemical drain cleaners as a last resort due to their potential damage to the disposal’s components and plumbing.
Q 7. What safety precautions do you take when working with plumbing?
Safety is paramount in plumbing work. I always start by turning off the water supply before working on any plumbing fixtures. I use appropriate personal protective equipment (PPE), including safety glasses and gloves, to protect myself from potential hazards. When working with electrical components like garbage disposals, I always ensure the power is completely shut off at the breaker box. I am familiar with local plumbing codes and regulations, ensuring my work adheres to all safety standards. I also take care to avoid any slips or falls during work, using appropriate safety equipment and procedures. For example, if working under a sink, I always ensure that I have sufficient light and a stable work surface. I am mindful of working in confined spaces and take extra precautions to maintain good ventilation.
Q 8. Explain the process of installing a new sink drain assembly.
Installing a new sink drain assembly is a straightforward process, but precision is key to prevent leaks. First, you disconnect the old assembly, carefully noting how the various components fit together – taking pictures is highly recommended. Then, you clean the sink flange thoroughly, removing any old sealant or debris. Next, you install the new tailpiece, ensuring a tight fit with the sink drain. The basket strainer is then fitted into place, followed by the flange and the slip nut. Finally, you connect the drainpipe to the tailpiece. It’s crucial to use plumber’s putty or a suitable sealant to create a watertight seal around all connections. Remember to hand-tighten all connections initially, followed by a gentle tightening with pliers to ensure they’re secure, but avoid over-tightening, which could damage the components.
For example, on a standard kitchen sink, you’ll typically find a tailpiece, a strainer basket, a flange, a slip nut, and a drainpipe. Each component has a specific role in directing wastewater from the sink to your plumbing system. Understanding their individual functions helps in the assembly process.
Q 9. How do you measure and cut a sink cutout accurately?
Accurately measuring and cutting a sink cutout is paramount for a seamless installation. Begin by consulting the manufacturer’s specifications for your sink, as these usually provide precise dimensions for the cutout. Use a measuring tape and a pencil to mark the sink’s outline on your countertop. I recommend double-checking these measurements multiple times. Once the outline is marked, use a jigsaw with a fine-tooth blade to carefully cut along the marked lines. Go slow and steady to avoid chipping or cracking the countertop. For a professional finish, a router can be used to clean up the edges and ensure a perfectly smooth fit.
Think of it like cutting a custom frame for a precious painting – you need accuracy and precision to avoid damaging the artwork (your countertop) and ensure a perfect fit. If the cutout is too small, the sink won’t fit; too large, and it will be unstable and potentially leak.
Q 10. What tools and equipment are essential for sink repair and replacement?
Essential tools and equipment for sink repair and replacement vary depending on the job’s complexity, but a basic toolkit should include: adjustable pliers, slip-joint pliers, basin wrenches, screwdrivers (Phillips and flathead), a plumber’s putty knife, a measuring tape, a pencil, a jigsaw with a fine-tooth blade, safety glasses, work gloves, a bucket, rags, and a sealant (plumber’s putty or silicone). For more complex jobs or larger sinks, power tools like a router or a reciprocating saw can be helpful. A helper is often beneficial for lifting and positioning heavier sinks.
Investing in quality tools is a good idea. A cheap jigsaw might bind or break, leading to an uneven cut and potentially damaging the countertop. Similarly, using low-quality sealant could lead to leaks down the line. This adds up to extra costs in time and materials, so starting with high-quality tools pays off.
Q 11. Describe your experience with different types of sink fixtures (e.g., single-lever, two-handle).
I have extensive experience with various sink fixtures, including single-lever, two-handle, and even sensor-activated faucets. Single-lever faucets offer convenience with one handle controlling both hot and cold water flow and temperature. Two-handle faucets provide separate control over hot and cold water, which some prefer for finer temperature adjustments. Sensor faucets are becoming increasingly popular for their hygienic benefits, eliminating the need to touch the faucet. Each type has its own installation nuances and potential repair challenges. For instance, single-lever faucets often require specialized tools for cartridge replacement, while two-handle faucets might need individual valve repairs. Understanding the internal mechanics of each type is crucial for effective repair and replacement.
One memorable experience involved repairing a very old two-handle faucet in a historic home. It required sourcing specialized replacement parts due to its age and unique design. The careful restoration of this fixture underscored the importance of understanding the design specifics of each type.
Q 12. How do you address a sink that is not properly level?
A sink that’s not level is a common issue often caused by uneven countertops or an incorrectly installed sink. Addressing this requires careful examination of the situation. If the countertop is uneven, it might need adjustments before the sink is installed. This can involve shimming the countertop to make it level. If the countertop is level, but the sink isn’t, you might need to use shims under the sink’s base to achieve a level position. These shims should be placed strategically, and the sink must be carefully leveled using a level tool before securing it permanently. Make sure the shims are strong enough to support the sink’s weight and are resistant to moisture.
Imagine trying to pour water into a bowl that’s tilted – the water will spill! Similarly, an unlevel sink can create problems such as water pooling, and stress on the sink itself, potentially leading to cracks or damage over time.
Q 13. What are some common problems encountered during sink installation?
Common problems encountered during sink installation include incorrect measurements leading to a poorly fitting sink; leaks due to improper sealant application or damaged components; difficulty aligning the drain assembly correctly; issues with the sink’s levelness, as previously discussed; and unexpected problems with existing plumbing. Preventive measures include careful planning, accurate measurements, the use of high-quality materials, and a thorough understanding of plumbing systems. Knowing how to troubleshoot common plumbing issues – such as identifying and repairing leaks – is crucial for a successful installation. Thoroughly reviewing existing plumbing before starting the job is a great preventative measure.
For instance, I once encountered a situation where the existing drainpipe was corroded and needed replacement before the new sink could be installed. This was an unexpected but solvable problem that could have created delays if not addressed immediately.
Q 14. How do you repair a cracked sink?
Repairing a cracked sink depends on the severity of the crack and the type of sink material. Small cracks in porcelain or ceramic sinks can sometimes be repaired with epoxy resin designed for this purpose. The crack should be cleaned thoroughly, and the resin applied carefully, following the manufacturer’s instructions. For larger cracks or those in more delicate materials, replacement might be the only viable option. It is important to consider the practicality of the repair – a visible repair on a prominent kitchen sink may not be aesthetically pleasing.
Think of it like patching a cracked vase – a small, hairline crack might be repairable, but a large, gaping crack usually requires a replacement. The repair’s success relies greatly on the correct selection of material and careful attention to the application process.
Q 15. How do you deal with a sink that is leaking around the faucet?
A leaky faucet-sink connection is a common problem, often stemming from loose or deteriorated caulking. The first step is to identify the source of the leak. Is it coming from under the faucet itself, or from the gap between the faucet base and the sink?
- Inspect the Caulk: Carefully examine the caulking around the faucet base. Cracks, gaps, or missing caulk are clear indicators of the problem.
- Check the Faucet Connections: Tighten any loose nuts or bolts connecting the faucet to the sink. Use an appropriate wrench to avoid damaging the fixture. Sometimes a slight tightening is all that’s needed.
- Address Underlying Issues: If tightening doesn’t work, the faucet might need replacement or the sink might require repair (e.g., a cracked surface underneath the faucet).
- Apply New Caulk: Once the source is identified, carefully remove old caulk using a utility knife or caulk remover tool. Then, apply a bead of high-quality 100% silicone caulk, smoothing it out with your finger (or a caulk smoothing tool) to create a watertight seal. Allow the caulk to cure fully before using the faucet.
Example: I once had a client whose leak was subtle. It turned out not to be the caulk, but a tiny crack in the porcelain of the sink itself, right under the faucet base. We ended up carefully filling the crack with epoxy and then recaulking. It solved the problem completely.
Career Expert Tips:
- Ace those interviews! Prepare effectively by reviewing the Top 50 Most Common Interview Questions on ResumeGemini.
- Navigate your job search with confidence! Explore a wide range of Career Tips on ResumeGemini. Learn about common challenges and recommendations to overcome them.
- Craft the perfect resume! Master the Art of Resume Writing with ResumeGemini’s guide. Showcase your unique qualifications and achievements effectively.
- Don’t miss out on holiday savings! Build your dream resume with ResumeGemini’s ATS optimized templates.
Q 16. Describe your experience with caulking and sealing around sinks.
Caulking and sealing are fundamental to sink installation and maintenance. My experience spans various types of caulk, including silicone, latex, and polyurethane. I’ve worked on countless sinks – from simple kitchen sinks to elaborate bathroom vanities. I understand the importance of selecting the appropriate caulk for each application and the proper techniques for application.
- Silicone Caulk: This is my preferred choice for most sink installations, particularly around faucets and the sink-countertop junction. It offers superior water resistance and durability.
- Latex Caulk: I use latex caulk less frequently, primarily in situations where paintability is a requirement. It’s generally less durable than silicone in wet environments.
- Preparation is Key: Before applying caulk, I always thoroughly clean and dry the surfaces to ensure proper adhesion. Any residue or debris can compromise the seal.
- Proper Application: A consistent, even bead of caulk is essential. I use a caulking gun and take care to smooth out the bead for a professional finish. I always allow ample curing time for optimal performance.
Example: I once had to replace the caulk around an old farmhouse sink with a very ornate edge. The precise application required patience and attention to detail, but the result was a beautiful, watertight seal that greatly enhanced the sink’s appearance.
Q 17. How do you handle a situation where a sink needs to be re-caulked?
Recaulking a sink is a straightforward process, but essential for maintaining a watertight seal. The first step is to remove the old caulk completely. This often requires a utility knife, but stubborn caulk might require a specialized caulk remover tool. Once the old caulk is gone, thoroughly clean and dry the surfaces.
- Clean Thoroughly: Use a cleaner such as rubbing alcohol to ensure there’s no residue from the old caulk. This is crucial for the new caulk’s adhesion.
- Apply New Caulk: Apply a new bead of silicone caulk (again, 100% silicone is generally best) following the same techniques mentioned earlier. Ensure the bead is continuous and consistent.
- Smooth and Cure: Smooth the caulk with a wet finger or a caulk smoothing tool. Allow the caulk to cure completely according to the manufacturer’s instructions before using the sink.
Practical Application: Recaulking is preventative maintenance. It’s best to do it every few years, or sooner if you see any signs of cracking or deterioration in the existing caulk. This will prevent leaks and potential damage to surrounding areas.
Q 18. What are different methods for unclogging a sink drain?
Sink drain clogs are a common plumbing problem, but there are several effective methods for resolving them.
- Boiling Water: Pouring a kettle of boiling water down the drain can melt away grease and soap buildup. This is a simple and effective first step.
- Plunger: A cup plunger is ideal for sink clogs. Ensure the plunger creates a tight seal around the drain opening. Pump vigorously to dislodge the clog.
- Baking Soda and Vinegar: Pour 1 cup of baking soda down the drain, followed by 1 cup of vinegar. The resulting fizzing reaction can help break down organic clogs. Let it sit for 30 minutes, then flush with hot water.
- Drain Snake/Auger: For stubborn clogs that don’t respond to simpler methods, a drain snake or auger might be necessary. Carefully feed the snake down the drain to break up or retrieve the blockage.
- Chemical Drain Cleaners (Use with Caution): Chemical drain cleaners are available, but use them as a last resort. These can damage pipes and are harmful if mishandled. Always follow the manufacturer’s instructions carefully.
Example: I once encountered a clog caused by a build-up of hair and soap scum. The plunger didn’t work initially. However, after a thorough cleaning with a drain snake, the problem was quickly resolved.
Q 19. How do you determine the proper size and type of sink for a given application?
Choosing the right sink depends on several factors: the available space, the intended use, the overall design aesthetic, and the plumbing configuration.
- Measurements: Accurately measure the countertop cutout and the available space beneath the counter for plumbing clearance. This is crucial to ensure a proper fit.
- Sink Material: Common materials include stainless steel (durable, easy to clean), porcelain (classic, elegant), and composite materials (variety of colors and styles). Consider durability, maintenance, and desired style.
- Sink Type: There are various types: single-basin, double-basin, farmhouse, undermount, and drop-in. The choice depends on the intended use and aesthetic preference. Double sinks are useful for multi-user situations.
- Plumbing Considerations: Ensure the sink drain opening is compatible with standard P-traps and other plumbing components.
Example: For a modern kitchen remodel, a sleek, undermount stainless steel sink with a single basin might be ideal. For a traditional bathroom, a porcelain drop-in sink with a classic design may be more suitable. Always consider the client’s needs and preferences during selection.
Q 20. Explain your experience with working with different types of P-traps.
P-traps are essential plumbing components that prevent sewer gases from entering the house. I’ve worked with various types, each with its own characteristics and advantages.
- Standard P-Traps: These are the most common type, with a curved pipe forming a “P” shape. They are relatively inexpensive and easy to install.
- Bottle Traps: These traps resemble a bottle and often have a cleanout plug for easier maintenance. They’re a good choice for sinks that are prone to clogging.
- Tubular Traps: These have a simpler design compared to bottle traps, but can be more prone to clogging.
- Installation and Maintenance: Proper installation of a P-trap is crucial to prevent leaks and ensure its functionality. Regular inspection and cleaning can prevent clogs.
Example: In a recent project, I chose a bottle trap for a frequently used kitchen sink because its cleanout plug simplified maintenance and minimized the risk of clogs due to food debris.
Q 21. How do you diagnose and repair a running toilet connected to the sink system?
A running toilet connected to a sink system usually indicates a problem within the toilet itself, not necessarily the sink plumbing. However, if there’s a significant leak or water pressure issue affecting both, it might be a shared plumbing problem upstream.
- Check the Toilet Tank: The most likely cause is a faulty flapper valve or fill valve within the toilet tank. Inspect the flapper for wear and tear and ensure it creates a watertight seal when the tank is full.
- Check the Toilet Fill Valve: Verify the fill valve is allowing the correct amount of water into the tank and is not leaking.
- Check for Leaks in the Toilet Supply Line: Inspect the water supply line from the shut-off valve to the toilet tank for any visible leaks or cracks.
- Check Water Pressure: If the water pressure is generally low, it could impact both the toilet and the sink. Check the main shut-off valve and check for any issues in the main supply line.
- Rule out Shared Plumbing Issues: If the issue is affecting both the toilet and sink significantly, there may be a problem with the shared water supply line or perhaps even a main water supply problem.
Important Note: If you are unsure about any aspect of plumbing repair, it’s always best to call a qualified plumber. Incorrectly repairing plumbing issues could lead to more significant and costly problems.
Q 22. Describe your experience with installing a garbage disposal.
Installing a garbage disposal involves several key steps, and I’ve performed this procedure countless times. First, I always turn off the power to the disposal at the breaker box – safety is paramount! Then, I disconnect the old disposal (if one exists), carefully noting how the plumbing is connected. Next, I install the new disposal, securing it to the sink using the provided mounting hardware. Then comes the crucial part: connecting the drain plumbing. This typically involves using slip-joint clamps to ensure a watertight seal. I always test the connections before turning the power back on, verifying everything is tight and secure. Finally, after ensuring the power is on, I run the disposal with water to flush out any debris and confirm its proper operation. I meticulously double-check every step to prevent future leaks or malfunctions.
For example, I once encountered a situation where the sink drain opening was slightly misaligned. Instead of forcing the fit, I carefully used a plumber’s putty to create a perfect seal around the disposal flange. This ensured a watertight connection without damage.
Q 23. What is your experience with repairing or replacing a dishwasher drain hose?
Repairing or replacing a dishwasher drain hose is a relatively straightforward task, but requires careful attention to detail to avoid leaks. I start by disconnecting the hose from both the dishwasher and the garbage disposal or drain line. If repairing, I carefully inspect the hose for any cracks, holes, or kinks. Minor damage can often be addressed with strong repair tape designed for plumbing applications, but extensive damage necessitates replacement. When replacing the hose, I always choose a hose of the correct length and diameter. Properly securing the hose clamps is crucial to prevent leaks – I ensure they are tightened securely, but not over-tightened, to avoid damaging the hose. Finally, I always test the connection for leaks, both before and after running the dishwasher to ensure everything is working correctly. This seemingly simple task can significantly reduce potential water damage.
For instance, I once had a situation where a customer reported a leak under their dishwasher. Upon inspection, I found a tiny hole in the drain hose that was previously unnoticed. A quick, careful repair with appropriate plumbing tape solved the problem without necessitating a full replacement.
Q 24. How familiar are you with local plumbing codes and regulations?
I am very familiar with local plumbing codes and regulations. Staying up-to-date is crucial for any professional plumber. I regularly consult the relevant codes to ensure my work meets all safety and compliance standards, and I subscribe to professional journals and attend continuing education courses to keep abreast of any changes. Knowledge of local regulations is essential for ensuring the longevity and safety of the plumbing systems I work on, and protects both myself and my clients from potential legal and safety issues. This includes everything from proper venting requirements to the specific materials allowed for drain lines.
For example, recent updates in our area required the use of specific types of pipe traps for certain sink installations. I promptly incorporated this into my practice, ensuring all new installs are fully compliant.
Q 25. How do you handle difficult or unusual sink repair situations?
Handling unusual sink repair situations often requires a systematic approach. I always start with a thorough inspection, carefully documenting the problem. This often involves using specialized tools like a plumbing camera to identify hidden issues. Then I research the specific sink model or manufacturer to access technical manuals or online forums for potential solutions. I also consult with other experienced plumbers, when necessary, to leverage collective expertise. Creativity and flexibility are key in these situations. I’m not afraid to explore different approaches, adapting my techniques to fit the unique demands of each challenge. Thorough documentation and careful planning is key to success.
For instance, I once had to repair a sink with a severely corroded drain assembly. After carefully removing the old assembly, I had to custom fabricate a replacement piece using specialized plumbing fittings. The result was a successful and lasting repair.
Q 26. What is your approach to diagnosing plumbing problems efficiently?
Diagnosing plumbing problems efficiently relies on a combination of experience, observation, and systematic testing. I begin by asking the customer detailed questions about the nature of the problem. Then, I visually inspect the affected area, checking for obvious signs of leaks, clogs, or damage. This is followed by carefully testing the water pressure and flow in different parts of the system. If necessary, I’ll use specialized tools like pressure gauges or drain snakes to investigate further. This structured approach allows me to quickly pinpoint the source of the problem, minimizing disruption and unnecessary work.
I’ll often utilize the process of elimination; for instance, if a sink is draining slowly, I’ll first try a plunger, then a drain snake, before resorting to more invasive methods like checking the main drain line.
Q 27. How do you prioritize tasks when dealing with multiple sink repair requests?
Prioritizing multiple sink repair requests involves a careful balancing act. I prioritize based on urgency and impact. Emergency situations, such as major leaks causing water damage, naturally take precedence. I then consider the client’s needs, scheduling requests based on their availability and the severity of the problem. I utilize a scheduling system that enables effective task management and communication. Open communication with clients is also essential, keeping them informed about expected timelines and any potential delays.
For example, I might handle a burst pipe immediately, followed by a clogged drain that is causing inconvenience, before attending to a minor faucet repair.
Q 28. Describe a time you had to troubleshoot a complex sink issue. What was the solution?
I once encountered a situation where a kitchen sink wouldn’t drain, despite multiple attempts at clearing the drain with standard tools. After a thorough inspection, I noticed a slight depression in the floor under the sink cabinet. Suspecting a collapsed drain pipe, I used a plumbing camera to inspect the drain line under the floor. Sure enough, a section of the drain pipe had collapsed, causing a complete blockage. The solution required access under the floor, a process that involved carefully removing a section of the subfloor. I then replaced the damaged section of pipe, ensuring a proper slope to prevent future blockages, and repaired the subfloor. The sink drained perfectly afterward. This experience highlighted the importance of thorough investigation and not prematurely assuming the source of a plumbing problem.
Key Topics to Learn for Sink Repair and Replacement Interview
- Understanding Sink Types and Materials: Learn the differences between various sink materials (e.g., stainless steel, porcelain, composite) and their respective repair and replacement methods. This includes recognizing common issues specific to each material.
- Plumbing Fundamentals: Gain a solid understanding of basic plumbing principles, including water supply lines, drain systems, and shut-off valves. Practice identifying and troubleshooting common plumbing problems related to sink installations.
- Repair Techniques: Master practical repair techniques such as fixing leaks in faucets, repairing cracks in sinks, unclogging drains, and replacing worn-out sink components (e.g., gaskets, sprayers).
- Replacement Procedures: Familiarize yourself with the step-by-step process of removing and installing different types of sinks, including undermount, drop-in, and farmhouse styles. This includes understanding proper sealant application and securing methods.
- Tools and Equipment: Become proficient with the use of essential tools and equipment used in sink repair and replacement, from basic hand tools to specialized plumbing equipment. Understand safety procedures for using these tools.
- Troubleshooting and Diagnostics: Develop your ability to diagnose the root cause of sink-related problems through systematic observation and testing. Learn to identify common issues and implement effective solutions.
- Code Compliance and Safety: Understand relevant building codes and safety regulations related to plumbing installations. This includes understanding water conservation measures and preventing potential water damage.
Next Steps
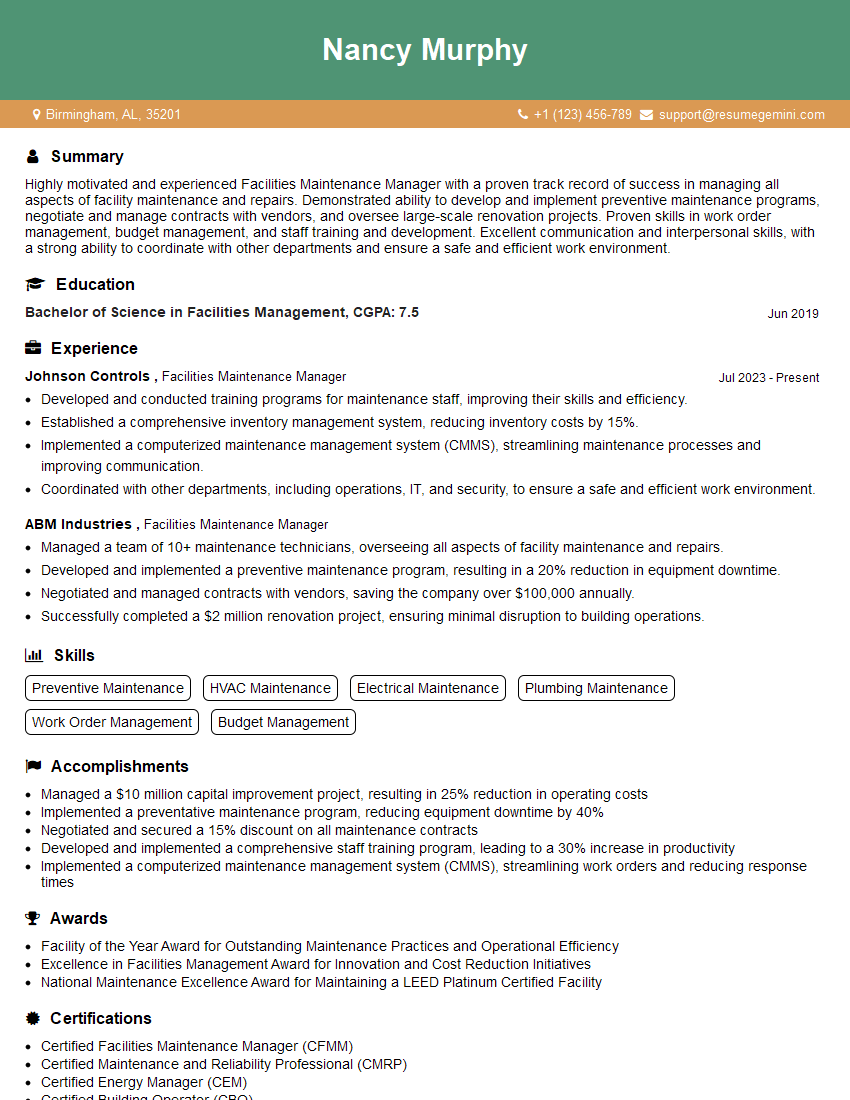
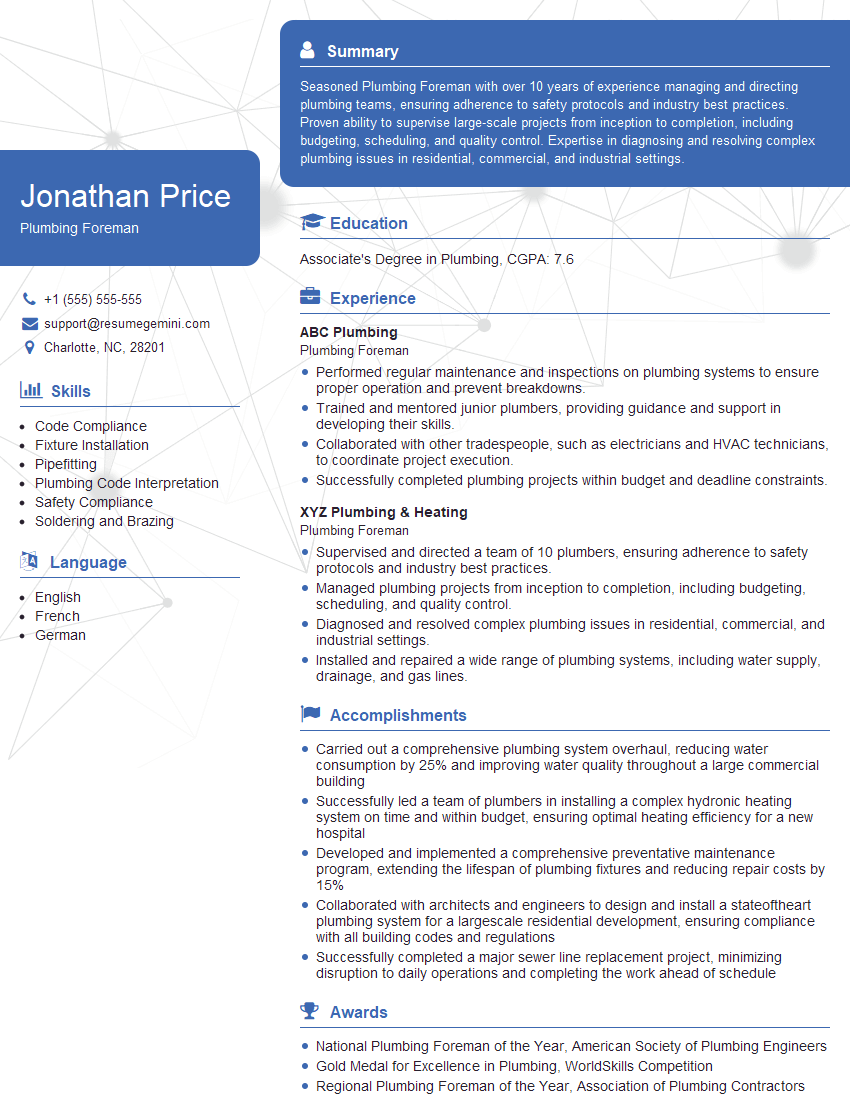
Mastering sink repair and replacement skills opens doors to diverse and rewarding career opportunities within the plumbing and home repair industries. To maximize your job prospects, it’s crucial to present your expertise effectively. Creating a strong, ATS-friendly resume is key to getting noticed by potential employers. ResumeGemini can help you build a professional and impactful resume that highlights your skills and experience. ResumeGemini provides examples of resumes tailored to the Sink repair and replacement field, helping you craft a document that stands out from the competition. Invest time in creating a compelling resume; it’s your first impression on a potential employer.

Explore more articles
Users Rating of Our Blogs
Share Your Experience
We value your feedback! Please rate our content and share your thoughts (optional).
What Readers Say About Our Blog
To the interviewgemini.com Webmaster.
Very helpful and content specific questions to help prepare me for my interview!
Thank you
To the interviewgemini.com Webmaster.
This was kind of a unique content I found around the specialized skills. Very helpful questions and good detailed answers.
Very Helpful blog, thank you Interviewgemini team.