Unlock your full potential by mastering the most common Understanding of Wallpaper Installation Standards interview questions. This blog offers a deep dive into the critical topics, ensuring you’re not only prepared to answer but to excel. With these insights, you’ll approach your interview with clarity and confidence.
Questions Asked in Understanding of Wallpaper Installation Standards Interview
Q 1. Explain the importance of proper surface preparation before wallpaper installation.
Proper surface preparation is paramount for a successful wallpaper installation. Think of it like building a house – you wouldn’t start constructing without a solid foundation. A poorly prepared wall will lead to peeling, bubbling, and an overall unsatisfactory finish. The process involves several key steps:
- Cleaning: Remove any dust, dirt, grease, or loose paint. A sugar soap solution is effective for cleaning and degreasing. For stubborn stains, consider using a suitable cleaner according to the wall’s material.
- Repairing: Fill any holes, cracks, or imperfections with filler, ensuring a smooth surface. Once dry, sand the filler until flush with the wall.
- Priming: Applying a primer seals the wall, creating a uniform surface for the wallpaper to adhere to. It also prevents the wallpaper from absorbing moisture from the wall, which can cause issues. Choose a primer specifically designed for wallpaper.
- Sizing (Optional): For porous walls like plaster, sizing helps create an even surface and improves adhesion. This is particularly important with lighter-weight wallpapers.
For instance, I once worked on a project where the homeowner hadn’t properly cleaned the walls. We discovered significant grease build-up from the kitchen, resulting in the wallpaper failing to adhere properly in that area. We had to strip the wallpaper and start the preparation process again, adding significant time and cost to the project. Thorough preparation saves time and money in the long run.
Q 2. Describe the different types of wallpaper and their respective installation methods.
Wallpaper comes in a variety of types, each requiring slightly different installation methods:
- Vinyl Wallpaper: Durable, washable, and easy to clean, making it a popular choice for high-traffic areas. Installation is relatively straightforward using paste-the-wall or pre-pasted methods.
- Non-Woven Wallpaper: Strong, tear-resistant, and easy to hang as paste is applied directly to the wall. This reduces the risk of stretching or tearing the paper.
- Fabric-backed Wallpaper: Adds texture and elegance but requires careful handling due to its delicate nature. It’s typically paste-the-wall.
- Grasscloth Wallpaper: Natural and textured, offering a unique aesthetic. Requires careful handling and often specialist paste.
- Metallic Wallpaper: Creates a luxurious effect. The installation is similar to vinyl but requires extra care due to potential scratching.
The installation methods differ primarily in how the adhesive is applied: paste-the-wall (adhesive is applied directly to the wall), paste-the-paper (adhesive is applied to the back of the wallpaper), and pre-pasted (wallpaper comes with pre-applied adhesive that is activated with water).
Choosing the right installation method depends heavily on the wallpaper type and the experience level of the installer. For instance, pre-pasted wallpaper is ideal for DIY projects, while grasscloth might require the expertise of a professional.
Q 3. How do you measure and calculate the amount of wallpaper needed for a project?
Accurately measuring and calculating wallpaper is crucial to avoid running short or buying excessive amounts. Here’s a step-by-step process:
- Measure the wall height and width: Measure each wall individually, noting any irregularities or openings (windows, doors).
- Calculate the total square footage: Multiply the height by the width of each wall, then add these figures together.
- Account for pattern repeat: Most patterned wallpapers require matching the pattern, which often leads to more wastage. Measure the pattern repeat (the distance the pattern repeats itself) and incorporate that into your calculations. This may require adding extra strips to account for pattern matching.
- Add extra for wastage: Always add 10-15% extra to account for cutting errors, pattern matching difficulties, and any potential damage during handling.
- Check the wallpaper roll dimensions: Wallpaper rolls typically indicate their square footage coverage. Divide the total calculated area by the square footage per roll to determine the number of rolls needed.
Example: A wall is 10 feet high and 12 feet wide. The area is 120 square feet. Adding 15% wastage adds 18 square feet (120 * 0.15), giving a total of 138 square feet. If a roll covers 56 square feet, you would need approximately 3 rolls (138 / 56 ≈ 2.46, round up to 3).
Q 4. What are the standard tools and materials required for wallpaper installation?
The tools and materials needed for wallpaper installation are straightforward but essential. Having everything prepared beforehand makes the process much smoother:
- Wallpaper: The type and quantity calculated as previously described.
- Wallpaper adhesive: Appropriate for the wallpaper type.
- Measuring tape and pencil: For accurate measurements and markings.
- Seam roller: To press down seams and remove air bubbles.
- Smoothing brush or plastic smoother: To smooth out the wallpaper and remove any air bubbles.
- Utility knife or sharp scissors: For cutting the wallpaper.
- Plumb bob or level: To ensure straight hanging.
- Paste brush or roller: For applying adhesive (if not pre-pasted).
- Drop cloths or plastic sheeting: To protect the floor.
- Stepladder or scaffolding: For reaching higher areas.
- Sponge or damp cloth: For cleaning up spills and excess adhesive.
- Bucket and water: For mixing paste and cleaning.
Investing in quality tools will significantly impact the final result. A good seam roller, for example, helps create a seamless finish.
Q 5. Explain the process of matching patterns in wallpaper installation.
Matching patterns in wallpaper installation is crucial for a professional finish. It requires careful planning and execution. Here’s a breakdown:
- Identify the pattern repeat: Determine how far the pattern repeats itself vertically and horizontally. This information is usually found on the wallpaper label.
- Measure and cut extra lengths: Cut strips of wallpaper that are longer than the wall height to account for pattern matching. Always cut more than you need.
- Book the wallpaper: Lay the cut pieces on the floor, face-to-face, matching the pattern to identify the necessary waste before applying the adhesive.
- Check the pattern alignment vertically: Once the adhesive is applied, start aligning the pattern carefully before applying the strips on the wall.
- Use a pencil to mark the pattern on the wall: This allows you to visually align the next strip with the previously hung strips.
- Adjust as needed: Gently adjust the edges to ensure perfect pattern matching. Work quickly while the adhesive is still wet.
For complex patterns, patience and precision are key. It’s often helpful to work in small sections, carefully matching each strip before proceeding. It’s better to take your time and do it right than rush and have mismatched patterns.
Q 6. How do you handle seams and ensure a seamless finish?
Seamless finishes are a hallmark of professional wallpaper installation. Here’s how to handle seams effectively:
- Accurate cutting: Precise cutting is essential to minimize overlap. Use a sharp utility knife and a metal straight edge for clean, straight cuts.
- Proper alignment: Carefully align the edges of adjacent strips before applying pressure. A plumb bob or level helps ensure vertical alignment.
- Seam rolling: Use a seam roller to firmly press down the seams, removing air bubbles and ensuring proper adhesion. Roll from the center of the seam outwards to avoid tearing.
- Overlapping (slightly): A small overlap is generally acceptable, especially with paste-the-wall methods. Excess material can be carefully trimmed away after drying.
- Using appropriate adhesive: The right adhesive for the wallpaper is crucial. This ensures proper bond at the seams, preventing future separation.
Sometimes, you might encounter imperfect seams, particularly with textured wallpapers. In those situations, carefully using a small, sharp knife to trim the edges can sometimes solve the issue. Often, it’s barely noticeable once the seam roller is applied, minimizing the imperfections.
Q 7. Describe your experience with different types of adhesives and their application.
My experience encompasses a range of adhesives, each tailored to specific wallpaper types and substrates. Choosing the wrong adhesive is a common cause of installation failure:
- Clear drying adhesive: Ideal for lighter wallpapers. The clarity makes it easier to handle and minimizes the chances of seeing glue lines.
- Heavy-duty adhesive: Necessary for heavier vinyl wallpapers or those applied to textured surfaces. It provides a stronger bond and helps prevent peeling.
- Pre-mixed adhesive: Convenient but often has a shorter working time. This needs to be carefully measured and mixed to achieve the desired consistency, adhering to the manufacturer’s instructions.
- Powdered adhesive: Requires mixing with water. This gives you better control over the consistency and can be cost-effective for larger projects. Mixing ratio is absolutely crucial for a successful outcome.
I always carefully read the manufacturer’s instructions for both the wallpaper and the adhesive to ensure compatibility and optimal performance. For example, using a heavy-duty adhesive on a delicate paper could damage the wallpaper. Conversely, a lightweight adhesive on a heavy vinyl wallpaper is unlikely to provide a lasting bond.
Q 8. How do you deal with challenging surfaces like textured walls or corners?
Dealing with textured walls and corners requires extra care and specialized techniques. Think of it like painting a bumpy rock – you need the right tools and approach to get a smooth finish. For textured walls, I use a high-quality paste designed for textured surfaces. This helps the wallpaper adhere better and prevents it from showing the texture too prominently. I also pre-paste the wallpaper, allowing it to soak and become more pliable before application. This minimizes the risk of tearing or stretching. When working with corners, I avoid simply butting the wallpaper together. Instead, I carefully overlap the wallpaper slightly (about 1/4 to 1/2 inch) and then use a seam roller and a sharp utility knife to neatly trim away the excess, creating a clean, seamless finish. For very sharp corners, it may be necessary to use a mitered corner technique.
Q 9. What are the common problems encountered during wallpaper installation and how do you solve them?
Common problems include air bubbles, wrinkles, mismatched patterns, and seams that don’t align. Air bubbles usually happen when the paste isn’t properly distributed or the wallpaper isn’t smoothed out adequately. I address this by gently piercing the bubble with a pin and smoothing the air out towards the edge using a smoothing tool. Wrinkles can stem from uneven surfaces or the wallpaper drying too quickly. Here, it’s often necessary to carefully loosen the wallpaper, reapply paste and then smooth it down again. Pattern misalignment is usually due to insufficient planning or improper measurement. A methodical approach with accurate measuring and precise cutting prevents this problem. Seam issues can result from improper trimming or overlapping. A sharp utility knife and a steady hand are key to achieving clean, even seams.
Q 10. Explain your understanding of wallpaper installation safety regulations.
Wallpaper installation safety involves understanding and complying with all relevant OSHA (Occupational Safety and Health Administration) guidelines. This means ensuring the workspace is well-lit and free from obstructions. Proper ventilation is crucial, particularly when using paste and solvents, to avoid inhaling harmful fumes. I always wear appropriate personal protective equipment (PPE), including gloves, eye protection, and a dust mask. Working at heights requires the use of safety harnesses and scaffolding where necessary. Proper disposal of waste materials, like old wallpaper and paste, in accordance with local regulations is also a paramount concern. I regularly inspect my tools to ensure they are in good working order, preventing accidents like cuts from sharp knives.
Q 11. How do you ensure the proper alignment and plumbness of wallpaper panels?
Ensuring proper alignment and plumbness is fundamental to a professional-looking finish. It’s like building a house – you need a strong foundation. I begin by establishing a plumb line on the wall using a level. This serves as my reference point for the first panel. Subsequent panels are carefully aligned using the previously hung panel as a guide. I use a measuring tape and a level to ensure each panel is straight and that the pattern repeats consistently. A seam roller helps to create a tight and secure bond between panels, ensuring consistent alignment throughout the project. Paying meticulous attention to detail in this step is essential to achieve a visually pleasing outcome.
Q 12. How do you clean up after a wallpaper installation project?
Cleaning up after a wallpaper installation project involves several steps. First, I remove any excess paste from the floor and walls using a damp sponge. I carefully collect and dispose of all waste materials including scraps, empty paste containers, and protective coverings. Tools are thoroughly cleaned and stored properly. I take care to remove any debris from the work area, and I always sweep and vacuum thoroughly. For larger projects, I may use a wet/dry vacuum to efficiently collect any excess paste and debris. It’s essential to leave the work area clean, tidy, and safe for the homeowner.
Q 13. What is your experience with removing existing wallpaper?
My experience with removing existing wallpaper includes both straightforward and challenging cases. The process depends heavily on the type of wallpaper and the condition of the wall. For easily removable vinyl wallpapers, scoring the surface and applying a wallpaper stripper usually suffices. More stubborn or textured wallpapers might require several applications of stripper and careful scraping using a scraper. In cases of multiple layers of wallpaper, patience and persistence are key. Always test the stripping process on a small, inconspicuous area before tackling the whole wall. I prioritize minimizing wall damage, and I always repair the wall accordingly after the old wallpaper has been removed.
Q 14. How do you handle wallpaper damage during the installation process?
Handling wallpaper damage during installation requires immediate action and careful consideration. If a small tear occurs, a seamless repair can often be done using wallpaper adhesive and a small piece of matching wallpaper. Larger tears may necessitate more extensive repairs, potentially requiring replacing an entire section of the wall covering. It’s always better to prevent damage by carefully handling the wallpaper and taking precautions against snags and cuts. If damage does occur, it’s critical to address it promptly and effectively to maintain a professional-quality finish. If the damage is beyond repair, I will discuss options with the client, such as ordering replacement wallpaper or exploring alternative solutions.
Q 15. Describe your experience working with different types of wallpaper materials (e.g., vinyl, fabric, grasscloth).
My experience encompasses a wide range of wallpaper materials, each demanding a unique approach. Vinyl wallpapers, known for their durability and washability, are relatively straightforward to install, requiring careful matching of patterns and precise cutting. I’ve worked extensively with various vinyl types, from smooth, paintable options to textured, embossed designs. Fabric wallpapers, on the other hand, present a more delicate challenge. Their inherent softness requires extra care during handling and application to avoid tearing or stretching. The installation process often involves using specialized adhesives designed for textile materials. Lastly, grasscloth wallpapers, with their natural fibers, demand the utmost precision. Their delicate nature necessitates a steady hand and careful planning to avoid seams that are too visible. The inherent texture also requires careful consideration of surface preparation to ensure a smooth, even finish.
- Vinyl: I’ve installed numerous vinyl wallpapers in both residential and commercial settings, mastering techniques for pattern matching and dealing with challenging corners.
- Fabric: My experience includes working with silk, linen, and other delicate fabrics, learning specialized techniques for seam alignment and preventing bubbling.
- Grasscloth: I’ve successfully installed several grasscloth projects, adapting my approach to the unique characteristics of the material and the need for careful surface preparation.
Career Expert Tips:
- Ace those interviews! Prepare effectively by reviewing the Top 50 Most Common Interview Questions on ResumeGemini.
- Navigate your job search with confidence! Explore a wide range of Career Tips on ResumeGemini. Learn about common challenges and recommendations to overcome them.
- Craft the perfect resume! Master the Art of Resume Writing with ResumeGemini’s guide. Showcase your unique qualifications and achievements effectively.
- Don’t miss out on holiday savings! Build your dream resume with ResumeGemini’s ATS optimized templates.
Q 16. What is your experience with specialized wallpaper installation techniques (e.g., borders, murals)?
Specialized techniques, such as installing borders and murals, add an artistic dimension to wallpapering, requiring precision and attention to detail. Borders demand careful measurement and alignment to create a visually appealing frame. I’ve successfully installed numerous borders, ensuring perfect alignment with existing wallpaper patterns or creating a striking contrast. Murals, often more complex in design and scale, require meticulous planning and application. This involves carefully matching sections, smoothing out any wrinkles or air bubbles, and ensuring the overall image is perfectly aligned. I approach mural installations as a collaborative process, often consulting with the client and designer to ensure that the final product meets their vision.
One memorable project involved a large-scale nature mural for a children’s playroom. The mural was composed of several panels, each requiring precise alignment to create a seamless, panoramic effect. The delicate nature of the material demanded meticulous attention to detail throughout the process, resulting in a stunning final product that delighted the family.
Q 17. How do you manage time effectively during a wallpaper installation project?
Effective time management is crucial for any wallpaper installation project. My approach involves a multi-stage process. First, a thorough assessment of the area and the type of wallpaper are key to accurately estimating the project timeline. This involves considering factors such as wall size, pattern matching requirements, and potential obstacles such as electrical outlets or unusual wall shapes. I then create a detailed schedule, breaking down the project into manageable tasks with realistic timeframes allocated to each. This schedule includes time for surface preparation, wallpaper cutting and application, and clean-up. Throughout the process, I maintain open communication with the client to ensure that any potential delays or changes are addressed promptly. I also factor in potential unforeseen circumstances, such as wall imperfections or unexpected material issues, to maintain flexibility in my schedule. My goal is not only to complete the project efficiently but also to deliver high-quality workmanship that meets the client’s expectations.
Q 18. Describe your experience with working from blueprints or design specifications.
Working from blueprints or design specifications is a standard part of my workflow. I find that careful review of these documents is crucial before starting any project. This allows me to understand the overall design concept, identify specific wallpaper patterns and placements, and accurately calculate the amount of wallpaper needed. Blueprints often provide detailed measurements and indicate the placement of electrical outlets, windows, and doors, information critical for proper wallpaper cutting and application. I regularly communicate with designers and architects to clarify any uncertainties or ambiguities in the plans, ensuring a smooth and accurate execution of their design vision. I consider this collaborative approach essential in delivering a high-quality final product that meets the client’s needs and aesthetic preferences.
Q 19. How do you handle customer requests or changes during the installation process?
Handling customer requests or changes during installation requires flexibility and proactive communication. I encourage open dialogue throughout the process, making sure that clients are informed of any potential implications of changes. Small adjustments, such as minor pattern shifts or repositioning of borders, are often manageable with minimal disruption. However, significant changes might require additional time and materials, which I always discuss transparently with the client, ensuring that we are on the same page regarding the project timeline and costs. My aim is to accommodate reasonable requests while maintaining the project’s integrity and achieving a successful outcome.
Q 20. What are your preferred methods for storing and handling wallpaper rolls?
Proper storage and handling of wallpaper rolls are essential to prevent damage and ensure a smooth installation process. I always store wallpaper rolls in a cool, dry place, protecting them from direct sunlight, extreme temperatures, and moisture. I ensure that rolls remain upright and flat to prevent creasing or damage. Rolls are kept in their original packaging whenever possible. For larger projects or when working with multiple patterns, I meticulously label each roll with clear identification, including the pattern number and batch information, facilitating easy access and selection during the installation. This careful approach guarantees that the wallpaper arrives at the installation site in pristine condition, ready for application.
Q 21. How do you deal with uneven walls or imperfections before wallpaper installation?
Uneven walls or imperfections pose significant challenges during wallpaper installation. Addressing these issues before applying the wallpaper is crucial for a professional finish. My approach begins with a thorough wall assessment, identifying any cracks, holes, or significant unevenness. Cracks are repaired using appropriate fillers, and holes are patched and sanded smooth. For larger imperfections or significant unevenness, wall preparation may involve skim coating or other surface leveling techniques. Proper priming is essential to ensure adhesion and prevent the wallpaper from highlighting any underlying imperfections. Once the wall surface is prepared, I apply the wallpaper using techniques that minimize the visibility of any remaining minor imperfections. The goal is to create a surface that allows for seamless wallpaper application and a beautiful, high-quality finished product.
Q 22. What steps do you take to ensure proper ventilation during and after wallpaper installation?
Proper ventilation is crucial during and after wallpaper installation to prevent moisture problems that can lead to peeling, bubbling, or mold growth. Think of it like baking a cake – you need the right environment for it to set properly.
- During installation: I always ensure the room is well-ventilated, often opening windows and using fans to circulate air. This helps the paste dry evenly and prevents the wallpaper from becoming too damp. Excessive humidity can significantly slow down the drying process and negatively impact the adhesive’s bond.
- After installation: I advise clients to keep windows slightly ajar for at least 24 hours post-installation, depending on the type of paste and wallpaper used. This allows for slow, controlled drying and helps minimize the risk of damage. For large spaces or particularly humid climates, I might even recommend using dehumidifiers to help regulate the environment.
For example, on a recent project in a basement apartment, I used two fans to ensure proper airflow, and we left the windows slightly open for 48 hours due to the higher humidity level. This extra precaution prevented any issues with the wallpaper.
Q 23. Explain your understanding of different wallpaper pasting methods (e.g., paste-the-wall, paste-the-paper).
Wallpaper pasting methods differ primarily in where the adhesive is applied: the wall or the wallpaper itself. Both have advantages and disadvantages.
- Paste-the-wall: The adhesive is applied directly to the wall. This method is generally faster, especially for lightweight wallpapers, as you don’t have to wait for individual strips to become tacky. It’s also better for certain types of delicate wallpapers that could be damaged by paste application directly to the paper.
- Paste-the-paper: The adhesive is applied to the back of the wallpaper. This method offers more control, particularly with heavier or textured wallpapers, as you can precisely adjust placement and minimize paste showing through. It allows for better matching of patterns and more accurate placement, which is critical for complex designs.
Choosing the right method depends on the type of wallpaper, the skill level of the installer, and the overall project requirements. For instance, I’d use paste-the-wall for a quick, straightforward job with a lightweight vinyl in a small room, but I’d use paste-the-paper for a complex pattern using heavy, textured wallpaper in a large space.
Q 24. How do you maintain a clean and organized workspace during wallpaper installation?
Maintaining a clean and organized workspace is paramount for efficient and high-quality wallpaper installation. Think of it as a surgeon’s operating room – cleanliness ensures precision and avoids mistakes.
- Drop cloths: I always cover the floor and furniture with drop cloths to protect them from adhesive, paste, and water spills.
- Designated areas: I set up separate areas for tools, supplies, cut wallpaper strips, and waste materials. This keeps everything accessible and prevents accidental damage or mixing of materials.
- Regular cleanup: I regularly clean up spills and remove waste to maintain a safe and efficient work area. This includes wiping up excess paste immediately and properly disposing of any waste according to local regulations.
- Tool organization: I keep all tools organized and readily accessible in a designated area using tool belts or trays. This allows me to work efficiently and prevent delays caused by searching for the right tool.
This organized approach not only ensures a faster, safer workflow but also contributes to a better end-product, as a clean workspace reduces the likelihood of mistakes and ensures a smoother final result.
Q 25. Describe your experience with working in various environments (e.g., residential, commercial).
I have extensive experience in both residential and commercial wallpaper installation. While the principles remain the same, the scale and demands differ significantly.
- Residential: Projects range from single rooms to entire houses. The focus is often on aesthetics, matching the client’s personal style and preferences. This requires flexibility and attention to detail.
- Commercial: Projects can involve large spaces, like office buildings, retail stores, or restaurants. The emphasis is on durability, easy maintenance, and sometimes fire-retardant materials. This requires more coordination and understanding of specific codes and regulations.
For example, a recent residential project involved a delicate floral pattern in a child’s bedroom. The focus was on precision and meticulous work. In contrast, a recent commercial project in a hospital required the use of scrubbable, vinyl wallpaper that met specific fire safety standards.
Q 26. What quality control measures do you implement to ensure a high-quality installation?
Quality control is ingrained in my process. It’s about more than just making it look good; it’s about ensuring a durable and long-lasting result.
- Pre-installation inspection: I carefully inspect the walls for imperfections like cracks, bumps, or loose paint. Addressing these issues before installation is vital for a smooth, even finish.
- Pattern matching: For patterned wallpapers, I meticulously match the patterns to ensure a seamless look. I meticulously plan the placement of each strip to minimize waste and maintain a visually appealing outcome.
- Seam alignment: I pay close attention to ensuring that seams are straight and properly aligned, minimizing the visibility of joins.
- Post-installation inspection: After completion, I perform a thorough inspection, checking for bubbles, wrinkles, or any imperfections. I always ask the client for feedback to ensure they are happy with the final result.
My attention to detail, from preparation to final inspection, guarantees a high-quality installation that clients can be proud of.
Q 27. How do you troubleshoot common wallpaper installation issues?
Troubleshooting is an integral part of my work. Common issues include bubbling, peeling, and pattern misalignment.
- Bubbling: This often indicates insufficient paste application or air trapped beneath the wallpaper. I carefully use a seam roller to push out air bubbles, or, if necessary, I may lift a small section, reapply paste, and re-adhere the wallpaper.
- Peeling: This can result from improper surface preparation or using the wrong adhesive for the surface. I would carefully investigate the cause before attempting any repair and may recommend repasting or even replacement.
- Pattern misalignment: This highlights the need for careful planning and accurate measurement. If it’s a minor misalignment, sometimes I can adjust it, but often a section will need to be carefully removed and reapplied.
My approach is always systematic: identifying the cause, determining the appropriate solution, and ensuring the repair blends seamlessly.
Q 28. Describe your experience working independently and as part of a team.
I’m comfortable working both independently and as part of a team. Each approach has its strengths.
- Independent work: Requires self-sufficiency, strong organizational skills, and a proactive approach to problem-solving. I thrive on the responsibility and ability to manage my time efficiently.
- Teamwork: Enhances efficiency, especially on large-scale projects. I value collaboration, communication, and a shared commitment to quality. This allows us to divide tasks, share expertise, and complete projects more quickly and efficiently.
In fact, many of my largest and most successful projects have relied on effective teamwork, drawing on the diverse skills and experience of fellow professionals.
Key Topics to Learn for Understanding of Wallpaper Installation Standards Interview
- Surface Preparation: Understanding the importance of properly preparing walls for wallpaper installation, including cleaning, patching, priming, and ensuring a smooth, even surface. This includes identifying and addressing common wall imperfections.
- Wallpaper Types and Selection: Knowledge of different wallpaper types (vinyl, non-woven, grasscloth, etc.), their properties, and suitability for various applications. This includes understanding pattern matching and calculating required quantities.
- Measuring and Cutting: Mastering accurate measuring techniques to minimize waste and ensure proper alignment of patterns. This includes understanding how to account for pattern repeats and waste factors.
- Application Techniques: Proficiency in using paste, adhesive, and tools for accurate and efficient wallpaper application. This includes understanding various pasting methods (paste-the-wall, pre-pasted) and their implications.
- Seam Matching and Finishing: Skill in achieving seamless transitions between wallpaper strips and proper finishing techniques for clean edges and corners. This includes understanding how to handle difficult areas like corners and windows.
- Troubleshooting Common Issues: Ability to identify and resolve common problems during installation, such as bubbling, peeling, and mismatched patterns. This includes understanding the causes of these issues and appropriate solutions.
- Safety and Best Practices: Awareness of safety procedures and best practices for wallpaper installation, including proper handling of tools and materials, and maintaining a clean and organized workspace.
- Industry Standards and Codes: Familiarity with relevant industry standards and codes of practice for wallpaper installation.
Next Steps
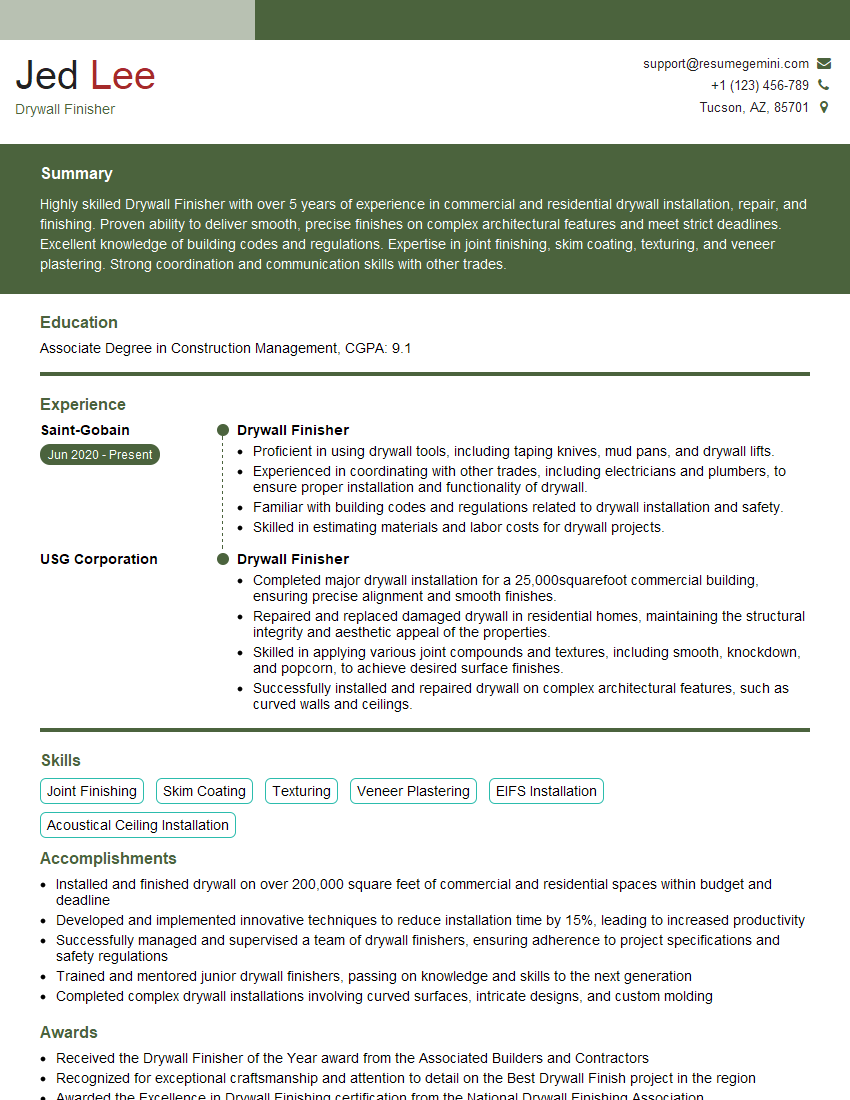
Mastering Understanding of Wallpaper Installation Standards is crucial for career advancement in the interior design and construction industries. Demonstrating this expertise will significantly enhance your job prospects and open doors to higher-paying positions and greater responsibility. To stand out to potential employers, creating a strong, ATS-friendly resume is essential. ResumeGemini is a trusted resource that can help you build a professional resume tailored to showcase your skills and experience effectively. Examples of resumes tailored specifically to highlight expertise in Understanding of Wallpaper Installation Standards are available, allowing you to present your qualifications in the best possible light.
Explore more articles
Users Rating of Our Blogs
Share Your Experience
We value your feedback! Please rate our content and share your thoughts (optional).
What Readers Say About Our Blog
To the interviewgemini.com Webmaster.
Very helpful and content specific questions to help prepare me for my interview!
Thank you
To the interviewgemini.com Webmaster.
This was kind of a unique content I found around the specialized skills. Very helpful questions and good detailed answers.
Very Helpful blog, thank you Interviewgemini team.