Every successful interview starts with knowing what to expect. In this blog, we’ll take you through the top Laser Level Operation interview questions, breaking them down with expert tips to help you deliver impactful answers. Step into your next interview fully prepared and ready to succeed.
Questions Asked in Laser Level Operation Interview
Q 1. Explain the different types of laser levels and their applications.
Laser levels come in various types, each suited for different applications. The most common are:
- Point Lasers: These project a single, precise point of laser light, ideal for marking a single location, aligning objects, or transferring measurements. Think of them like a super-accurate, long-range dot.
- Line Lasers: These project a continuous line of laser light, perfect for tasks like hanging pictures straight, leveling shelves, or setting up drywall. Imagine them as a perfectly straight, visible guide.
- Rotary Lasers: These rotate 360 degrees, projecting a horizontal and/or vertical plane of laser light. They are indispensable for larger construction projects, accurately leveling large areas for foundations or grading.
- Cross-Line Lasers: These project both a horizontal and a vertical line intersecting at a 90-degree angle, forming a cross. This is very useful for tasks that require both horizontal and vertical alignment, such as tiling or installing cabinets.
- Self-Leveling Lasers: Many laser levels have a self-leveling mechanism which automatically compensates for minor variations in the ground or surface. This makes setup much faster and easier.
The choice depends entirely on the task. For hanging a single picture, a point laser might suffice. For a large construction project, a rotary laser with a receiver is necessary for optimal accuracy and range.
Q 2. Describe the process of setting up a laser level for a specific task.
Setting up a laser level involves several key steps, which vary slightly depending on the type of laser but generally follow these guidelines:
- Choose the Right Spot: Select a stable, level location for your laser level. This is crucial for accuracy.
- Mount the Level: Securely mount the level on a tripod or other stable base. Ensure the base is sturdy and won’t shift during operation.
- Power On and Level: Turn on the laser level and let it self-level (if it’s self-leveling). If not, manually adjust using the leveling screws until the indicator light shows it’s properly leveled.
- Adjust Beam Height: For precise work, fine-tune the beam height to your specific needs using the leveling screws.
- Check Alignment: Use a target or detector to confirm the laser beam’s alignment with your desired reference point. This step is crucial for accuracy, especially over longer distances.
- Safety Precautions: Always ensure appropriate eye protection for yourself and others nearby. The laser is a safety hazard, and necessary protection must be worn, especially indoors.
For example, if tiling a floor, you’d want to level the laser carefully to create a horizontal plane and then use a straight-edge to confirm that everything is set properly and aligned perfectly.
Q 3. How do you ensure the accuracy of a laser level measurement?
Ensuring accuracy involves a multi-pronged approach:
- Proper Setup: As described earlier, a stable, level setup is paramount. A poorly placed tripod is the most common cause of inaccurate measurements.
- Calibration: Regularly calibrate your laser level according to the manufacturer’s instructions. This ensures the laser is projecting accurately and remains within its specified tolerance.
- Environmental Factors: Account for environmental influences like temperature, humidity, and even dust that can affect the laser’s accuracy. These variables need to be within acceptable operational parameters.
- Multiple Measurements: Take multiple measurements from different angles and locations, especially for large projects. Comparing multiple results helps identify and resolve inconsistencies.
- Use a Target or Detector: For long-range measurements, always use a target or detector. This improves accuracy by giving you a clear and precise point of reference.
- Quality Equipment: Investing in a high-quality laser level from a reputable manufacturer drastically reduces the risk of inaccurate readings.
Imagine building a wall. You wouldn’t simply use one measurement to check for plumbness; you’d check it at several points along the height. This is the same principle.
Q 4. What are the common sources of error in laser level measurements?
Several factors can introduce errors into laser level measurements:
- Improper Leveling: The most common source of error is failure to properly level the laser. Even a slight tilt can lead to significant inaccuracies over distance.
- Environmental Conditions: Extreme temperatures, humidity, or dust can refract the laser beam, resulting in inaccurate readings.
- Incorrect Calibration: An uncalibrated or poorly calibrated laser level will produce inaccurate readings. Always keep your equipment updated and properly calibrated.
- Instrument Malfunction: Internal components can malfunction and result in imprecise measurements.
- User Error: Incorrect interpretation of the laser beam or misreading the measuring device can also lead to errors.
- Long Distance Measurements without Detector: Trying to read a laser beam over long distances without a detector is prone to inaccuracy.
For instance, working in direct sunlight might cause the laser beam to appear slightly bent or distorted; working with a detector will minimize these risks.
Q 5. How do you troubleshoot a laser level that is not functioning correctly?
Troubleshooting depends on the specific symptom, but here’s a general approach:
- Check Batteries: Low batteries are a frequent culprit. Replace them with fresh ones.
- Check the Power Switch: Make sure the laser level is actually turned on.
- Inspect for Obstructions: Ensure nothing is obstructing the laser beam, such as dust, debris, or even moisture.
- Verify Leveling: Double-check that the laser is properly leveled. Consult the manual and check the leveling indicator.
- Test in a Controlled Environment: Try operating the laser in a controlled environment to rule out external factors.
- Check for Calibration: If the problem persists, calibrate the laser according to the manufacturer’s instructions. If calibration isn’t possible, this is an indicator that a repair may be necessary.
- Contact Support: If you’ve exhausted all troubleshooting steps, contact the manufacturer or a qualified repair technician.
For example, if your laser appears to be projecting an uneven line, it’s likely either not leveled properly or there’s a problem within the instrument itself.
Q 6. Explain the importance of proper calibration for laser levels.
Proper calibration is essential for maintaining the accuracy of your laser level. Over time, internal components can wear, drift, or be affected by environmental factors, leading to inaccuracies.
Regular calibration ensures your measurements remain reliable and within the manufacturer’s specified tolerance. It’s like taking your car for regular servicing; it keeps everything functioning as intended. An uncalibrated laser could lead to significant errors in construction, potentially causing costly rework or even safety hazards.
Calibration frequency depends on the laser level and its usage; consult the manufacturer’s instructions for the recommended schedule. Using a laser level without calibration is akin to using a measuring tape that is stretched or damaged; the measurements provided are unreliable. It’s a safety hazard and a waste of time and money.
Q 7. Describe the safety procedures you follow when operating a laser level.
Safety is paramount when operating a laser level. Always follow these procedures:
- Eye Protection: Always wear appropriate laser safety eyewear. Never look directly into the laser beam.
- Warning Signs: Post warning signs in the area to alert others about the presence of the laser beam. Consider setting up barriers or roped-off areas to help enforce these safety measures.
- Avoid Direct Exposure: Avoid direct exposure of the laser beam to skin or eyes. This is vital for both your safety and the safety of those working around you.
- Proper Handling: Handle the laser level with care to prevent damage. Avoid dropping or jarring the device, as it could affect calibration.
- Manufacturer Instructions: Always read and follow the manufacturer’s safety instructions carefully. Each laser level may have its own specific safety requirements.
- Emergency Procedures: Familiarize yourself with emergency procedures in case of accidental exposure.
Think of it like working with any other power tool; a respectful and responsible approach towards safety is crucial.
Q 8. How do you interpret laser level readings?
Interpreting laser level readings involves understanding the projected lines or points and their relationship to your reference points. Think of it like drawing a perfectly straight line – the laser is your incredibly precise pencil. You’ll use the laser’s projected lines to establish level planes, plumb lines (vertical lines), or both, depending on your tool’s capabilities. For instance, if you’re installing cabinets, you’ll use the horizontal laser line to ensure the top of each cabinet is perfectly level across the whole run. You’ll compare the laser line to a physical level placed on the cabinets themselves to verify accuracy. Discrepancies mean adjustments are needed. Accurate readings require consideration of the distance from the laser to the target surface; the further away, the more potential for error. Also, always check for environmental factors (like heat causing refraction) that can distort the reading.
Example: Let’s say you’re setting foundation posts. You project the laser’s plumb line onto each post, and measure the offset from the laser’s projected point to the post’s surface. Small deviations can be corrected, but larger ones might require recalibration or indicate a problem with the laser itself. It’s about consistent and careful comparison between the laser and physical reference points.
Q 9. What are the limitations of laser levels?
Laser levels, while incredibly precise, have limitations. Environmental factors like temperature fluctuations can cause refraction, bending the laser beam and resulting in inaccurate readings. Distance plays a significant role; the further the laser beam travels, the more susceptible it is to atmospheric effects. Obstructions such as dust, smoke, or rain can also scatter or block the laser beam, rendering it unusable. Internal limitations like the laser’s accuracy rating (usually expressed as mm/m or in/100 ft) also impact precision. Finally, the operator’s skill in setting up and using the level can introduce human error. For example, a slight misalignment of the tripod or improper calibration can lead to significant errors in larger projects.
Q 10. What is the difference between self-leveling and manual leveling laser levels?
The core difference lies in how the laser level maintains its level plane. Self-leveling laser levels contain internal mechanisms (typically pendulums or gyroscopes) that automatically correct for minor misalignments of the instrument. If you slightly bump the level, it automatically compensates and maintains a level plane. This is ideal for quick setups and smaller jobs. Manual leveling laser levels require precise leveling using built-in leveling vials, similar to a spirit level. They need to be perfectly aligned, usually with the help of leveling screws, before accurate readings can be obtained. Manual leveling offers increased precision for very demanding applications but requires greater skill and time.
Q 11. How do you compensate for environmental factors that affect laser level accuracy?
Compensating for environmental factors impacting accuracy involves a multi-pronged approach. Firstly, understanding the conditions is key: is it a hot, sunny day, causing refraction? Is there significant wind affecting the stability of the tripod? Secondly, choosing the right time of day can minimize certain effects. Early mornings or late afternoons offer cooler temperatures, minimizing refraction. Thirdly, minimizing the distance between the laser and the target reduces the impact of atmospheric interference. Fourthly, using higher-quality lasers with a wider operational temperature range can help mitigate some errors. Finally, multiple readings and cross-checking with other tools (like a regular spirit level) can help confirm accuracy and identify potential errors. This methodical approach, coupled with an awareness of environmental influences, is crucial.
Q 12. Explain the various components of a laser level system.
A laser level system comprises several key components working in harmony. The laser diode produces the laser beam. The leveling mechanism (either self-leveling or manual) ensures the instrument is correctly aligned. The housing protects the internal components from damage. The power source (batteries or AC adapter) provides the energy needed for operation. Often included are mounting hardware such as a tripod and a rotating mount for adjusting the laser beam’s direction. Some systems include a receiver to extend the range and visibility of the laser beam, particularly in bright sunlight. And finally, calibration tools can be included, ensuring prolonged accuracy.
Q 13. How do you select the appropriate laser level for a given task?
Selecting the appropriate laser level depends heavily on the specific task. Accuracy is a key factor; high-accuracy levels are essential for precision work like surveying or setting precise foundations. Range is crucial for larger projects – a long-range laser is needed for larger construction sites. Functionality is also key; you’ll need a level with plumb-bob functionality for vertical alignment, and a rotary laser for large area leveling. Durability is vital for harsh outdoor environments, requiring a robust and weatherproof design. Finally, your budget is a primary constraint; higher-end levels boast more features and greater accuracy but come with a higher price tag. For example, a simple DIY homeowner project might only require a basic self-leveling line laser, whereas a large construction project would need a robust rotary laser with a long range and receiver.
Q 14. Describe your experience with different types of laser level mounts and tripods.
My experience encompasses a wide variety of laser level mounts and tripods. I’ve used simple, lightweight tripods for smaller projects where portability is key, and sturdier, heavier-duty tripods for larger, more demanding tasks where stability is paramount. I’ve also worked with various mounting options, including magnetic mounts for attaching the laser to metallic surfaces, and wall mounts for fixed installations. I’ve even utilized specialized mounts for attaching the laser to construction equipment such as scaffolding. The choice of mount and tripod depends entirely on the job at hand; lightweight setups for interior work and heavy-duty setups for outdoor and large-scale construction projects.
For instance, on a recent large-scale tiling job, the use of a sturdy tripod with a robust levelling base, coupled with a high quality rotating laser level and receiver, was crucial for ensuring accuracy across a vast area. In contrast, for a smaller plumbing job, a simple, lightweight tripod and a self-leveling line laser sufficed perfectly for the project’s smaller scale and limited range requirements.
Q 15. How do you maintain and clean a laser level?
Maintaining a laser level is crucial for its accuracy and longevity. Think of it like maintaining a precision instrument – regular cleaning and careful handling are key. My routine involves several steps:
- Lens Cleaning: I use a soft, lint-free cloth, like a microfiber cloth, to gently wipe the lens. Avoid harsh chemicals or abrasive materials that could scratch the lens surface. Compressed air can be used to remove dust particles before wiping.
- Body Cleaning: The laser level body can be wiped down with a slightly damp cloth. Again, avoid harsh chemicals. For stubborn dirt, a mild detergent solution can be used, followed by thorough rinsing and drying.
- Battery Compartment: Regularly check the battery compartment for corrosion or debris. Clean it with a dry cloth. Ensure proper battery installation to avoid damage.
- Regular Checks: Before each use, I check the laser level for any visible damage, loose parts, or unusual wear and tear.
By following this simple routine, I ensure the laser level remains accurate and reliable, minimizing the chance of costly errors on the job site.
Career Expert Tips:
- Ace those interviews! Prepare effectively by reviewing the Top 50 Most Common Interview Questions on ResumeGemini.
- Navigate your job search with confidence! Explore a wide range of Career Tips on ResumeGemini. Learn about common challenges and recommendations to overcome them.
- Craft the perfect resume! Master the Art of Resume Writing with ResumeGemini’s guide. Showcase your unique qualifications and achievements effectively.
- Don’t miss out on holiday savings! Build your dream resume with ResumeGemini’s ATS optimized templates.
Q 16. What are the best practices for storing a laser level?
Proper storage is essential for protecting a laser level from damage and maintaining its accuracy. I always follow these best practices:
- Protective Case: Store the laser level in its original hard case or a suitable protective case. This shields it from impacts, dust, and moisture.
- Clean and Dry Environment: The storage area should be clean, dry, and temperature-controlled, away from direct sunlight, extreme temperatures, and humidity. Excessive heat or cold can damage the internal components.
- Vertical Storage: I recommend storing the laser level upright to prevent any internal components from shifting or damage to the lens.
- Separate from Tools: Keep the laser level separate from other tools to avoid accidental scratches or damage during transport or storage.
Imagine storing a fine watch – the same care and attention to detail applies to a laser level, ensuring its long lifespan and accurate operation.
Q 17. Explain your experience with using laser levels in different terrain conditions.
My experience with laser levels across varied terrain has taught me the importance of adaptability. On flat, stable surfaces, operation is straightforward. However, challenging terrain requires strategic adjustments:
- Uneven Ground: For uneven ground, using a tripod with adjustable legs is crucial for stabilizing the laser level and achieving accurate readings. I’ve found that heavier tripods provide better stability.
- Windy Conditions: Strong winds can affect the laser beam’s stability. In such cases, using windbreaks or finding sheltered locations can improve accuracy. Sometimes, delaying the operation until the wind subsides is the best solution.
- Sloped Terrain: On slopes, careful leveling of the tripod is essential. I often use a level or inclinometer to ensure accurate setup before commencing work.
One memorable instance involved working on a steep hillside during a construction project. By carefully selecting the tripod’s position and using a sturdy setup, I successfully completed the leveling work with accurate results despite the difficult terrain.
Q 18. Describe your experience working with laser level software and data logging.
My experience with laser level software and data logging is extensive. Many modern laser levels offer Bluetooth connectivity, enabling data transfer to software for analysis and documentation. This enhances project efficiency and accuracy. I’ve worked with several software packages that allow for:
- Data Recording: Recording precise measurements and generating detailed reports.
- Visualization: Creating 2D or 3D models of the project site, enhancing understanding.
- Analysis: Comparing measured data with planned designs, identifying discrepancies early on.
Example Data Point: {Timestamp: 2024-10-27 10:30:00, Elevation: 12.5m, Distance: 25.2m}
This data logging capability has been incredibly useful for complex projects, enabling easy tracking of progress and facilitating detailed analysis. This reduces errors and supports better project management.
Q 19. How do you handle unexpected problems or malfunctions during a laser level operation?
Unexpected problems during laser level operation are not uncommon. My approach is systematic and based on troubleshooting:
- Identify the Problem: Is the laser not emitting? Is the beam weak or unstable? Is the display malfunctioning? Carefully observe the symptoms.
- Check the Obvious: Verify battery levels, ensure proper power connection, and check if the laser level is properly leveled.
- Consult the Manual: The user manual provides troubleshooting guides and potential solutions. Refer to it for specific problems.
- Test in Controlled Environment: If possible, test the laser level in a controlled environment (away from interference) to rule out external factors.
- Seek Professional Help: If the problem persists, contacting the manufacturer or a qualified technician is vital. Never attempt complex repairs unless you are adequately trained.
For example, if the laser beam is unstable, it might be due to external interference, low battery, or a faulty internal component. I systematically check each possibility before deciding whether to replace the battery, relocate, or seek professional service.
Q 20. What is your experience working with different laser level technologies (e.g., rotary, line, point)?
I’m proficient with various laser level technologies, each suitable for different applications. My experience includes:
- Rotary Lasers: Ideal for large-scale projects requiring long-range leveling and alignment, such as grading and earthworks. Their 360-degree coverage is extremely efficient.
- Line Lasers: Perfect for interior work, like hanging drywall or tiling, providing a clear, horizontal or vertical reference line. These are simple and highly accurate for indoor applications.
- Point Lasers: Useful for marking specific points or aligning objects in smaller-scale tasks. These are great for precise point-to-point measurements.
Selecting the right technology depends on the project’s scale and complexity. Using a rotary laser for a small indoor task would be overkill, while a point laser wouldn’t be sufficient for grading a large area.
Q 21. Explain how you ensure the safety of yourself and others when operating a laser level in a construction site.
Safety is paramount when operating a laser level on a construction site. My safety protocols include:
- Laser Safety Glasses: Always wear appropriate laser safety glasses rated for the laser’s wavelength and class. Never look directly into the laser beam.
- Warning Signs: Post clear warning signs in the vicinity of laser operations, indicating the presence of laser radiation and potential hazards.
- Proper Training: Ensure all personnel involved in the project have received adequate training on laser safety procedures and understand the risks.
- Controlled Access: Restrict access to the laser operation area to authorized personnel only. This minimizes the risk of accidental exposure.
- Emergency Procedures: Develop and communicate clear emergency procedures in case of accidental exposure or malfunction.
By strictly adhering to these procedures, I contribute to a safe and productive work environment for myself and my colleagues, reducing the risks associated with laser operation.
Q 22. How familiar are you with laser safety regulations and standards?
Laser safety is paramount in my work. I’m intimately familiar with ANSI Z136.1, the American National Standard for Safe Use of Lasers, and other relevant international standards. This includes understanding laser classifications (Class 1 through 4), appropriate eye and skin protection, safe operating procedures, and environmental considerations. For instance, I always ensure the work area is clear of obstructions and that appropriate warning signs are posted when operating Class 2 or higher lasers. I’m also trained in emergency procedures in case of accidental exposure.
Beyond specific standards, I understand the importance of risk assessment before any laser operation. This involves identifying potential hazards, evaluating the risks, and implementing control measures to minimize or eliminate exposure. This proactive approach ensures safety for myself and others on the job site.
Q 23. What is your understanding of different laser level accuracy classes?
Laser levels are categorized by their accuracy classes, typically denoted by a letter and a numerical value. Common classes include:
- Self-Leveling: These levels automatically align themselves to a horizontal or vertical plane within a certain tolerance (e.g., ±0.2mm/m). This is essential for fast setup and efficient leveling tasks. They commonly have a self-leveling range.
- Accuracy Classes (e.g., ±0.5mm/m, ±1mm/m, ±2mm/m): These indicate the maximum deviation from true level over a specific distance (often 10 meters). A lower number denotes higher accuracy. A laser level with an accuracy of ±0.5mm/m is more precise than one with an accuracy of ±1mm/m. The choice of accuracy class depends on the project’s requirements; highly precise applications like machine installation require higher accuracy classes.
- Manual Leveling: Requires manual alignment to level, often through using a bubble level. These generally lack the auto-leveling feature.
Understanding these classes is crucial for selecting the right tool for the job. Choosing a laser level that’s too inaccurate can lead to significant errors in construction or surveying work.
Q 24. How do you calculate the level difference between two points using a laser level?
Calculating the level difference between two points using a laser level involves a few steps, depending on the level’s features and your equipment.
- Using a Laser Level and a Staff: First, you establish a known benchmark point. Set up the laser level, ensuring it’s properly leveled. Next, position a leveling staff at the first point, aiming the laser beam at the staff. The staff measurement is taken where the laser beam hits. Repeat this process for the second point. The difference in staff readings is the level difference between the two points.
- Using a Laser Level and Detector with height measuring feature: This provides direct elevation difference measurement. The laser is pointed at the detector which is placed at each point and the difference is displayed on the detector.
For example, if the staff reading at point A is 1.5 meters and at point B is 2.0 meters, the difference is 0.5 meters, indicating point B is 0.5 meters higher than point A. Always account for the height of the laser level itself in your calculations for accuracy.
Q 25. Describe your experience using laser levels in conjunction with other surveying equipment.
I have extensive experience integrating laser levels with other surveying equipment such as total stations, theodolites, and GPS receivers. For example, during a recent road construction project, we used a laser level to establish precise grade elevations. Then we used a total station to measure horizontal distances and angles, integrating the laser level’s vertical data into the total station’s measurements. This allowed for precise control of the road’s grading, ensuring accurate drainage.
Another example involved employing a laser level to create a level reference plane for setting out foundation points, which then were further checked and refined with GPS measurements. This cross-checking ensured the accuracy and precision of the foundation layout.
Q 26. How do you deal with signal interference or obstruction when using a laser level?
Signal interference or obstruction is a common challenge when using laser levels. To mitigate this:
- Identify and remove obstructions: The most straightforward solution is to clear any obstacles—like people, equipment, or excessive dust—from the laser’s path.
- Adjust laser level positioning: Sometimes, a slight change in the laser’s position can significantly improve the signal strength.
- Utilize a laser detector: Laser detectors can pick up weaker signals and have greater range than relying on direct line of sight to the beam itself.
- Consider alternative technologies: In extremely challenging environments, alternative methods, such as using a traditional leveling instrument, might be necessary.
For example, in a large warehouse with significant dust, I would use a laser detector to extend my range and enhance signal reception. In cases of strong sunlight interfering with the visibility of the laser line, I would switch to a laser detector or simply work in shade if possible.
Q 27. What is your experience in using different types of laser level detectors?
My experience with laser level detectors includes both digital and analog types. Digital detectors offer a range of advantages, including more precise readings, data logging capabilities, and often larger and easier-to-read displays. These are particularly useful for complex projects requiring detailed records.
Analog detectors typically utilize a bar graph or needle display, providing a less precise, but still functional, representation of the signal strength and level relative to the laser beam. These might be preferred in less demanding situations or where ruggedness is a priority over precision of the displayed reading.
The choice between these detector types depends heavily on the job requirements. High-precision work favors digital detectors, while in other projects requiring only relative level, an analog detector might suffice.
Q 28. Describe a time you had to troubleshoot a complex laser level issue and how you resolved it.
During a large-scale building project, our laser level started exhibiting erratic readings. Initially, I suspected a faulty unit. I systematically began troubleshooting by checking the following:
- Battery power: First, I checked the battery level – a simple but often overlooked cause. In this case the battery was fine.
- Leveling mechanism: I carefully checked the leveling mechanism to ensure it was operating correctly and that there was no damage. This was fine.
- Environmental factors: I considered environmental factors like extreme temperatures or electromagnetic interference. This was also eliminated.
- Software/Firmware: Some newer laser levels have software. A software issue might manifest in such irregularities. I checked for software updates and found a recent update was needed and performed this update.
After the software update the erratic readings ceased. This highlighted the importance of keeping the laser level’s firmware up-to-date. A simple software update solved a seemingly complex problem, preventing significant delays and cost overruns on the project.
Key Topics to Learn for Laser Level Operation Interview
- Understanding Laser Principles: Grasp the fundamental physics behind laser operation, including wavelength, coherence, and beam divergence. Prepare to discuss the different types of lasers commonly used in your field.
- Laser Level Calibration and Adjustment: Demonstrate a thorough understanding of calibration procedures, troubleshooting common calibration issues, and performing necessary adjustments to ensure accuracy.
- Practical Applications in Construction/Surveying: Be ready to discuss real-world applications such as leveling, aligning, and measuring in various construction projects. Prepare examples showcasing your experience using laser levels in different settings.
- Safety Precautions and Regulations: Highlight your knowledge of laser safety regulations and procedures, including eye protection and proper handling techniques. Discuss potential hazards and how to mitigate them.
- Troubleshooting and Maintenance: Discuss common problems encountered with laser levels, the steps involved in troubleshooting, and routine maintenance procedures to ensure optimal performance.
- Data Interpretation and Analysis: Explain your ability to accurately interpret readings from the laser level and use this data for precise measurements and calculations. Be prepared to discuss potential sources of error and how to minimize them.
- Different Types of Laser Levels: Familiarize yourself with various laser level types (rotary, line, point) and their respective applications and limitations. Be prepared to compare and contrast their functionalities.
Next Steps
Mastering laser level operation opens doors to exciting career opportunities in construction, surveying, and related fields, offering opportunities for growth and specialization. To maximize your chances of landing your dream job, it’s crucial to present yourself effectively. Building an ATS-friendly resume is key to getting noticed by recruiters. We strongly recommend using ResumeGemini to craft a professional and impactful resume that highlights your skills and experience. ResumeGemini offers a user-friendly platform and provides examples of resumes tailored specifically to Laser Level Operation roles, giving you a head start in your job search.

Project Engineer Resume Sample

Geospatial Technician Resume Sample

Surveyor Resume Sample

Calibration Technician Resume Sample

Civil Engineering Technician Resume Sample

Construction Inspector Resume Sample

Field Technician Resume Sample
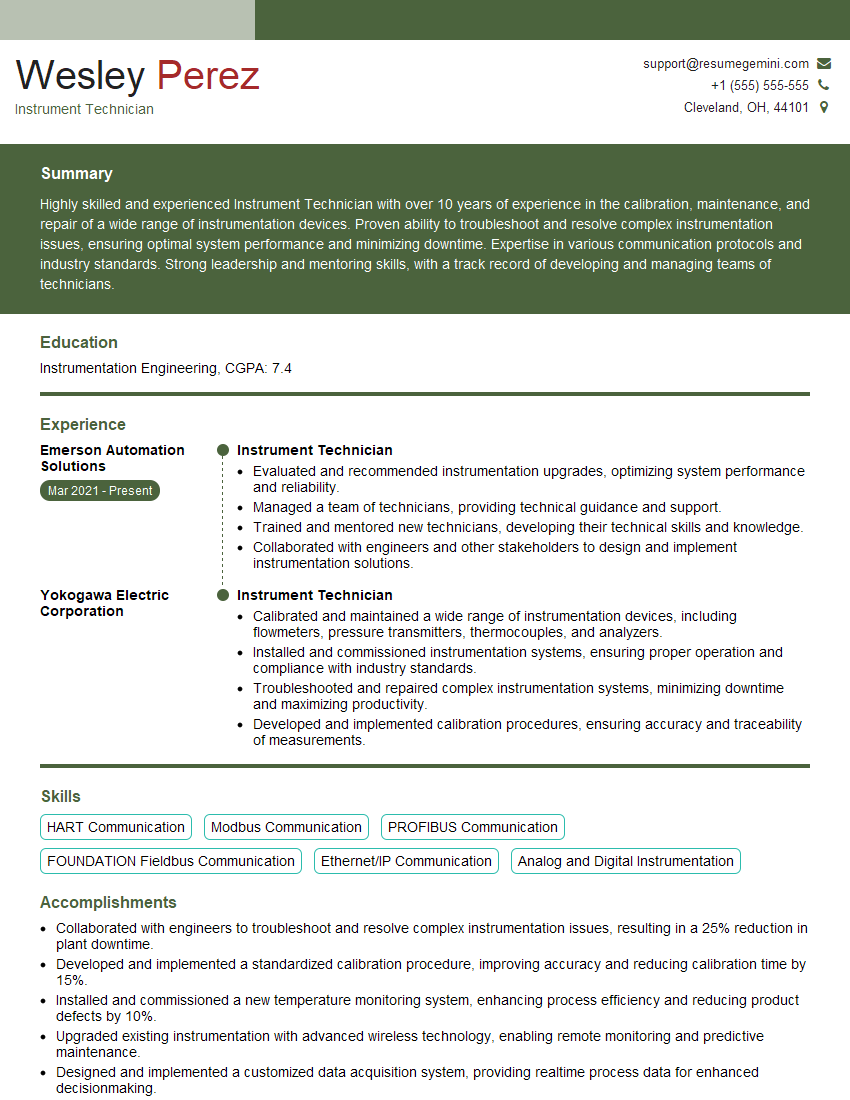
Instrument Technician Resume Sample

Survey Crew Chief Resume Sample

Quality Control Inspector Resume Sample
Explore more articles
Users Rating of Our Blogs
Share Your Experience
We value your feedback! Please rate our content and share your thoughts (optional).
What Readers Say About Our Blog
To the interviewgemini.com Webmaster.
Very helpful and content specific questions to help prepare me for my interview!
Thank you
To the interviewgemini.com Webmaster.
This was kind of a unique content I found around the specialized skills. Very helpful questions and good detailed answers.
Very Helpful blog, thank you Interviewgemini team.