The thought of an interview can be nerve-wracking, but the right preparation can make all the difference. Explore this comprehensive guide to Residential Wallpaper Installation interview questions and gain the confidence you need to showcase your abilities and secure the role.
Questions Asked in Residential Wallpaper Installation Interview
Q 1. What types of wallpaper have you worked with (e.g., vinyl, non-woven, grasscloth)?
Over the years, I’ve worked extensively with a wide variety of wallpapers, each presenting unique installation challenges and aesthetic possibilities. My experience encompasses:
- Vinyl Wallpaper: This is a durable and washable option, perfect for high-traffic areas like hallways or kitchens. I’ve handled both pre-pasted and unpasted vinyl, understanding the differences in application techniques.
- Non-Woven Wallpaper: This material is incredibly popular due to its ease of installation. It’s easier to hang and typically doesn’t require soaking, making the process quicker and less messy. I’m proficient in working with various non-woven textures and patterns.
- Grasscloth Wallpaper: This natural fiber wallpaper adds a touch of elegance and texture. However, it requires a more delicate approach during installation, and I’m skilled in handling its unique characteristics, such as its susceptibility to tearing and the need for careful seam matching.
- Fabric-backed Vinyl: This offers a unique look and feel, often resembling fabric or textiles. Its installation demands precision due to the material’s weight and texture.
- Textured Wallpaper: Working with textured wallpapers requires understanding how the texture impacts the application of paste and the need for careful smoothing to avoid imperfections.
My experience allows me to select the appropriate installation methods and tools based on the specific type of wallpaper being used.
Q 2. Describe your experience with preparing walls for wallpaper installation.
Wall preparation is the cornerstone of a successful wallpaper installation. A poorly prepared wall will lead to peeling, bubbling, and an overall unsatisfactory finish. My process involves several key steps:
- Cleaning: I thoroughly clean the walls to remove dust, dirt, cobwebs, and any loose paint or debris. This ensures the wallpaper adhesive has optimal contact with the wall surface.
- Repairing: I carefully repair any holes, cracks, or imperfections in the wall using spackling compound. After it dries, I sand it smooth and prime the repaired areas to ensure even paint coverage.
- Priming: This step is critical, especially for porous walls or those with previously painted surfaces. Primer ensures a uniform surface for the wallpaper adhesive to bond to, preventing uneven absorption and ensuring a smooth, consistent finish. I select primers based on the wall’s composition and the wallpaper type.
- Sealing: For particularly porous surfaces or if there’s a chance of bleed-through from previous colors, I’ll use a wall sealer to create a barrier against moisture and color transfer.
- Sizing: Some wallpapers, particularly grasscloth, benefit from the use of wallpaper sizing. This helps to create a uniform surface and enhances adhesion.
I always ensure the wall is completely dry before proceeding with the wallpaper installation to prevent adhesion problems.
Q 3. What tools and materials are essential for efficient wallpaper installation?
Having the right tools significantly improves efficiency and the quality of the finished product. My essential toolkit includes:
- Measuring Tape and Pencil: Accurate measurements are crucial for calculating wallpaper needs and layout.
- Straight Edge and Level: Ensures perfectly aligned vertical and horizontal seams.
- Utility Knife or Razor Blade: For precise cutting of wallpaper around outlets and corners.
- Smoothing Brush or Roller: To remove air bubbles and ensure proper adhesion.
- Paste Brush or Roller: Applies adhesive evenly to the wall or wallpaper (depending on the type of wallpaper).
- Seam Roller: Compresses seams and prevents peeling.
- Drop Cloth or Plastic Sheeting: Protects floors and furniture from spills and damage.
- Stepladder or Scaffolding: Safe and comfortable access to higher areas.
- Bucket and Sponge: For cleaning up excess paste.
- Measuring tools (square, etc.): For precise cutting and matching.
In addition to tools, I always have on hand appropriate wallpaper adhesive, primer, and any necessary additional materials for specific projects (e.g., sizing).
Q 4. How do you measure and calculate the amount of wallpaper needed for a project?
Accurately measuring and calculating wallpaper needs is crucial to avoid unnecessary expenses or shortages. My process involves:
- Measuring the Wall Height and Width: I carefully measure the height and width of each wall section to be wallpapered.
- Calculating the Total Square Footage: I multiply the height and width of each section to determine the square footage for each wall, and then sum this for the total project area. This accounts for doors and windows, but not for waste.
- Considering Pattern Repeat: Many wallpapers have a pattern repeat—the distance it takes for the pattern to fully repeat itself. This needs to be added to the calculation to accommodate for matching.
- Adding Waste: I always add an extra 10-15% to account for waste during cutting, matching, and potential mistakes. This buffer ensures I have enough wallpaper to complete the project without running short.
- Checking Roll Dimensions: Wallpaper rolls come in standard dimensions (usually 53cm or 27 inches in width and varying lengths). This knowledge is vital to correctly determine the number of rolls needed based on my calculations.
For instance, if a wall is 10ft high and 12ft wide, that’s 120 sq ft. With a pattern repeat adding 10% and another 15% for waste, the total wallpaper needed would be roughly 156 sq ft. I use this amount to determine the needed rolls based on the roll dimensions.
Q 5. Explain your process for matching patterns in wallpaper.
Pattern matching is a critical aspect of wallpaper installation, especially for more intricate designs. My approach involves:
- Understanding the Pattern Repeat: I carefully examine the wallpaper roll to determine the pattern repeat – how far the pattern repeats itself vertically. This is usually indicated on the wallpaper label.
- Measuring and Cutting: I measure and cut the first strip carefully, ensuring it’s aligned to the desired starting point. For patterned wallpaper, careful measuring to account for the pattern repeat is critical at the very beginning of the process.
- Precise Overlapping: I precisely overlap the second strip with the first, aligning the pattern meticulously. A sharp eye is essential here.
- Using a Straight Edge or Level: I use a straight edge or level to ensure the vertical seams are perfectly aligned. This prevents misalignment as you move from strip to strip.
- Marking and Aligning: I sometimes make marks on the wall (using pencil) to guide me while aligning subsequent strips. This is particularly helpful for complex patterns.
- Patience and Precision: Pattern matching requires patience and a high degree of precision. Haste can result in misalignment and wasted material.
For highly complex patterns, I may use a large layout area to plan and organize the cuts beforehand to minimize mistakes and optimize usage of the wallpaper.
Q 6. How do you handle difficult areas, such as corners, windows, and doors?
Difficult areas like corners, windows, and doors require extra care and precision. Here’s how I handle them:
- Corners: I carefully measure and cut the wallpaper to fit snugly into the corner, overlapping slightly on each side. Then, I use a seam roller to press the wallpaper firmly into the corner, creating a clean, seamless transition. I make sure not to stretch the wallpaper.
- Windows and Doors: For windows and doors, I measure and carefully cut the wallpaper to fit around the frames. I use a utility knife to make precise cuts, creating clean edges and avoiding tearing. This process often involves making cuts for the window/door frame in place instead of cutting it all off and attempting to fit it into a space.
- Outlets and Switches: I carefully cut out holes around light switches and electrical outlets after the wallpaper has been applied, using a sharp utility knife to ensure neatness.
The key is meticulous measurement and careful cutting to achieve a professional finish. Practice and experience are vital in mastering these techniques.
Q 7. What techniques do you use to ensure proper seam alignment?
Proper seam alignment is critical for a professional-looking finish. My techniques ensure perfectly matched seams:
- Accurate Measurement and Cutting: This is foundational—precise measurements are critical. I double-check measurements for each strip to ensure consistent width and prevent misalignment.
- Using a Plumb Line or Level: I use a plumb line or level to ensure perfectly vertical seams. This helps maintain consistency throughout the wall.
- Overlapping and Smoothing: I slightly overlap strips before pressing them to the wall using a smoothing brush or roller. This helps prevent gaps and ensures the adhesive fully bonds the seams.
- Seam Roller: A seam roller is essential for pressing the seams firmly and eliminating any air pockets. It helps create a sturdy bond.
- Careful Adhesion: I ensure the adhesive is evenly distributed to promote proper adhesion throughout the seam area. Uneven glue can create lifting or poor bonds.
Consistency is paramount. By sticking to these steps, I can achieve near-invisible seams for a seamless and professional look. It’s important to work methodically and patiently for best results.
Q 8. How do you remove existing wallpaper effectively?
Removing existing wallpaper efficiently involves a multi-step process that hinges on understanding the type of wallpaper and the wall’s condition. First, I assess the wallpaper – is it vinyl, paper, or fabric-backed? This dictates the best approach. For vinyl, scoring the surface with a scoring tool is crucial before applying a wallpaper stripper. This weakens the adhesive, making removal easier. For paper wallpaper, hot water and a sponge often suffice, followed by gentle scraping. For stubborn adhesives, a commercial wallpaper remover may be necessary. Always test a small, inconspicuous area first to avoid damaging the underlying paint. The key is patience and methodical work. I work in sections, applying the stripper or water, allowing sufficient soak time, and then carefully peeling back the wallpaper with a scraper or putty knife. Remember to protect the floor with drop cloths to avoid damage.
For example, on a recent project with heavily textured vinyl wallpaper, scoring proved vital. I scored the entire wall before applying a commercial stripper, which allowed me to remove the wallpaper in large sheets with minimal tearing, reducing the cleaning time significantly.
Q 9. Describe your experience working with different types of wall surfaces (e.g., drywall, plaster).
My experience spans various wall surfaces, each presenting unique challenges. Drywall, the most common, is relatively easy to work with, offering a smooth, even surface for wallpaper adhesion. However, it can be sensitive to moisture, so I always take precautions to avoid over-saturation during wallpaper removal or installation. Plaster, on the other hand, can be more challenging. It’s often more porous and uneven, potentially requiring more preparation work like filling cracks and smoothing the surface. Sometimes, a skim coat of joint compound is needed for a pristine finish. Older plaster walls may also contain lead-based paint, requiring specialized safety measures and disposal procedures. I’ve worked on walls with textured finishes, which demand careful matching and positioning of wallpaper patterns to minimize visual discrepancies. The preparation is key to a successful job; ensuring the wall is clean, smooth, and primed is crucial regardless of the wall type.
Q 10. How do you handle wallpaper seams that are not perfectly aligned?
Imperfect seam alignment is a common challenge, but manageable with careful technique and attention to detail. Firstly, I focus on precise cutting and matching during installation; using a plumb line or level to ensure vertical alignment before applying the next strip. If slight misalignment occurs, I try to adjust the seam by gently sliding the wallpaper before the adhesive sets. For more significant misalignments, I carefully use a sharp utility knife or seam roller to trim excess wallpaper where needed. A slight overlap, meticulously trimmed with a sharp blade, followed by using a seam roller to create a seamless bond, often effectively hides minor imperfections. In cases of larger gaps, I might need to resort to a touch-up using the same wallpaper or a color-matched paint.
Q 11. What are the common problems you encounter during wallpaper installation, and how do you address them?
Common problems include improper surface preparation (leading to poor adhesion and peeling), mismatched patterns due to inaccurate measurements or cutting, air bubbles trapped under the wallpaper (requiring careful smoothing or re-application), and wall imperfections (like cracks or holes) that weren’t addressed before installation. I address these by, firstly, always thoroughly preparing the wall surface, filling any holes or cracks, and priming for optimal adhesion. Secondly, meticulous measuring and cutting, double-checking alignment before applying each strip is crucial. Thirdly, I use specialized tools like seam rollers and smoothing brushes to minimize air bubbles during the installation process. Finally, addressing any wall imperfections *before* wallpapering is essential to a successful job; patching, sanding, and priming any problematic areas beforehand prevents future issues.
Q 12. What safety precautions do you take during wallpaper installation?
Safety is paramount. I always wear appropriate personal protective equipment (PPE), including gloves to protect my hands from chemicals and sharp tools, eye protection to shield against flying debris, and a dust mask when dealing with older wallpaper or plaster that might contain lead. I use safety ladders securely and follow proper lifting techniques to avoid injury. Proper ventilation is crucial when using wallpaper removers and adhesives, as the fumes can be harmful. I always dispose of materials responsibly, following local regulations for hazardous waste, especially for lead paint or wallpaper remover.
Q 13. How do you manage your time and resources on a wallpaper installation project?
Effective time and resource management is key. I start with a detailed assessment of the project’s scope, carefully measuring the walls and calculating the necessary wallpaper quantities. This helps in creating a realistic timeline. I procure all necessary tools and materials in advance to avoid delays. I break down the project into smaller, manageable tasks (preparation, wallpaper removal, installation, cleaning) and allocate time for each. I also factor in potential unforeseen challenges, allowing for flexibility. Regularly checking progress against the timeline ensures efficiency and helps address any emerging issues promptly. For example, on larger projects, I often collaborate with assistants to distribute tasks efficiently.
Q 14. How do you communicate with clients regarding project timelines and expectations?
Clear communication is paramount. I initiate the project by discussing with the client their expectations, budget, desired timeline, and any specific preferences. I then provide a detailed estimate, outlining the scope of work, materials costs, and a realistic project timeline. I keep clients updated on progress, proactively addressing any questions or concerns. I use both verbal communication and written updates (emails, texts) to maintain transparency and ensure the client is fully informed throughout the process. For instance, I might send pictures of completed stages, or schedule regular check-ins for feedback.
Q 15. What is your experience with using paste, pre-pasted, and peel-and-stick wallpapers?
My experience spans all three types of wallpaper: paste, pre-pasted, and peel-and-stick. Each requires a different approach. Paste wallpapers, the most traditional, demand precise application of adhesive to the paper itself, allowing for better control and correction, especially crucial on complex designs or difficult wall surfaces. I’ve worked extensively with various paste types, understanding their drying times and adhesive strengths, crucial for achieving a seamless, bubble-free finish. Pre-pasted wallpapers offer convenience – the adhesive is already applied, requiring only activation with water. This is faster but demands careful timing to ensure the paste doesn’t dry too quickly. Finally, peel-and-stick wallpapers provide the simplest application – just peel and stick. However, repositioning is limited, and they are best suited for smaller projects or rooms with simpler designs. My skill lies in adapting my technique to the specific wallpaper type to guarantee a professional outcome, regardless of the choice.
For example, with a complex damask pattern using paste, I use a specialized pasting table to apply the adhesive evenly, ensuring accurate alignment of the pattern, especially at the seams. On the other hand, with pre-pasted paper, I’ll use a measuring tool and a book to evenly load the paper with the water required for activation and to then avoid any creasing. I even use a different technique for installing peel-and-stick wallpaper, such as applying from the top down to avoid any shifting, especially for larger sizes.
Career Expert Tips:
- Ace those interviews! Prepare effectively by reviewing the Top 50 Most Common Interview Questions on ResumeGemini.
- Navigate your job search with confidence! Explore a wide range of Career Tips on ResumeGemini. Learn about common challenges and recommendations to overcome them.
- Craft the perfect resume! Master the Art of Resume Writing with ResumeGemini’s guide. Showcase your unique qualifications and achievements effectively.
- Don’t miss out on holiday savings! Build your dream resume with ResumeGemini’s ATS optimized templates.
Q 16. Describe your process for cleaning up after a wallpaper installation project.
Thorough cleanup is as important as the installation itself. My process begins during the installation, using drop cloths to protect floors and furniture. Any excess paste is immediately wiped away with a damp sponge to prevent staining. After installation, I meticulously clean the walls, removing any excess adhesive or paste residue with a clean, damp cloth and mild detergent. I pay close attention to the edges and corners, ensuring a pristine finish. Any tools, like seam rollers, brushes, and buckets, are rinsed and thoroughly cleaned before packing up. All trash and debris are carefully removed from the job site, leaving the area cleaner than when I arrived. This not only respects the client but also demonstrates professionalism and prevents future issues.
For instance, after working with a heavily textured wallpaper that required more paste, I make sure to use a slightly soapy water solution to clear any lingering paste or excess glue. I also dispose of waste in an environmentally friendly way, separating the cardboard and plastic accordingly.
Q 17. How do you ensure the longevity and durability of the installed wallpaper?
Ensuring wallpaper longevity involves several key steps. First, proper surface preparation is critical; I always ensure the wall is clean, smooth, and free of any imperfections, which could cause the wallpaper to peel or bubble. Next, correct adhesive application and careful installation are paramount. A properly installed wallpaper, with tight seams and no air bubbles, will last significantly longer. After installation, I advise clients on proper care, including avoiding harsh chemicals and excessive moisture, which can damage the paper and affect the color or pattern integrity. Furthermore, I may recommend specific sealants or protective coatings depending on the type of wallpaper used and the room’s conditions (e.g., high humidity in a bathroom). I also clearly explain these aspects to my clients in a manner that is easy to understand.
For example, in a kitchen or bathroom, where moisture is a concern, I’d recommend a vinyl wallpaper which is more resistant to moisture and mildew. Moreover, I’d advise my clients to avoid using excessive heat near the wallpaper, as this may also affect the paper’s longevity.
Q 18. What are the differences between different types of wallpaper adhesives?
Wallpaper adhesives vary significantly in their composition and application. Some are water-activated, while others are pre-mixed. The type of adhesive chosen depends heavily on the wallpaper material and the wall surface. For instance, heavy vinyl wallpapers often require a stronger, more tenacious adhesive than lightweight papers. Clear adhesives are preferred for lighter wallpapers to avoid showing through. Different adhesives also have varying drying times, impacting the time needed for final adjustments during installation. Understanding these differences is essential for choosing the right adhesive for each project and achieving optimal results.
For example, I would use a heavy-duty, pre-mixed adhesive for a textured, heavy wallpaper, while for a more delicate paper, I might choose a water-activated paste with a longer drying time to allow for better adjustment and repositioning.
Q 19. How do you deal with difficult clients or unexpected challenges on a job site?
Dealing with difficult clients or unexpected challenges requires patience, clear communication, and problem-solving skills. If a client is unhappy, I listen attentively to their concerns, explaining the process and my reasoning clearly. I always maintain a professional and respectful demeanor, even in stressful situations. Unexpected challenges, such as damaged walls or inconsistencies in the wallpaper roll, require quick thinking and adaptability. I’ve learned to assess the situation, propose solutions, and always keep the client informed. Prioritizing clear communication and showing a willingness to find solutions often defuses tense situations. Documentation of the issues is also key for later reference if needed.
For example, if I encountered a damaged section of wall, I would immediately inform the client, explain the best course of action—such as repair or careful installation workarounds—and agree on the next steps together. I would also document this with photographs.
Q 20. Explain your understanding of different wallpaper patterns and designs.
My understanding of wallpaper patterns and designs is extensive. I’m familiar with various styles, from classic damasks and florals to modern geometric prints and abstract designs. Understanding the scale and repeat of a pattern is critical for proper installation, ensuring a seamless and visually appealing outcome. I can identify and address potential alignment issues, such as pattern matching at seams or around corners. I also advise clients on pattern choices, considering the room’s size, lighting, and overall décor to create a cohesive and aesthetically pleasing look. Knowledge of color theory and design principles helps me guide clients toward choices that complement their existing furnishings and create a balanced space.
For example, I would advise against a large, bold pattern in a small room, as it could overwhelm the space. Instead, I’d suggest a smaller pattern or a subtle texture. Conversely, a large room might benefit from a bolder and larger scale pattern.
Q 21. Describe your experience with using a seam roller and other wallpaper tools.
I have extensive experience using a seam roller, which is crucial for creating smooth, even seams and preventing bubbles. The technique involves rolling firmly and evenly along the seams to press the wallpaper firmly against the wall and expel any trapped air. Beyond the seam roller, I’m proficient with various other tools: a smoothing brush to remove air bubbles during installation, a utility knife for precise cuts around windows and outlets, a plumb bob for straight vertical lines, and a measuring tape for accurate measurements. My expertise lies not just in using these tools, but in understanding when and how to use them effectively, depending on the wallpaper type, the surface, and the specific pattern.
For example, I use a different technique for rolling seams with different wallpaper materials; for example, I use lighter pressure with delicate papers to avoid tearing.
Q 22. How do you assess the condition of the walls before starting a wallpaper installation project?
Assessing wall condition before wallpaper installation is crucial for a successful project. It’s like preparing a canvas before painting a masterpiece! I meticulously inspect the walls for several key factors:
- Surface Smoothness: I check for bumps, cracks, holes, or uneven textures. Significant imperfections need repair with spackle or joint compound before wallpapering to prevent showing through.
- Cleanliness: Walls must be thoroughly cleaned to remove dust, dirt, grease, or old wallpaper residue. This ensures the adhesive bonds properly. I typically use a sugar soap solution for this.
- Moisture: I check for signs of dampness or water damage, which can lead to mold growth and wallpaper failure. If moisture is present, addressing the root cause is essential before proceeding. I use a moisture meter to be certain.
- Wall Type: Identifying the wall type (drywall, plaster, etc.) helps determine the appropriate adhesive and preparation methods. Plaster walls, for instance, might require a sizing solution before wallpaper application.
A thorough assessment prevents costly mistakes and ensures the wallpaper adheres properly, resulting in a long-lasting, beautiful finish. I’ve seen projects go awry due to overlooked cracks or unclean surfaces, so this step is non-negotiable.
Q 23. What is your process for dealing with wallpaper bubbles or wrinkles?
Dealing with bubbles or wrinkles in wallpaper requires a delicate touch and the right tools. It’s like smoothing out a crease in a fine garment. My process involves:
- Gentle Pressing: For small bubbles, I carefully smooth the area using a clean, soft cloth or wallpaper smoother, working from the center outward. This often releases trapped air.
- Incision and Re-Adhesion: If pressing doesn’t work, I carefully pierce the bubble with a sharp needle, then inject a small amount of wallpaper adhesive into the hole using a syringe. I then firmly press the area to reseal it. This is like patching a tiny hole!
- Steam and Resmoothing: Larger wrinkles or creases often require steam. I carefully use a steam iron (on a low setting) to loosen the adhesive, then gently smooth the area with a cloth and smoother. Overheating can damage the paper, so caution is key.
- Seam Roller: After addressing bubbles and wrinkles, I roll the entire wall with a seam roller to ensure a firm, even adhesion.
Addressing bubbles and wrinkles immediately is critical; allowing them to persist can lead to further issues. My experience has taught me that patience and precision are key to achieving a seamless, professional finish.
Q 24. What is your experience with wallpaper removal and disposal?
Wallpaper removal and disposal is a crucial part of the process, and an often overlooked one! It’s about both the efficient removal of the old paper and the responsible disposal of the waste. My approach consists of:
- Scoring and Softening: I score the old wallpaper to help break up the layers. I then apply a wallpaper remover solution to soften the adhesive, making removal easier. I let it soak for the manufacturer’s recommended time to prevent damage to the wall.
- Careful Stripping: Using a putty knife or scraper, I carefully remove the wallpaper strips. I work in small sections to prevent tearing or damaging the underlying wall.
- Residue Removal: After removing the wallpaper, I clean the walls thoroughly to remove any remaining adhesive. A scraper, sponge, and wallpaper remover are my go-to tools for this task.
- Responsible Disposal: I always dispose of the removed wallpaper and adhesive responsibly. Many local waste management facilities have specific guidelines for handling these materials, and I always adhere to them.
I’ve encountered many situations where improper removal damages walls, leading to additional costs and delays. Proper removal and disposal are not just about efficiency but about sustainability and respect for the environment.
Q 25. What types of wallpaper are best suited for high-moisture areas (e.g., bathrooms)?
High-moisture areas like bathrooms demand specific types of wallpaper that can withstand the humidity and prevent mold growth. It’s not just about aesthetics; it’s about practicality! I usually recommend:
- Vinyl Wallpaper: Vinyl is highly water-resistant, making it ideal for bathrooms and other damp areas. It’s easy to clean and can withstand regular scrubbing.
- Fabric-backed Vinyl: This combines the durability of vinyl with a more textured, luxurious look. The fabric backing adds strength and prevents tearing.
- Peel-and-Stick Wallpaper: For smaller bathrooms or accent walls, peel-and-stick vinyl is a great option. It is easier to install and remove, making it a popular choice for renters.
Avoid using paper-based wallpapers or wallpapers with porous surfaces in bathrooms. They are susceptible to moisture damage and can lead to mildew or mold growth, potentially creating health concerns. I always advise clients on the best material selection based on their bathroom’s environment and the look they want to achieve.
Q 26. How do you handle different types of wall textures during installation?
Handling different wall textures requires adapting your techniques. Think of it as tailoring a suit to fit perfectly. I adjust my approach based on the texture:
- Smooth Walls: These are the easiest to work with. Standard wallpapering techniques are sufficient.
- Textured Walls: Heavily textured walls might require a heavier-weight wallpaper or a special adhesive to ensure proper adhesion. I might also use a textured roller to help the paper conform to the irregularities.
- Knockdown Texture: This requires careful planning and often necessitates using a heavier wallpaper to avoid showing imperfections. Prepping the wall with a primer can also improve adherence.
- Orange Peel Texture: This texture requires a premium wallpaper paste for superior bonding, and careful placement of the paper to avoid emphasizing the texture variations.
Ignoring wall texture can lead to poor adhesion, uneven application, and ultimately, a less-than-professional finish. My experience in handling various textures has enabled me to adapt my methods for optimal results regardless of the wall’s surface.
Q 27. Explain your experience working from blueprints or design plans.
Working from blueprints or design plans is a crucial aspect of larger-scale projects, ensuring precision and efficiency. It’s like having a roadmap for a journey! I meticulously review the plans to:
- Understand the Scope: I carefully review the plans to understand the specific areas to be wallpapered, the types of wallpaper to be used, and any special instructions.
- Calculate Materials: Based on the dimensions and the pattern repeat of the wallpaper, I accurately calculate the amount of wallpaper needed, minimizing waste.
- Plan the Layout: I study the plans to determine the optimal placement of the wallpaper to minimize seams and create a visually appealing effect. This might involve matching patterns across multiple walls or aligning with architectural features.
- Identify Potential Challenges: I anticipate any potential challenges based on the plans, such as complex shapes, unusual angles, or areas with existing features. I plan my workflow accordingly.
Following blueprints and design plans reduces errors, saves time, and helps to produce a result that precisely matches the client’s vision. It has enabled me to handle complex and challenging installations efficiently, resulting in many satisfied clients.
Q 28. Describe your experience with various wallpaper trimming and cutting techniques.
Trimming and cutting wallpaper requires precision and skill. It’s a delicate dance of careful measurement and sharp tools! My techniques include:
- Sharp Tools: I always use sharp utility knives and shears for precise cuts. Dull blades lead to ragged edges and wasted material.
- Measuring and Marking: I carefully measure and mark the wallpaper before cutting, using a straight edge and a pencil to ensure accurate cuts. It’s akin to surgical precision!
- Cutting Techniques: For straight cuts, I use a sharp utility knife and a metal ruler as a guide. For curves or complex shapes, I utilize scissors or a rotary cutter.
- Pattern Matching: When working with patterned wallpaper, I carefully match the patterns to create a seamless look. This often requires extra care and precise cutting.
Precise trimming and cutting are crucial to achieve a clean, professional finish. Over the years I have honed my skills to handle various wallpaper types and patterns with precision and efficiency, ensuring a flawless end result every time.
Key Topics to Learn for Residential Wallpaper Installation Interview
- Surface Preparation: Understanding different wall types (drywall, plaster, etc.), identifying imperfections, and applying appropriate primers and treatments. Practical application: Explaining your process for preparing a textured wall for wallpaper.
- Measuring and Calculating Wallpaper Needs: Accurately measuring wall dimensions, accounting for pattern repeats and waste, and calculating the necessary number of rolls. Practical application: Demonstrating your ability to calculate the required wallpaper for a room with complex features like windows and doors.
- Wallpaper Hanging Techniques: Mastering various hanging methods (straight match, drop match, offset match), using paste correctly, and achieving smooth, wrinkle-free application. Practical application: Describing your experience with different types of wallpaper and their unique hanging requirements.
- Pattern Matching and Seam Alignment: Precisely aligning patterns for a seamless finish, understanding different pattern types, and resolving alignment issues. Practical application: Explaining how you troubleshoot mismatched patterns during installation.
- Tools and Equipment: Familiarity with essential tools (measuring tapes, utility knives, smoothing brushes, seam rollers), their proper use, and maintenance. Practical application: Describing your preferred tools and why you choose them for specific tasks.
- Troubleshooting Common Issues: Identifying and resolving problems such as bubbling, peeling, and uneven seams. Practical application: Explaining your approach to fixing common wallpaper installation problems.
- Safety Procedures: Understanding and adhering to safety regulations, including proper ladder use and handling of sharp tools. Practical application: Demonstrating awareness of workplace safety practices related to wallpaper installation.
- Clean-up and Project Completion: Efficiently cleaning up after installation, protecting surfaces, and ensuring client satisfaction. Practical application: Describing your post-installation procedures and client communication strategies.
Next Steps
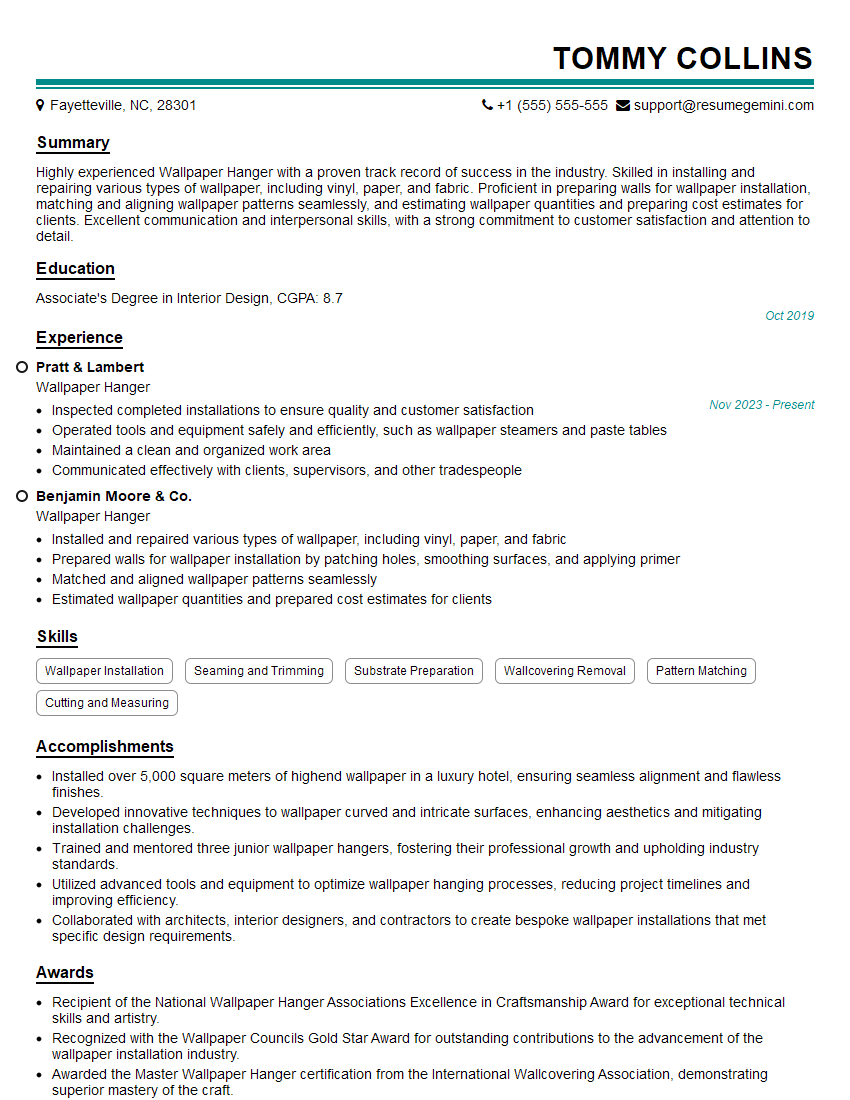
Mastering residential wallpaper installation opens doors to a rewarding career with opportunities for growth, from independent contractor to team lead or even business ownership. To maximize your job prospects, it’s crucial to have an ATS-friendly resume that highlights your skills and experience effectively. ResumeGemini is a trusted resource to help you build a professional and impactful resume that catches the eye of potential employers. Examples of resumes tailored to Residential Wallpaper Installation are available to help you get started.
Explore more articles
Users Rating of Our Blogs
Share Your Experience
We value your feedback! Please rate our content and share your thoughts (optional).
What Readers Say About Our Blog
To the interviewgemini.com Webmaster.
Very helpful and content specific questions to help prepare me for my interview!
Thank you
To the interviewgemini.com Webmaster.
This was kind of a unique content I found around the specialized skills. Very helpful questions and good detailed answers.
Very Helpful blog, thank you Interviewgemini team.